Getting Started with Input Questions
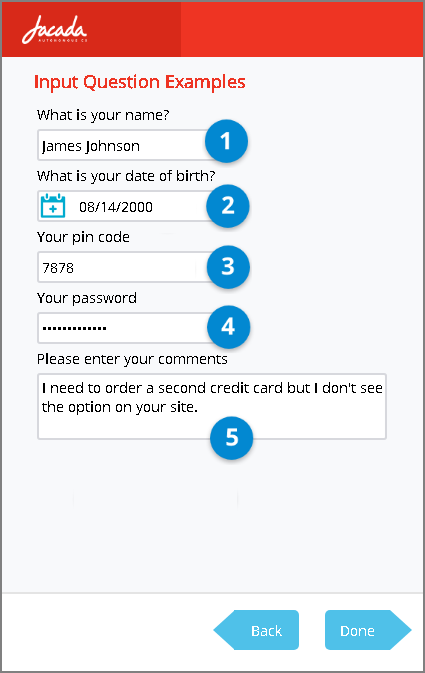
Input questions get answers by asking users or Agents to enter data manually. The information provided might be text (e.g., a name), numbers (e.g., a zip code), passwords, dates, etc. Examples of different types of input questions are shown below, along with more details.
A Page containing input question elements can include other elements as well, for example paragraphs that might display additional information needed for answering the questions, or set of selection choices.
 |
Item | Input Type | Description |
|---|---|---|
1 | Users enter a short answer. | |
2 | Users select a date, using a date picker. | |
3 | Users enter an answer containing numbers only. | |
4 | Users enter an answer whose characters are masked as they are entered. | |
5 | Users enter a multiple line answer, for example a comment. |
Tip
A related type of question is Upload Image element which lets users send images from their device.
Designing Input Questions: Basic Workflow
The following shows the basic workflow for creating input questions of all types:
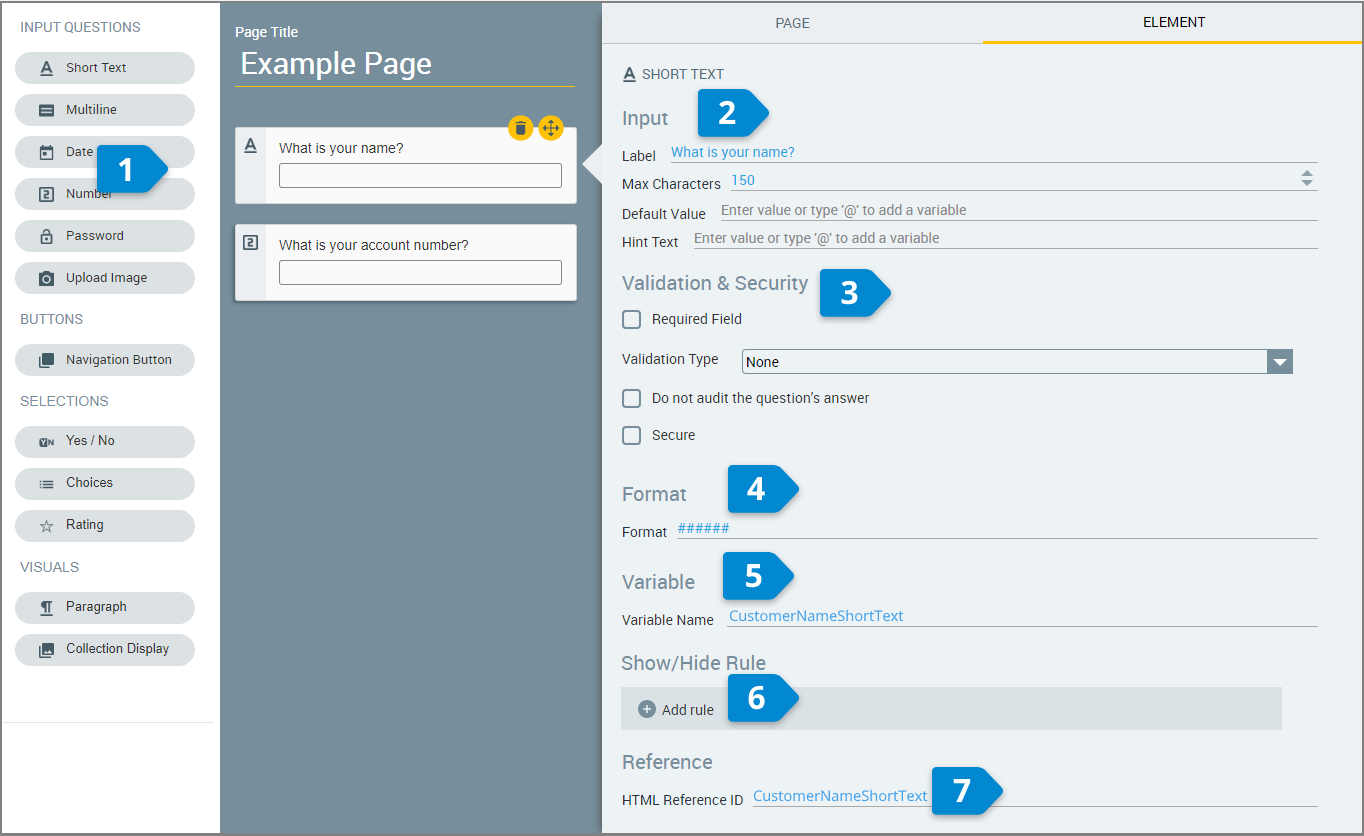 |
From the Page Editor, select the required type of input question and drag it onto the Page map. (In the example above, a Password type question is selected.) When a question type is dragged onto the Page map, the Element tab (on the right side of the Page Editor) automatically opens.
The text that you put in the fields of the Input section of the Element tab determines what the user sees on the Page. The following fields are common to all input questions:
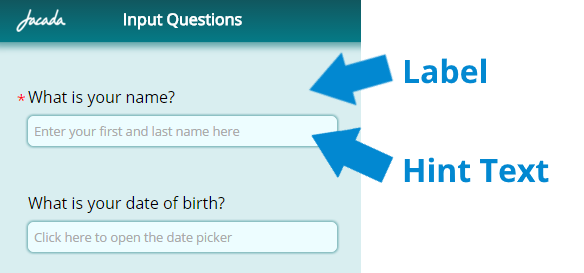 |
Label: This is the displayed question text. The X-Designer has a default label for every input question, which you can replace using the text of your choice.
Hint Text: This optional text is displayed in the answer field on the Flow page. Enter text here that can guide your users in answering the question.
The settings in this section of the Element tab enable checking the answers provided and also protecting sensitive input. All settings in this section are optional.
The following are some common settings for input questions:
Required Field: When this checkbox is selected, users cannot proceed to the next page of the Flow if they have not provided an answer. Required fields are indicated in a Flow page by a red asterisk next to the label. (See the example in the first question in the figure above.)
Do not audit the question's answer: When this checkbox is selected, the answer entered by the user is not saved in the X‑Platform databases.
Secure: Use this checkbox for collecting text information that contains sensitive data.
The Validation Type setting involves checking an answer to determine if it conforms to the validation settings configured. Validation settings are relevant to text and number input questions only. For more information, refer to Configuring Validation Settings for Input Questions.
Settings for optionally limiting the Format of short text input. For more information, refer to Text Input Questions.
The Variable Name field stores the runtime response as a User Input variable in order to make it readily available to other Flow elements. A unique name is automatically assigned to this field by default, but you can enter a more descriptive name of your own.
You can also assign the runtime response to an existing or new variable. Entering '@' in the field enables you to select and assign a variable of the correct type using the autocomplete variables list. For more information, refer to Viewing and Managing Variables.
To display U-Assist AI-based suggestions at runtime, a Session Variable must be assigned to this field.
The Show/Hide Rule field enables you to show or hide the input question during runtime if a specified Rule condition is met. The input question is always displayed by default. For more information, refer to Dynamically Displaying Elements with Rules.
The HTML Reference ID field stores the response in order to make it available for use outside of Interact, for example in CSS or application extensions. A unique name is automatically assigned to this field by default, but you can assign a more descriptive name to make it easier to identify.
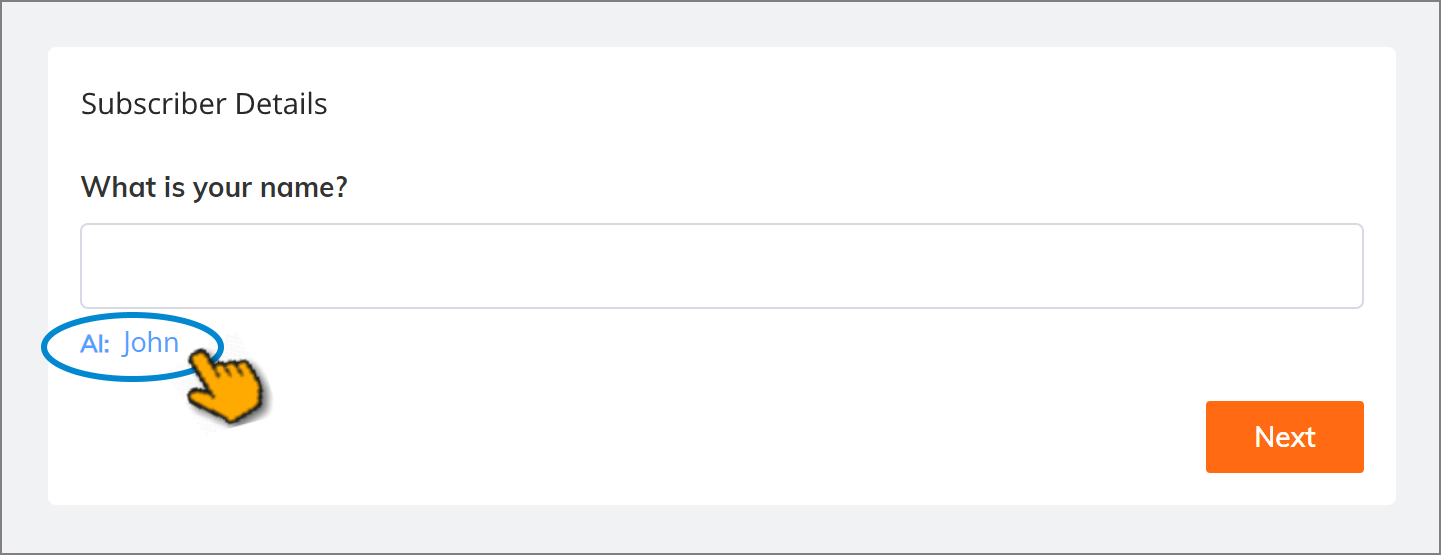
Working with AI-Based Suggestions
At runtime, Uniphore U-Assist can automatically display clickable, AI-based data suggestions for an element in a Flow. This provides an Agent with a quick way to fill in fields, and also reduce entry errors during a call:
 |
To activate the display of AI-based suggestions for an element:
The element must have a Session Variable assigned to its Variable Name field, for example:
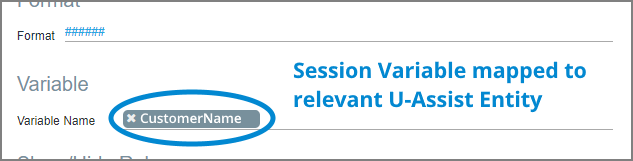
The Session Variable must be mapped to the relevant Entity in the U-Assist AI Model.
When an Entity is triggered during the conversation, the AI-based suggestion that appears will be based on an analysis of the current conversation, using the relevant AI Model.
Currently, AI-based suggestions are supported for the following Page elements:
Short Text
Multiline Text
Numbers
For details on using the AI-based suggestions in the AI Agent Assist client application, click here.