Text Input Questions
Short Text and Multiline input questions allow you to obtain a wide variety of information from users. Answers may include any combination of characters (letters, numbers, special characters, and so on), and both short (Short Text) and longer (Multiline) answers are supported.
You may use text input questions to:
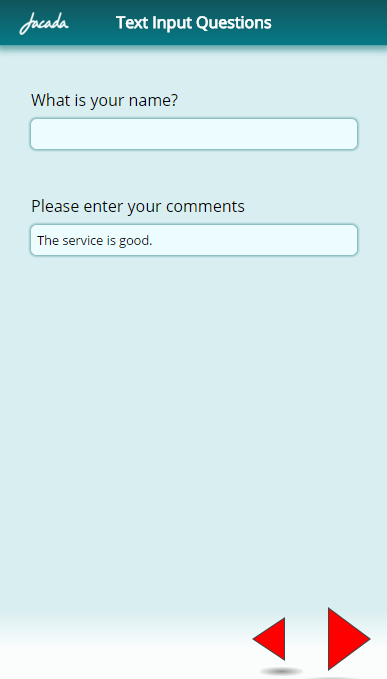
Obtain user details, such as name, address, and so on.
Obtain product information, such as the name or serial number of a product.
Ask for a short description of the issue for which the user needs assistance.
Request comments and feedback.
Creating a Text Input Question
From the left side of the Page Editor, click the required element (Short Text or Multiline). Alternatively, selectthe required element and drag it to the Page map. On the right side of the Page Editor, the Element tab opens.
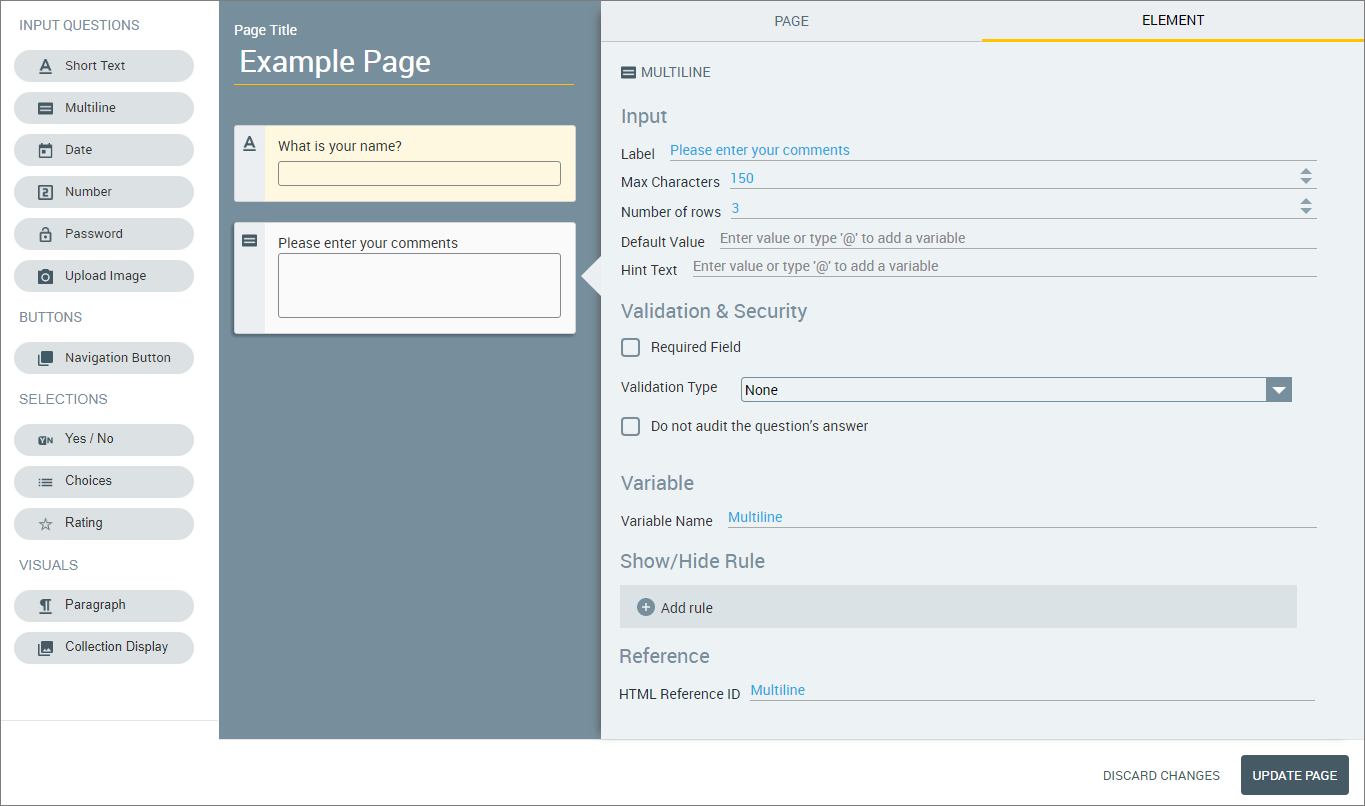
In the Label field of the Element tab, enter the text of the question.
If desired, adjust the maximum number of characters that users will be able to enter. The default number of characters is 150.
For Multiline type questions only: Indicate the number of rows that will be available for the user to enter the answer on.
If desired, in the Default Value field, enter text to be displayed as a placeholder in the answer field on the Flow page.
If desired, in the Hint Text field, enter a message that guides users as to how to answer the question (e.g., 'Enter your first and last name'). If a default value is defined, the Hint Text will be displayed after the user clicks the answer field to change the default answer.
Configure validation and security settings:
If relevant, select the Required Field checkbox and/or the Do not audit the question's answer checkbox, as described in the basic workflow for input questions.
If relevant, configure any settings for custom validation. For details, click here.
For Short Text questions only: If the information you are requesting involves sensitive data, select the Secure checkbox and specify how many characters at the beginning and/or end of the string will be displayed in clear text (the rest of the string will be masked).
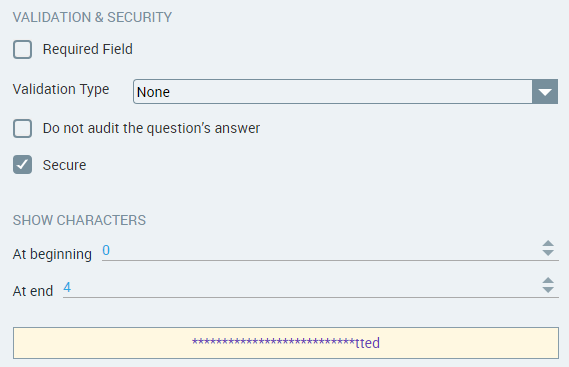
When using the Secure feature, keep in mind that characters will be masked only when the input is used (e.g., by another Flow element). Characters are not masked as they are being entered by the customer.
For Short Text questions only: If desired, in the Format field, set a pattern for limiting user text input to this pre-defined format. For example, the following entry sets the pattern for a telephone number:

The symbol # represents the characters in the string. You can add supplemental spaces, hyphens, and other special characters to the string, as required.
To limit text input to more complex patterns and regular expressions, use custom validation described in the previous step.
The Variable Name field stores the runtime response as a User Input variable in order to make it readily available to other Flow elements. A unique name is automatically assigned to this field by default, but you can enter a more descriptive name of your own. You can also assign the runtime response to an existing or new variable. Entering '@' in the field enables you to select and assign a variable of the correct type using the autocomplete variables list. For more information, refer to Viewing and Managing Variables.
The Show/Hide Rule field enables you to show or hide the input question during runtime if a specified Rule condition is met. (An input question is always displayed by default.) To add a Show/Hide rule, click the Plus
 icon and enter the condition to meet using the Rule Editor that appears:
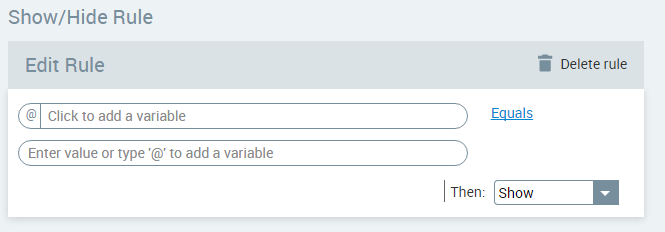
After adding the condition, select Show or Hide from the dropdown menu at the lower right to set the question's display status. To delete a Rule, click Delete rule at the top right corner of the Rule Editor.
For more details and an example, click here.
The HTML Reference ID field stores the response in order to make it available for use outside of Interact, for example in CSS or application extensions. A unique name is automatically assigned to this field by default, but you can assign a more descriptive name to make it easier to identify.
To save your changes, at the lower right corner of the Page Editor, click Update Page (or Create Page). The Page Editor closes, and the Flow Map is displayed.