Image Upload: Getting Images From Customers
Your users can upload a selected image to a Flow directly from their current device, enabling them to easily share photos and visual information with an Agent.
For example, a customer can send a photo of their ID card or the status of LEDs on their router.
Users can upload multiple images in a single Flow step. X‑Platform supports JPG, PNG and GIF image formats.
Image uploads have the following limits:
An uploaded image cannot exceed 10 MB in size.
When using the Mobile Web App, Customer Assistant and Agent Assistant applications, up to 10 images may be uploaded per Upload Image element.
When using the Agent, Web Self Service applications, up to 3 images may be uploaded per Upload Image element.
Note
Image uploading is supported in all modern browsers and with smartphone operating system iOS 6, Android 4.4 or later versions.
The Upload Image element is used to enable image submissions in a Flow.
Creating an Upload Image Input Question
From the left side of the Page Editor, drag the Upload Image question element to the Page map. The Element tab opens.
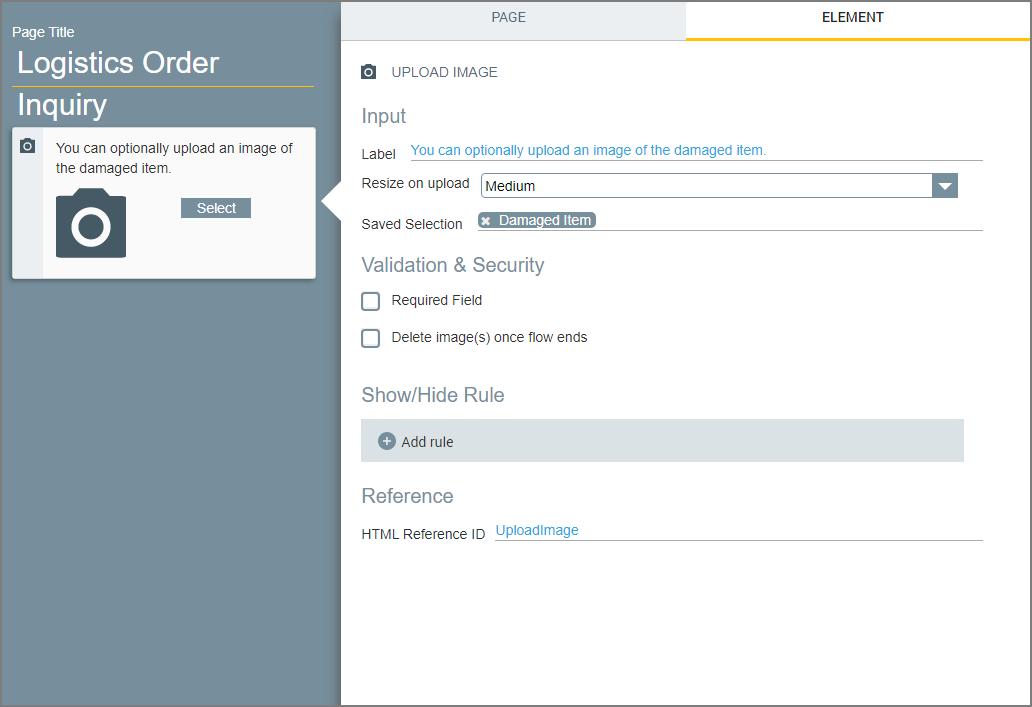
Change the default text of the Label field in the Element panel as needed.
From the Resize on upload dropdown list, select the appropriate compression option: Small, Medium, Large or None.
Tip
Make the compression choice based on what kind of photos will be uploaded. For example, if customers are likely to upload photographs of documents that Agents will need to read, select None.
Specify the Collection variable that will contain the uploaded photos. Click Saved Selection and select a collection from the Variables list. Only variables of type Collection of Image will be displayed:
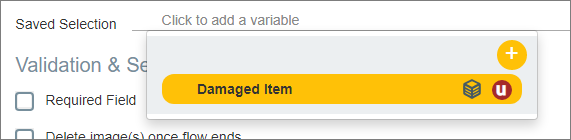
If needed, click Add to create a new variable now. For details, click here.
Optionally activate the Required Field checkbox. When selected, users will not be able to proceed to the next page of the Flow until they have uploaded at least one image.
Optionally activate the Delete image(s) once flow ends checkbox. When selected, all images that were uploaded by a user while running this Flow will be removed from the X‑Platform database when the Flow finishes, or when the current session ends.
Note that when this option is enabled, the Saved Selection variable which stores the image(s) must have its Do not audit the variable’s value checkbox enabled.
The Show/Hide Rule field enables you to show or hide the Photo Upload question during runtime if a specified Rule condition is met. (An input question is always displayed by default.) To add a Show/Hide rule, click on the Plus
 icon and enter the condition to meet using the Rule Editor that appears:
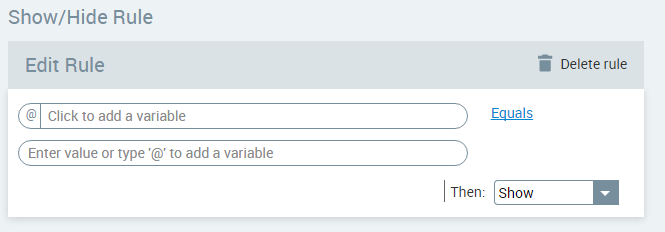
After adding the condition, select Show or Hide from the dropdown menu at the lower right to set the question's display status. To delete a Rule, click on Delete rule at the top right corner of the Rule Editor.
For more details and an example, click here.
The HTML Reference ID field stores the response in order to make it available for use outside of Interact, for example in CSS or application extensions. A unique name is automatically assigned to this field by default, but you can assign a more descriptive name to make it easier to identify.
To save your changes, at the lower right corner of the Page Editor, click Create Page (or Update Page). The Page Editor closes and the Flow Map is displayed.
Creating the Saved Selection Variable
When you design an Upload Image question, you need to specify a type of object collection (a Collection of Image variable) to store the uploaded images. This variable can be used to access and display uploaded photos in paragraphs, resources, email notifications and other Flow elements.
If no Collection of Image variable types currently exist, you'll be prompted to create one when you click the Saved Selection line.
Click the Plus  icon to open the Variable Editor:
 |
The Collection of Image type is selected by default. Specify the Variable Name and other desired parameters and click Save Variable.
For more information about defining User Variables, click here. Uploaded images can also be stored in a Session Variable for access by other Flows. For more information about defining Session Variables, click here.
Image Uploading: What a User Sees
When your customer reaches an Upload Image step, they simply click the Add (plus) icon and select one or more images to upload from their device. Of course, a Flow Designer can provide any additional information or instructions required on the Page that contains the step.
After a customer adds an image, its thumbnail is displayed on the page:
 |
Note
After the maximum number of photos have been selected for upload, the Add icon is automatically hidden.
Additional user options are available according to the application type running:
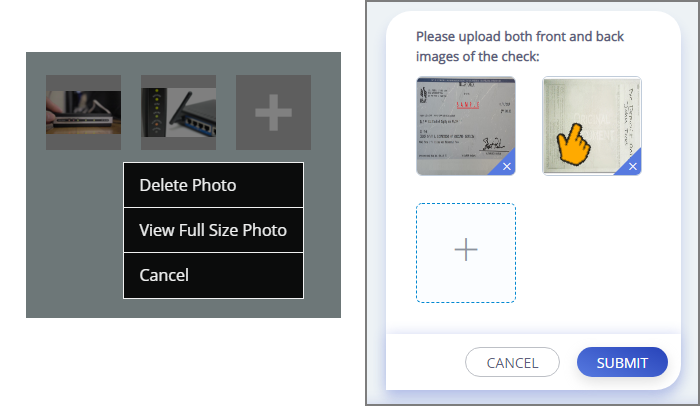 |
For example, when running the Mobile Web Application (above left), a user can right-click on a thumbnail to view or delete an image. When running the Customer Assistant Application (above right), a user taps a thumbnail to view it or the X to delete it.
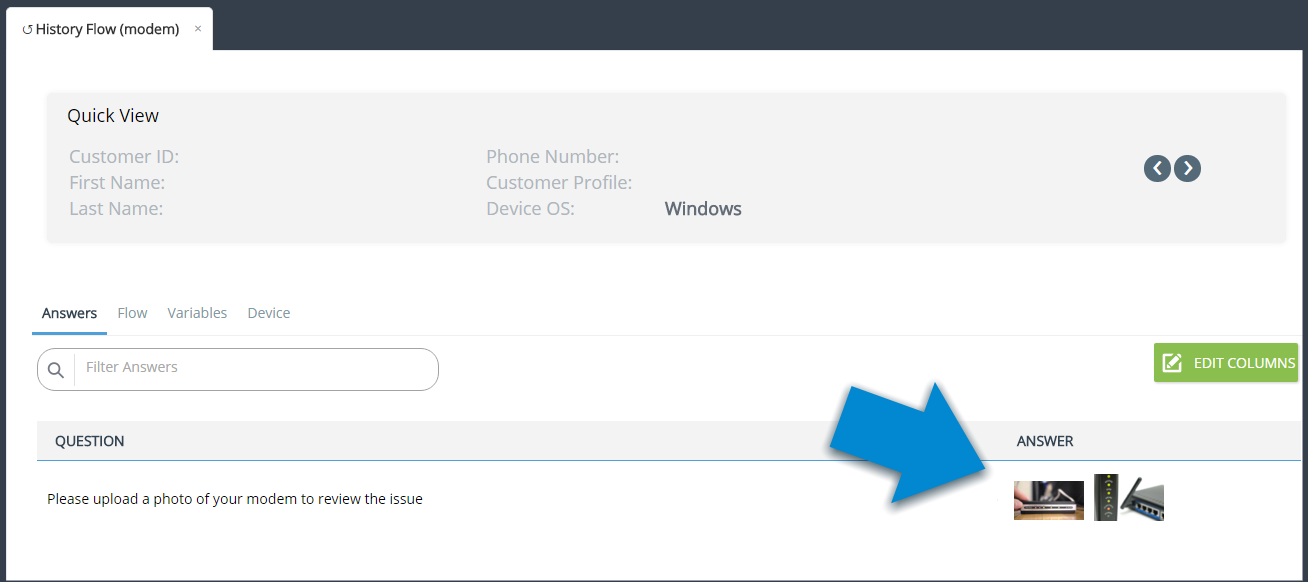
Image Uploading: What a Call Center Agent Sees
When an Agent views the customer's Flow instance using Agent Application, all images that were uploaded by the customer can be viewed using the History Flow tab.
 |
Important
If uploaded customer images were optionally deleted when the Flow ended , images will display here only as broken links and will no longer be accessible.
For more information on viewing Flow History, click here.