Sending Email Automatically During a Flow
You can use the Email element to send email notifications to one or more recipients at anytime in a Flow.
For example:
At a call center, an email containing a summary of the Flow is automatically sent to a supervisor or support group when an agent reaches a certain Flow step.
In a self-service support Flow, a customer reaches a stage that indicates a device is faulty and should be sent in for repair. At this point, an email that contains key customer data (and perhaps an image that they've uploaded) is automatically sent to the repairs department.
As part of a registration process used by a new customer, an email containing useful information and a link is automatically sent to the customer when the Flow ends.
An Email element runs in the background, so customers or agents using the Flow are not aware that the email is being sent.
Important
Before using Email elements in a Flow, ensure that settings for the SMTP server are configured correctly in the X-Console. For details, click here.
Creating an Email Element
At the top left of the Flow Map, click the round Add Steps icon. The Add Steps Toolbox opens.
From the Logic Elements group, select and drag the Email element to the desired location on the Flow Map. The Email Editor opens.
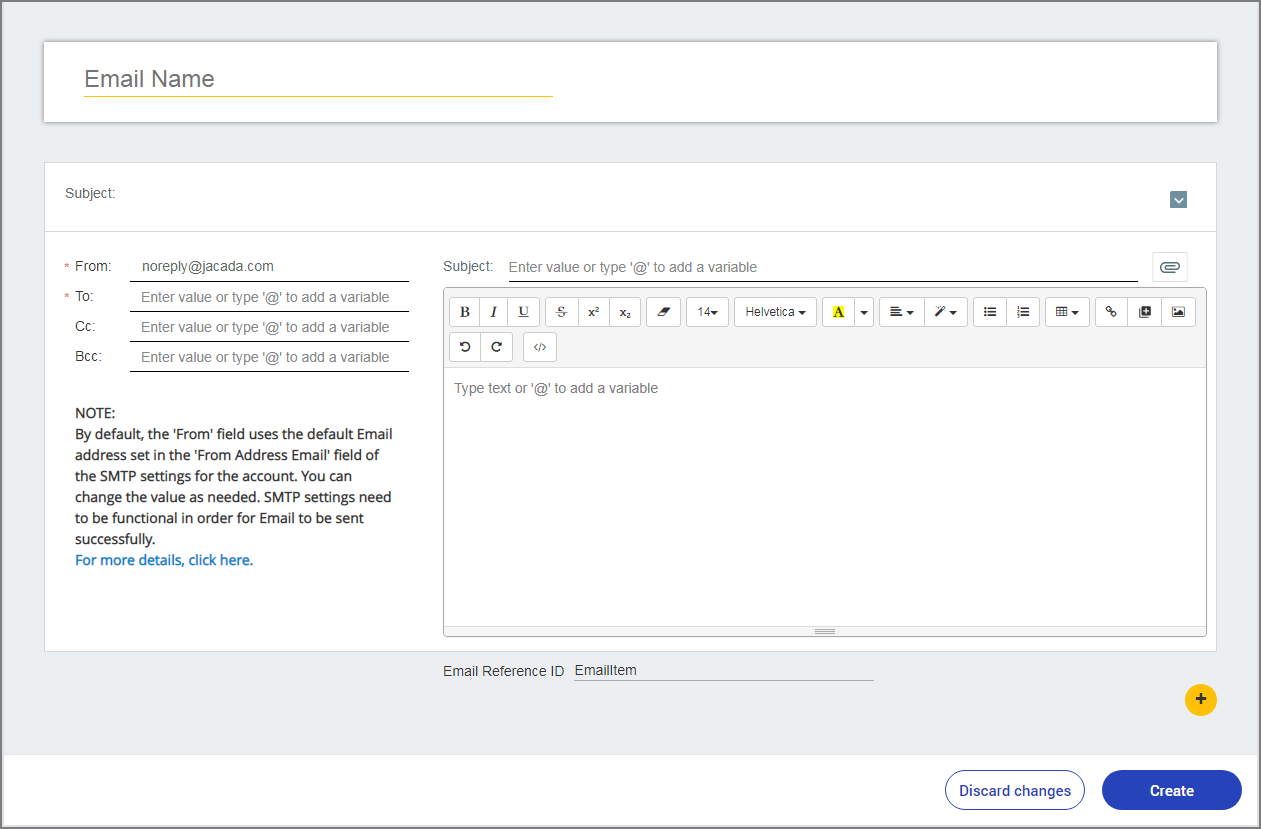
In the Email Name field, enter a unique name for the Email element.
Enter relevant email addresses in the the From, To, Cc and Bcc fields.
Note
The default value of the From field is maintained on the SMTP Server Settings page for the current account.
On the Subject line above the text editor, enter relevant free text. As you type, the text is displayed in the Subject field above.
To use a variable in the the field, enter the '@' sign and choose from the list of available variables.
Optionally add an attachment:
Click the Attachment
 icon. The Attached field appears.
Select the variable that is being used to reference files uploaded by the customer. For more details, see below.
Compose your email in the text editor. For more information about the editor and details about how to use variables, uploaded photos, images, media and styles in the body of the email, click here.
Optionally enter an email reference identifier (e.g, for tracking purposes) in the Email Reference ID field.
To add another email, click the Plus
 icon in the lower right corner of the editor and then repeat the steps above.
Click Create Email. The Email Editor closes, and the Email element appears on the Flow Map.
Attaching Uploaded Photos to Your Email
X‑Platform lets you access photos that were uploaded by customers (via the Upload Image element) and send these as attachments to Email notifications. For example, you might ask customers to take pictures of a device that needs repair. These could be sent in an email directly to your repairs department as attachments.
Photos uploaded by customers are stored in a Collection of Images type variable. Creating an email attachment therefore involves specifying the Image type variable that is associated with the photos you need. When you create an attachment, you can use either (or both) of the following techniques:
Select the Collection of Images variable that holds the images uploaded in a specific Photo Upload question. In this case, all photos uploaded by the customer in response to that question are included in the attachment.
Select an Image type variable that holds a single photo. This type of variable is usually created by allocating one of the photos from the image collection into a simple Image variable. For complete information about creating this variable type, click here.
In the Email editor, position the cursor on the Attached line, and then enter '@'. The Variables list opens. Note that only variables of type Image (single and collections) are available.
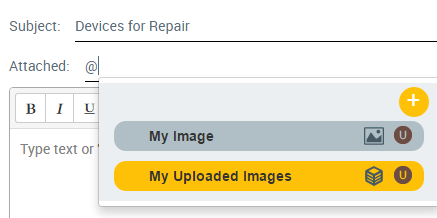
Select the required variable. The name of the selected variable is displayed on the Attached line in a gray frame.
To add more uploaded photos to the attachment, repeat Steps 1-2.