Configuring Email Settings
You configure X‑Platform Email settings to enable both outgoing and incoming connectivity for your account.
Outgoing Email Configuration for the Account
The Email Settings page stores SMTP server settings for your account. These settings are used to send email from Flows that contain email elements.
From the Account menu in the X-Console, click Email. The Email Settings page is displayed:
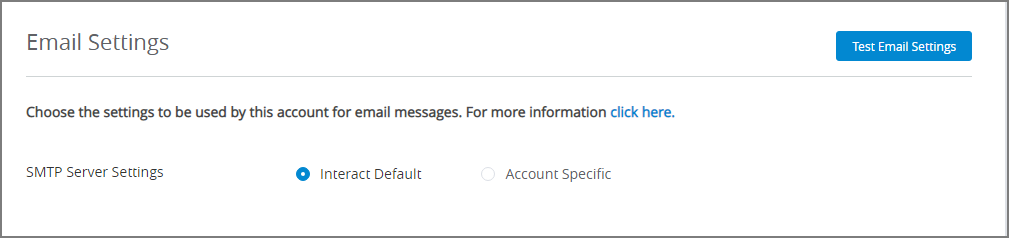
On first access, assign SMTP Server Settings to use either:
X‑Platform Default. The standard tenant settings created for your X‑Platform account. This choice is selected by default.
Account Specific. Specific settings that you enter for this account.
Note
When Account Specific settings are used, they will be saved until the SMTP Server Settings field is switched to X‑Platform Default. Upon switching, all saved settings will be cleared.
If you assign Account Specific settings, provide the following additional parameters:
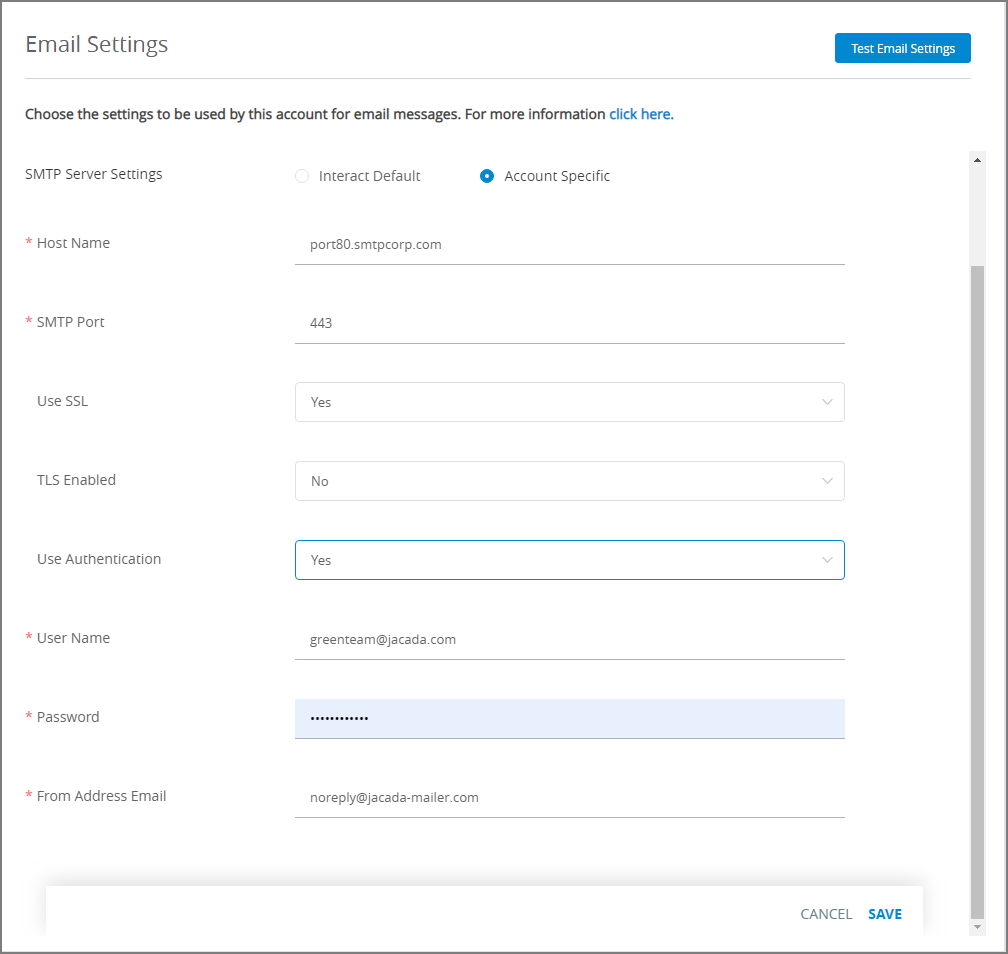
Enter the relevant host name in the Host Name field.
Enter the relevant SMTP port in the SMTP Port field.
Note
Your SMTP server must have a currently validated, trusted SSL Certificate.
To use SSL and/or TLS, select Yes from the appropriate dropdown list(s).
If your email settings require authentication, select Yes from the Use Authentication dropdown list, and enter relevant Username and Password information in the required fields.
In the From Email Address field, enter a default email address that will be used in emails that are sent from the account, when no other address is provided.
At the bottom right corner of the page, click Save. A confirmation message is displayed. In addition, the Test Email Settings button is enabled.
To test the current Email settings, at the upper right corner of the Email Settings page, click Test Email Settings. The Test Email Settings page opens:
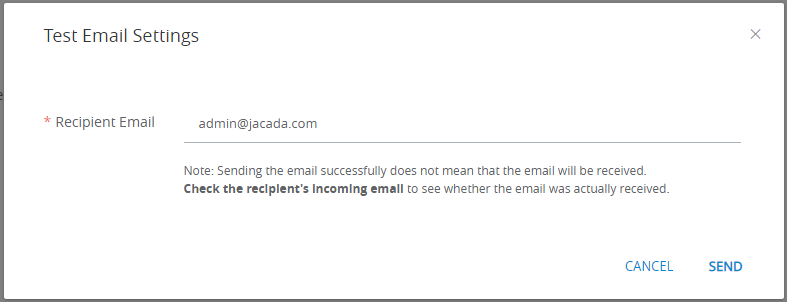
In the Recipient Email field, enter the email address to which a test email will be sent. Then, click Send. A confirmation message is displayed.
Note
The test only verifies a successful send operation using the saved SMTP parameters. Be sure to confirm that your test email was received at the recipient address.
Incoming 'Contact Us' Email Configuration for the Account
The Connectivity Settings page stores the Application email address that is used by the various Contact Us methods when a customer wants to connect with an Agent.
From the Settings menu in the X-Console, click Connectivity. The General settings page is displayed.
At the upper right corner of the page, click Edit. The settings become editable.
In the Contact Us Email Settings section, enter the default email address into the Email Address for 'Contact Us' field:

At the upper right corner of the page, click Save. Changes are saved in the system.