Defining After Hours and Holiday Schedules
Using the After Hours and Holidays Schedules page, you can define sets of time periods during which live call center Agents are not available to respond to customer call and email requests.
A schedule can use weekly patterns that are repetitive (e.g., closed every Sunday) as well as events that occur infrequently (e.g., annual holidays).
You can create multiple schedules can be created to accommodate different functionalities. For example, you can create one schedule for the call service, and a different schedule for mobile service responses.
After you have defined a schedule, you associate it with the relevant connectivity settings, which use the information to effectively handle a request.
Creating a New Schedule
Creating an After Hours schedule involves specifying a name and a time zone for the schedule, and then configuring the days and times during which call center agents are unavailable.
From the Settings menu in the X-Console, click After Hours. The After Hours and Holidays Schedules page is displayed.
At the upper right corner of the page, click Add. The Edit Schedule page is displayed:
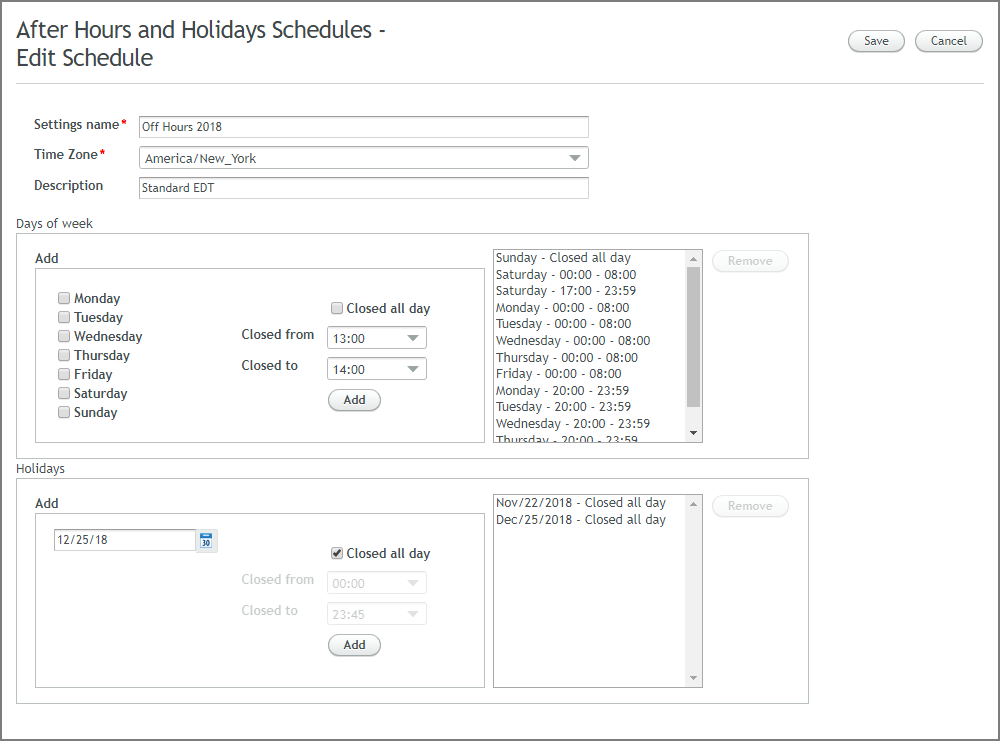
In the Settings name textbox, enter an appropriate name for the new schedule.
From the Time Zone dropdown list, select the relevant time zone.
If desired, in the Description field, enter notes or comments about the schedule.
In the Days of week section, specify the weekly schedule:
Select a day of the week.
From the Closed from and Closed to dropdown lists, select the time period during which the call center is closed. Note that you can configure multiple time slots for a single day.
Alternatively, select the Closed all day checkbox.
Click Add. The newly defined time period is listed in the pane to the right.
To delete an existing item, select the item in the list and click Remove.
Repeat Step 6 for each required day.
In the Holidays section, specify the schedule for holidays:
Use the Calendar popup to navigate to and select the relevant day.
From the Closed from and Closed to dropdown lists, select the time period during which the call center is closed. Note that you can configure multiple time slots for a single day.
Alternatively, select the Closed all day checkbox.
Click Add. The newly defined time period is listed in the pane to the right.
To delete an existing item, select the item in the list and click Remove.
Repeat Step 8 for each holiday.
At the upper right corner of the page, click Save. The new schedule will be listed on the page.
Note
After it's creation, an After Hours and Holidays Schedule must be associated with call configuration settings for it to be used, as described here.
Updating After Hours and Holidays Settings
You can edit and update any component of an existing schedule:
From the After Hours and Holidays Schedules page, click the schedule you wish to update. The Edit Schedule page opens.
Change the settings as required. (See above for details.)
At the right upper corner of the page, click Save. The changes will be saved in the system.
Deleting a Schedule
The Delete button enables you to remove a selected schedule(s) from the page:
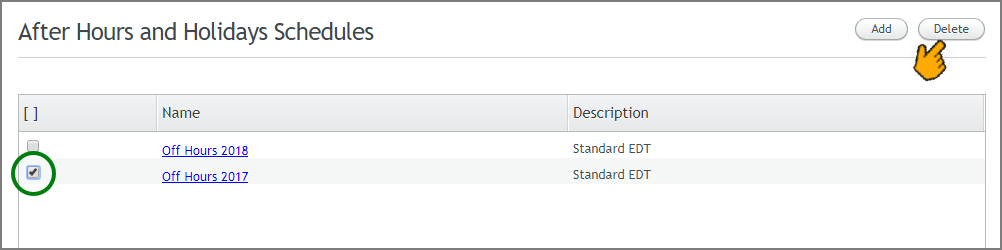 |
From the After Hours and Holidays Schedules page, select the checkbox to the left of the schedule you wish to remove.
Note
If a schedule is currently referenced by call configuration settings, it cannot be deleted.
At the right upper corner of the page, click Delete. The schedule will be removed from the system.