Adding a RPA Sequence to the Flow (Legacy)
X‑Platform enables you to easily add any sequence of Robotic Process Automation (RPA) activities within a Flow.
Note
RPA Covered Applications must be assigned to your account in order to create RPA Sequences that execute inside a Flow.
An RPA Sequence is a set of customized business workflow Steps that will execute automatically in a X-Designer Flow, according to predefined logic of the Flow, for example:
You can create an RPA Sequence in any of the following ways:
Using X-Designer's built-in mechanism to record your Windows, Web and other Covered Application workflow and automatically create the RPA Sequence.
Manually building the workflow using drag-and-drop UI objects from Covered Applications, in the RPA Sequence Editor.
After adding an RPA Sequence, you can edit or enhance any of its Steps, whenever required.
Recording an RPA Sequence
For complete details about using the built-in Step recording mechanism to create your business workflow, click here.
Manually Creating an RPA Sequence
You can manually build and add RPA Sequences to any type of Flow using the RPA Sequence Editor.
Each RPA Sequence contains one or more Steps. Each Step contains a single Resource, taken from any available Covered Application. You also assign the Action that will be taken when the Resource is called.
At the top left of the Flow Map, click the round Add Steps icon. The Add Steps Toolbox opens.
From the Logic Elements group, select and drag the RPA Sequence element to the desired location on the Flow Map. The RPA Sequence Editor opens.
In the Sequence Name field, enter a unique name for the RPA Sequence:
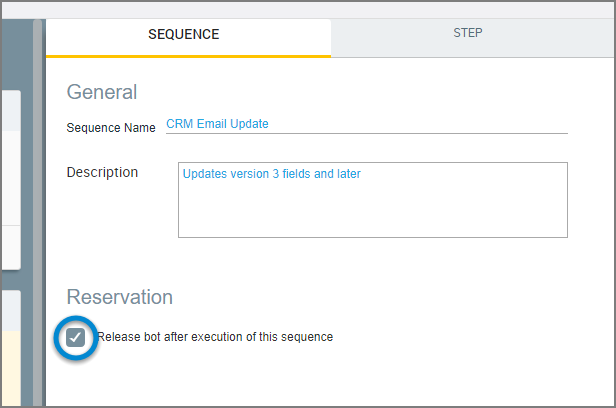
Optionally add a remark in the Description field.
If desired, activate the Release Bot after execution of this sequence checkbox to request that X‑Platform perform a Cleanup following completion of this RPA Sequence. Releasing the Bot frees up all associated resources and enables it to be executed by other Services. For more information about the CLEANUP Status, click here.
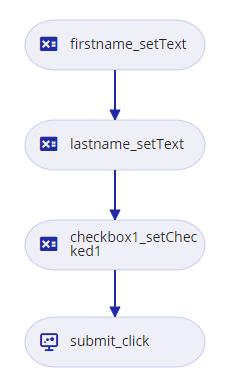
Add one or more Steps to the Sequence using any of the following methods:
From the Resources list at the left side of the page, select and drag each RPA Resource that will be used in this Sequence onto the canvas at the center of the page:
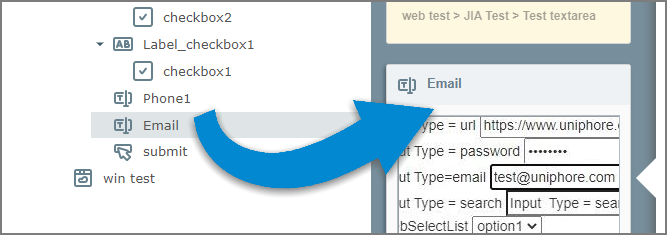
The Resources list contains all the UI objects currently available in your Covered Applications.
At the top right of the Resources list, click on the Capture
 icon to add a Resource using the live UI element capture mechanism.
The RPA Sequence will execute Steps in the same order they are placed on the canvas.
For complete information on changing the order, removing a Step, and other RPA Sequence Editor options, click here.
In the Step panel, from the Action dropdown list, select the activity to perform when the current Resource is invoked during the Sequence. For example:

A unique Step panel is displayed for each Resource.
The Action options that are available will vary, depending on the currently active Resource.
When you finish adding Resources to the Sequence, click Create. The RPA Sequence is added to the Flow Map.
For detailed information on using the RPA Sequence Editor, click here.
Editing an RPA Sequence
You can manually change or update any RPA Sequence in a Flow using the RPA Sequence Editor.
From the Main Toolbar, open the Flow that contains the RPA Sequence you want to change.
On the Flow Map, double-click the RPA Sequence for editing. The RPA Sequence Editor opens to display all elements in the selected sequence.
Make the desired changes to the sequence.
Click Update. Your edits will be stored and the RPA Sequence Editor will close.