Using the RPA Recorder
X-Designer provides a powerful RPA Recorder that enables you to create RPA Sequences automatically, based on the Steps used in your business workflow.
This built-in mechanism instantly records and creates an RPA Sequence inside the current Flow. After a recording is completed, you can edit and customize individual Steps of your Sequence as needed, using any standard X-Designer Flow editing tool.
Note
If you only need to record a single element, you can alternatively use the RPA Capture mechanism.
Recording an RPA Sequence
The RPA Recorder is a separate application that runs on a Designer's desktop together with the X-Designer browser window and the Covered Application you wish to record. Whenever the Recorder is invoked, the X-Designer browser window will be minimized automatically. When you finish recording, the X-Designer will be restored automatically.
Important
For X-Designer browser minimize and restore functionality to work, the Uniphore Automation Designer Extension for Chrome must be installed and active.
At the top left of the Flow Map, click the round Add Steps icon. The Add Steps Toolbox opens.
From the Logic Elements group, select and drag the RPA Recorder element to the desired location on the Flow Map. The X-Designer browser window will be minimized and the RPA Recorder application window will open:

Click the Record
 button to start recording. The button will change and begin to flare slightly to indicate that recording is now active:
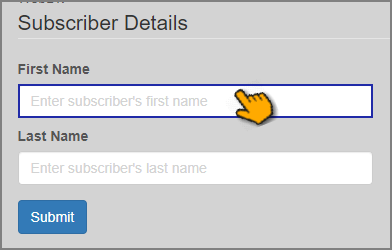
Activate the relevant Covered Application window and hover over the UI element you want to record. If it can be recorded, the element will be highlighted with a blue rectangle, as show below:
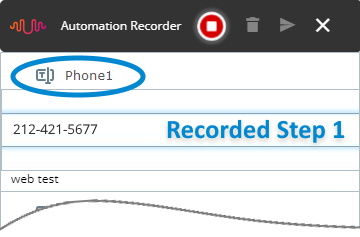
Click the desired UI element, select one of its options or enter a value into its field. Your action will be recorded and displayed immediately as a thumbnail in the RPA Recorder window:
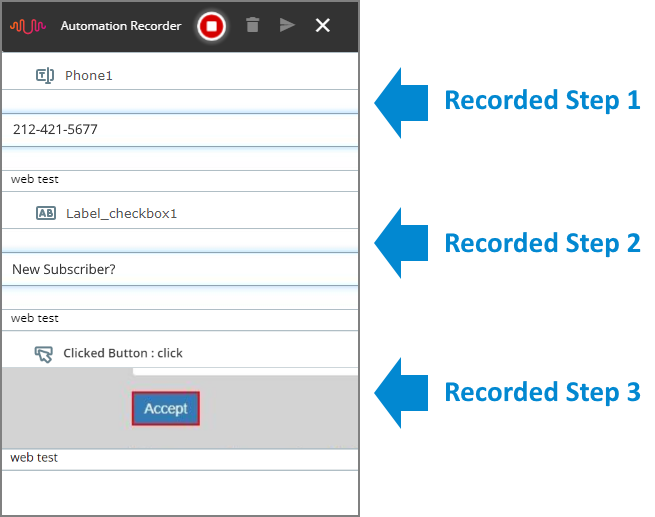
Continue interacting with the Covered Application. Each time you click an element or enter a value in a field, the RPA Recorder will record and display your action:
When you finish the last Covered Application action that you want in your recorded RPA Sequence, or you want to pause your recording, click the Stop
 button. The button will change to indicate that recording has stopped.
You can continue the current recording by clicking the button again. All of your previously recorded elements will be retained.
To delete all recorded elements in the window, click the Trash icon. A popup dialog will be displayed to ask you to confirm deletion.
To cancel the entire recording and return to X-Designer without saving any elements, click the CancelX icon. A popup dialog will be displayed to ask you to confirm cancellation.
When your recorded sequence is ready, click the Send
 button to submit all recorded elements to the active X-Designer Flow:
The X-Designer browser window will be restored, and the RPA Recorder will push the new elements directly to the Flow where you started recording.
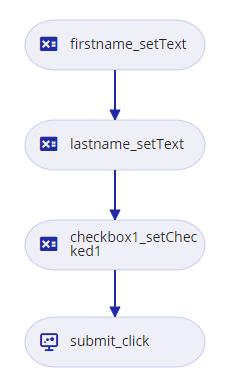
Your recorded Sequence is displayed on the active Flow Map, like the one shown below. You can then edit and customize individual Steps of your Sequence as needed.
Working with Recorded RPA Sequences
After a recording is completed, you can edit and customize individual Steps of your Sequence, using any standard X-Designer Flow tool.
Being able to change any Step in the RPA Sequence ensures complete flexibility for maintaining and improving your automation activities.
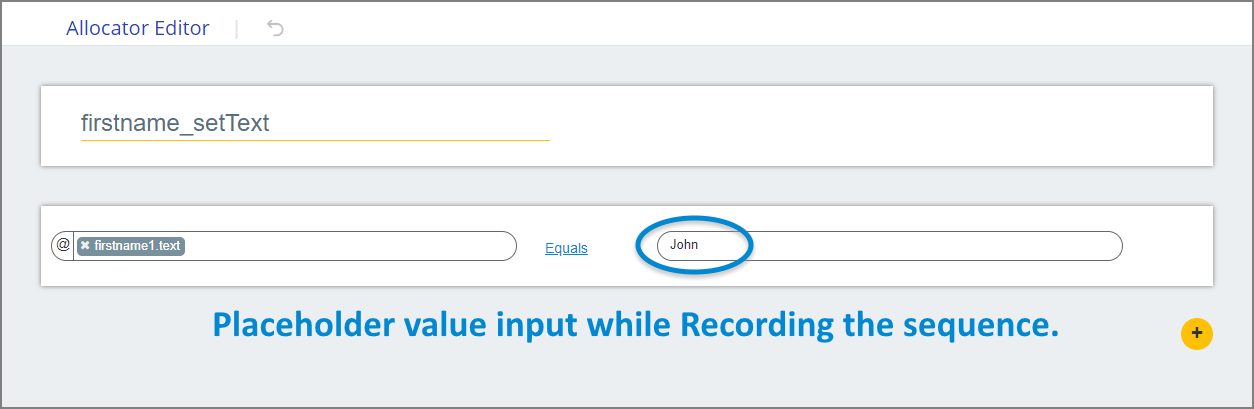
In the example below, we use the Allocator to change the 'placeholder' value that was provided for the Step during the RPA Recorder session. We replace the static field input (shown in the top image) with a runtime variable that will be populated when a Sub-Flow is executed to perform call validation (shown in the bottom image).
 |
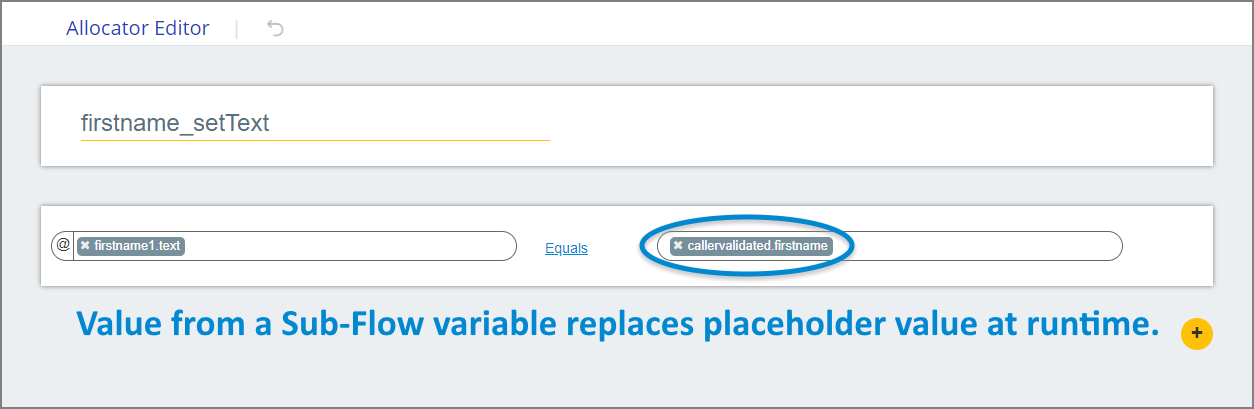 |
Using this method, the RPA Sequence can receive all of the values and attributes input live by the Agent or user during the call.
You can also use the RPA Sequence Editor to view and change an RPA Element Step. For example, you can change an RPA element's Action selection, or assign an Output Mapping Variable.
For complete information, click here.