Image Variables: Using Uploaded Images in Flows
Images uploaded by a customer, can be accessed from a dedicated variable of type Collection of Image for use in other parts of the Flow.
Designer elements that can access Collection of Image variables include:
HTML-based Elements. You can display one or more uploaded images in a paragraph, a resource, or other Flow elements.
Email Attachments. You can send one or more uploaded images as an attachment to an email notification. In our example below, we get a customer to upload photos of a device that needs repair, and then send the photos in an email addressed to our repairs personnel.
Example Flow for Using Uploaded Images
The following Interaction Flow shows how uploaded photos are obtained and then used in an Email element.
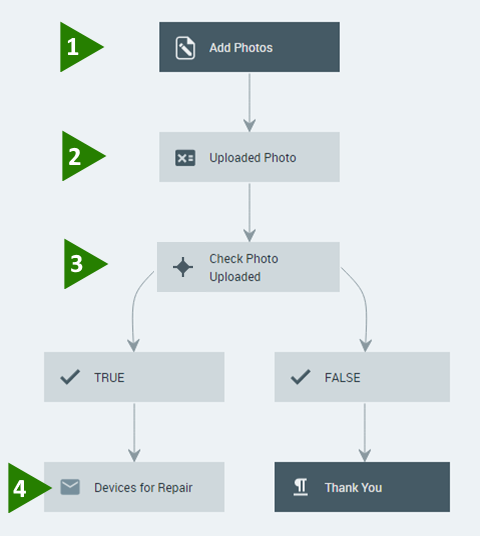 |
You design the flow with Upload Image question, where a customer is prompted to add photos, etc. Images are stored in a variable named My Uploaded Images, as designed in the Flow:
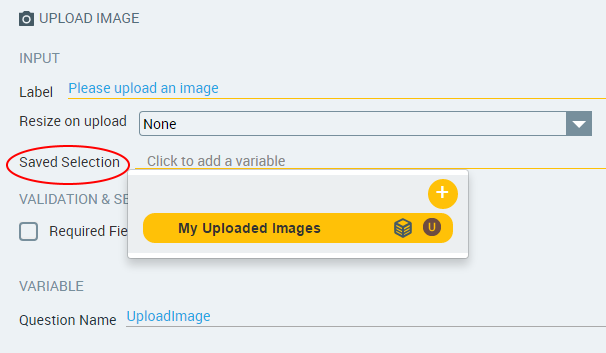
If no Collection of Image type variable exists when you design the question, the X-Designer prompts you to create one.
Add an Allocator step to set the value to the first photo of the Image Collection defined in Step 1.
Add a Decision Point step to check whether or not any photos were uploaded in Step 1.
If photos were uploaded, create an Email step that sends the first photo of the collection in an email notification. In addition, the entire Image Collection is included in an attachment.
Following are some detailed examples.
Allocator: Access an Image From the Collection
We use an Allocator to set the value of a new user variable to one or more images in the stored Collection, making the images available for later steps in the Flow.
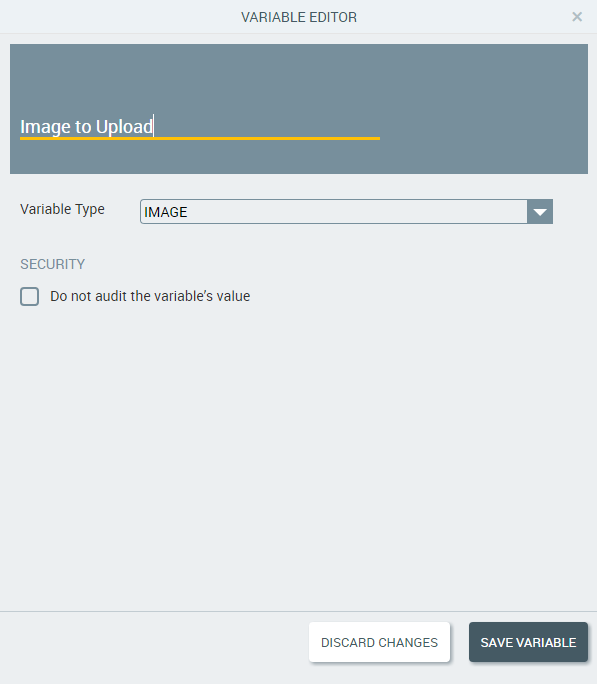
From the Variable Editor, create a new user variable of type Image, called Image to Upload.
In the Allocator editor, we allocate the value of the new variable:
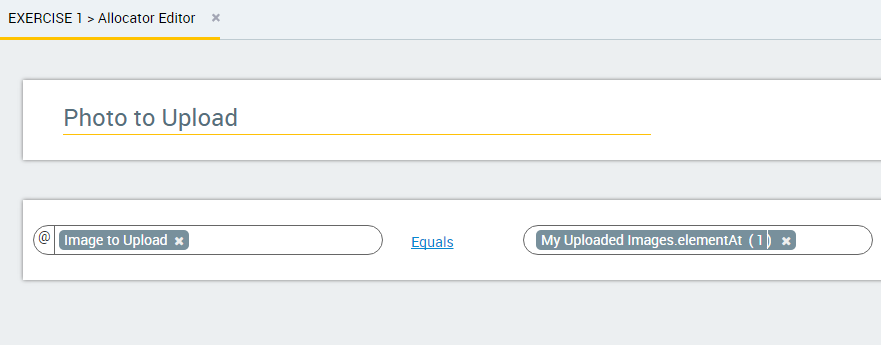
On the left side of the Allocator, select the newly-created user variable, Image to Upload.
On the right side of the Allocator, select My Uploaded Images.elementAt. Then, in the parentheses, enter the index number of the image that you need. In our example above, the value of the Image to Upload variable is set to the first image in the My Uploaded Images collection.
For complete information about creating Allocators, click here.
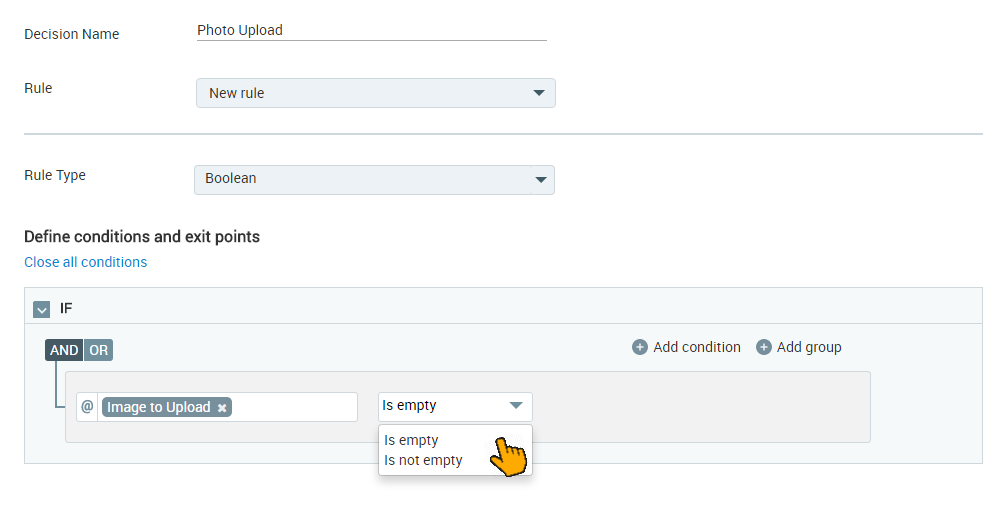
Decision Point: Determine if Images were Uploaded
We use a Decision Point element to determine whether or not the customer uploaded photos in the Upload Image question.
If photos were uploaded, we attach them to an email notification in the next step. If no photos were uploaded, the Flow ends with a Thank You statement.
On the left side of your Decision Point condition, select the Image type variable named Image to Upload created above.
Note
When you select an Image type variable, the right side of the condition is not needed, so it is not displayed.
Select Is empty or Is not empty for the operator, as needed.
Click Save to save the Decision Point.
For complete information about creating Decision Points, click here.
Email Element: Attach and Send the Images
We use an Email element to send the uploaded images with an email notification. The email contains a single photo in its body, and includes the entire image collection as an attachment.
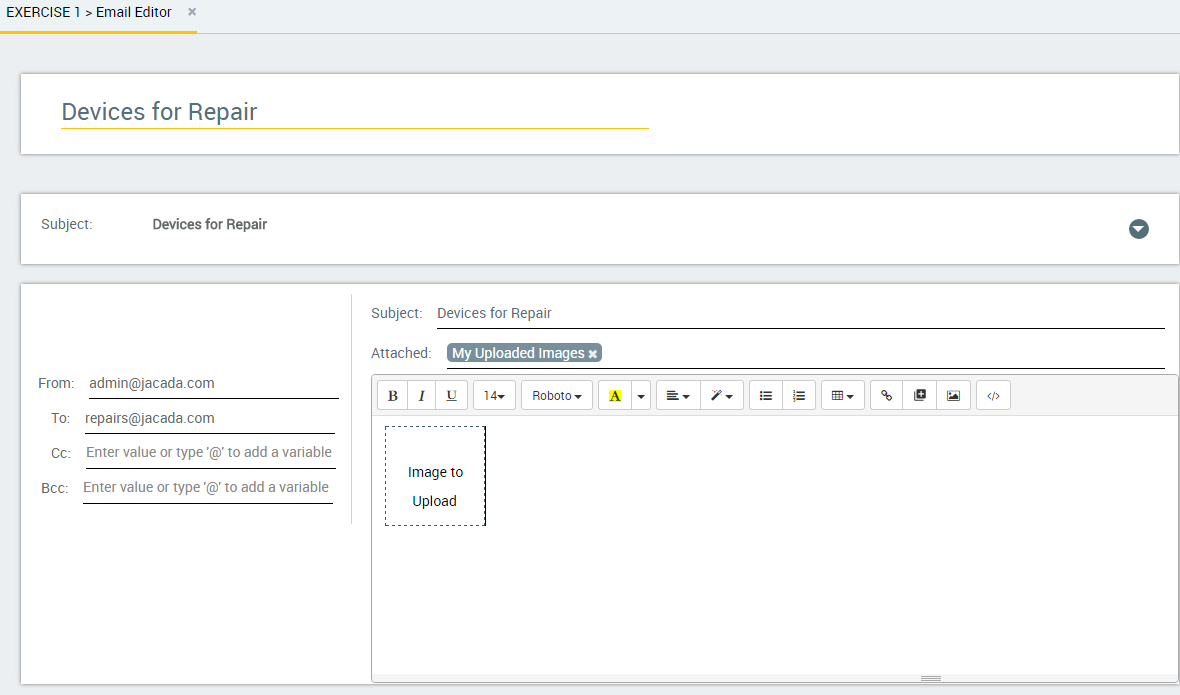 |
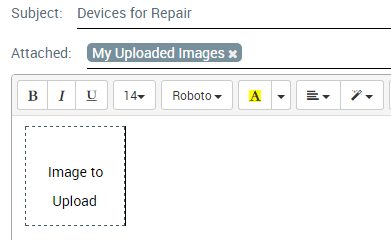
In the Email editor, position the cursor at the point where you want to insert the photo. Then, enter '@' to open the Variables list.
Select the Image to Upload variable. (Note that the variable is of the type Image.) A placeholder frame for the image is inserted at the cursor, and the name of the selected variable is displayed inside the frame.
Optionally edit the display of the photo by clicking on the placeholder frame and using the toolbar options to resize or realign it, or clicking on a corner of the frame and dragging it to the required size.

Now position the cursor on the Attached field, and enter '@' to open the Variables list. (Note that only variables of type Image are available.)
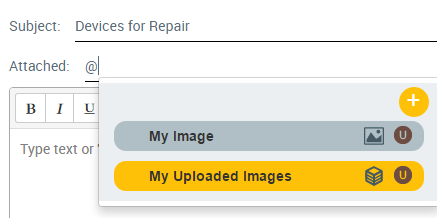
Select the My Uploaded Images variable.
The selected variable is displayed in the Attached field.
This Email will be sent with the selected image displayed and the selected Collection attached.
For complete information about creating Email notifications, click here.