Decision Points: Control Workflow Using Logic Conditions
A Decision Point is a logic step that evaluates one or more conditions to determine the direction of a Flow.
You create a Decision Point using Rules. A Decision Point can be based on either a global Rule defined using the Rules feature, or a local Rule defined for the current Flow only.
Decision Points can use the following to produce the desired result:
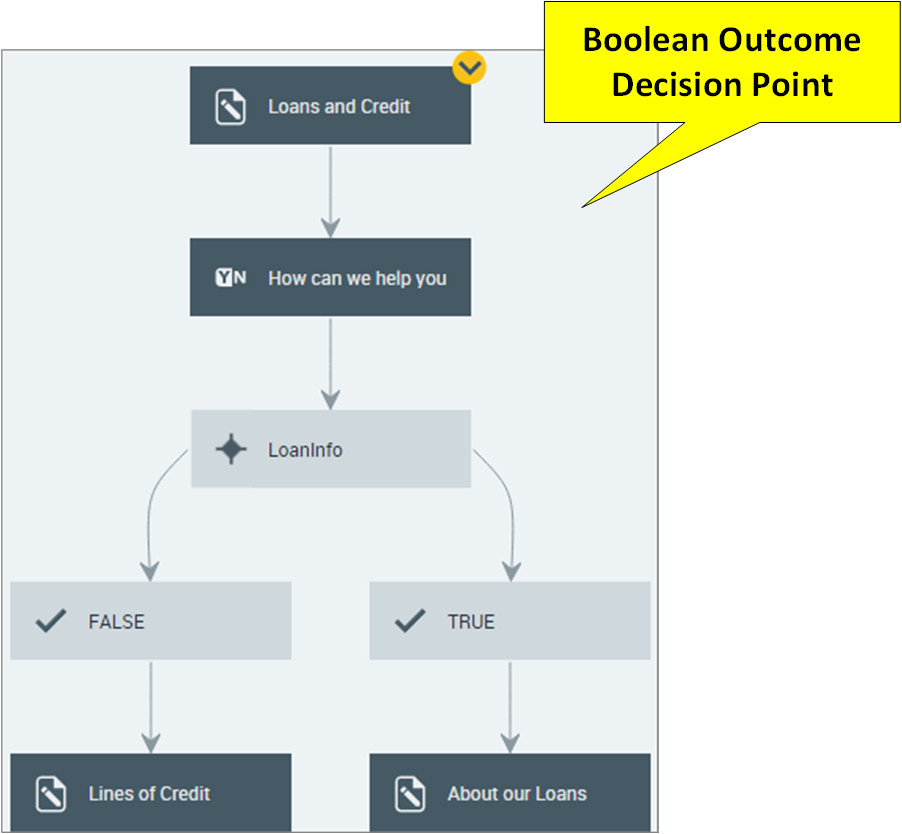
one or more conditions that result in a Boolean outcome (with True/False exit points)
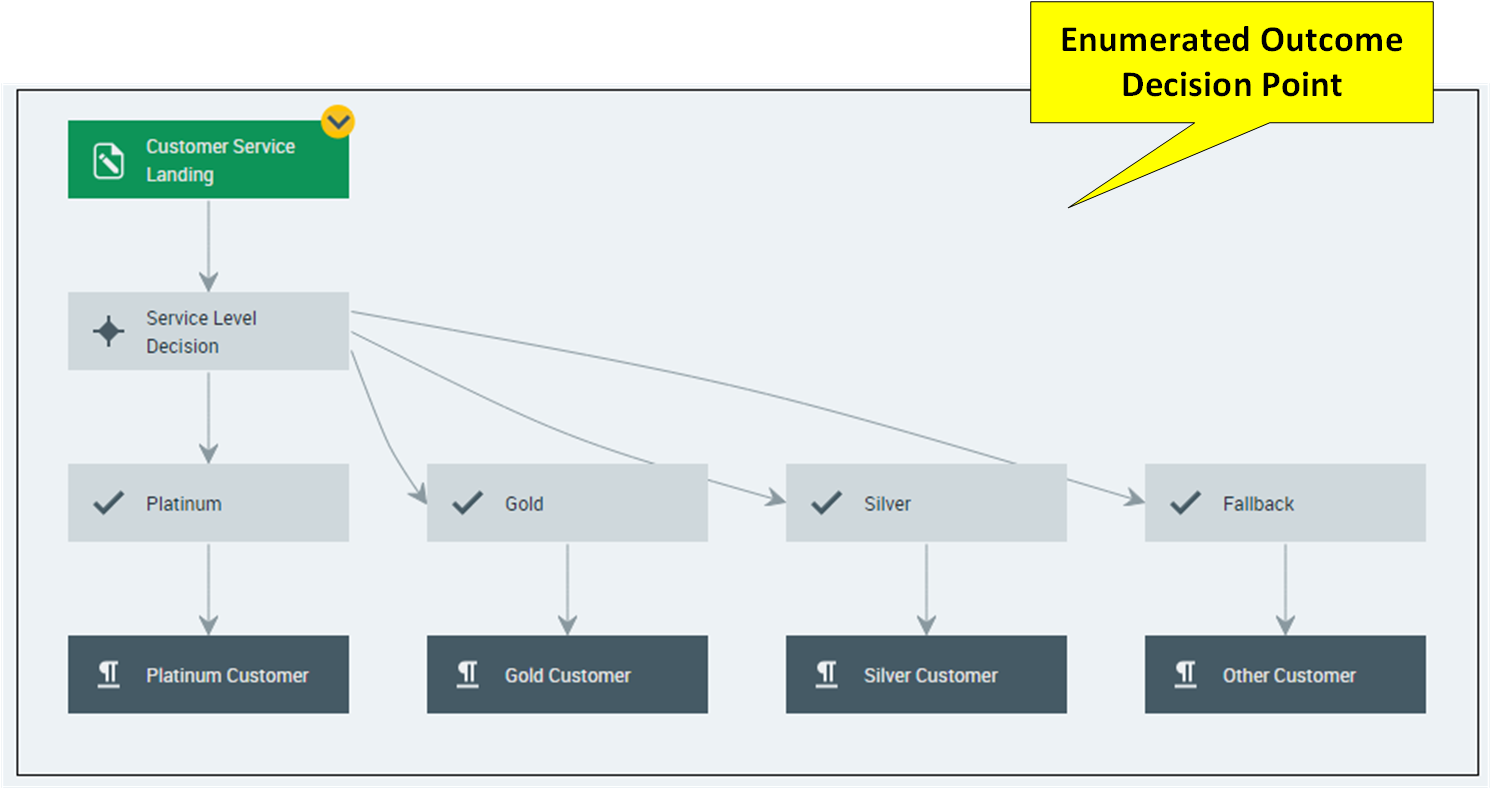
one or more conditions that result in Enumerated outcomes (with as many exit points as needed)
 |
 |
Here are some example scenarios where using a Decision Point is ideal:
A product purchasing site offers various payment options, according to the value of the purchase. The Decision Point evaluates whether the value of the purchase is higher than a certain amount, and then directs the user to the page with the appropriate payment options.
A travel site provides various benefits based on customer account levels, for example: platinum, gold or silver. The Decision Point determines customer level according to the account number entered and directs the customer only to pages that were designed specifically for their viewing.
A banking self-help portal presents customers with different loan application pages, based on employment, credit rating, and overdraft status. In this case, the Decision Point evaluates several concurrent conditions, such as length of current employment being over a certain threshold, a good credit rating based on specific criterion, and overdraft history. The customer is directed to the relevant loan application page based on the Decision result.
Defining a Decision Point
A Decision Point includes the following components:
Decision Name. A unique name that identifies the Decision Point on the Flow Map.
Rule. One or more Boolean or enumerated conditions to analyze input and direct the workflow. You can either select a pre-defined global Account Rule here or create a local Rule.
Outcomes. Two or more exit points on the Flow Map that handle the result of analysis for the decision. A Decision Point automatically creates a Fallback exit point.
At the top left of the Flow Map, click the round Add Steps icon. The Add Steps Toolbox opens.
From the Logic Elements group, select and drag the Decision Point element to the desired location on the Flow Map. The Add New Decision page opens.
In the Decision Name field, enter a unique name for the element. This name will appear on the Flow Map.
Click on the Rule dropdown list. You can either:
select an existing Account Rule from the list; or
create a new local Rule in place.
Continue below according to the method you have chosen.
The Rules appearing in the dropdown list are global Rules which are available for all Flows (found on the Account Rules page). When you select a global Account Rule, the Decision evaluation will return one of the enumerated result values or the Fallback value for the Rule.
Click on Select rule in the dropdown box.
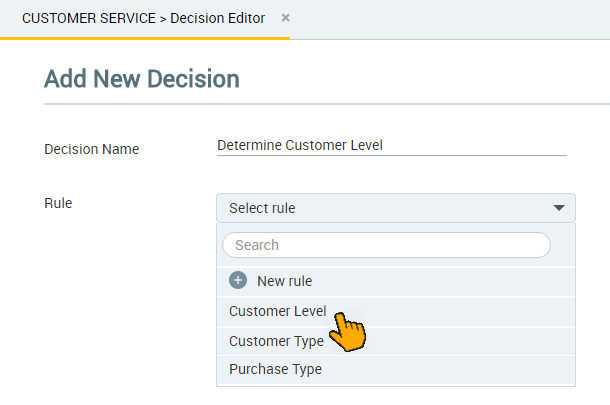
Select an existing Rule from the list. Your selection becomes the Rule used for the Decision Point.
At the lower right of the page, click Create. The Decision Point will be created on the Flow Map, together with its exit points.
Note
When you create a new Rule inside a Decision Point, the Rule will only be available to the current Flow. If you wish to create a global Account Rule that is available to all Flows, use the Rules button on the Main Toolbar. For more details, click here.
You can choose to create either:
a rule that results in enumerated outcomes (Enum), or
Click on Select rule in the Rule dropdown box. Then click New rule next to the Plus
 icon.
icon.
The local Rule definition panel will appear:
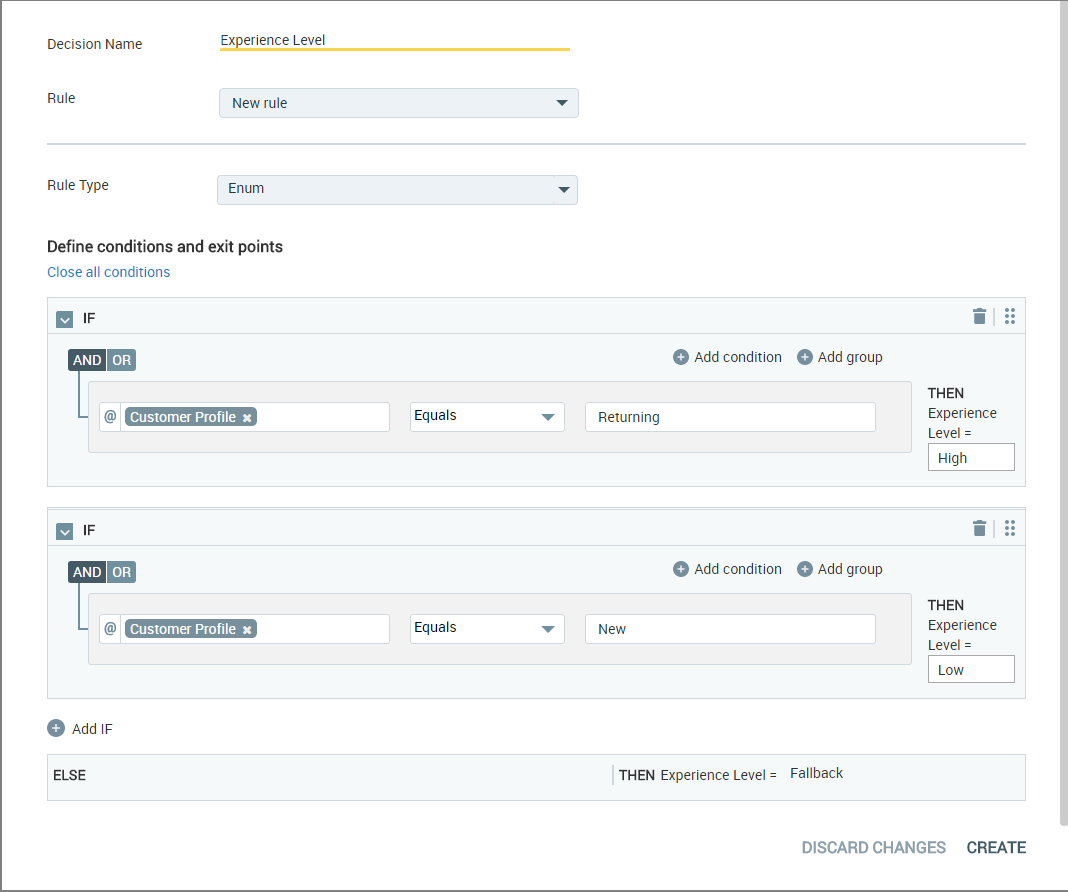
By default, the Rule Type Enum is displayed for a new Rule.
Enum rules enable you to build sets of multiple conditions to determine the outcome of a Decision Point. As you build the rule you can specify AND/OR logic for how each individual condition is applied to the Rule, and specify values to use when one or more conditions evaluate to True. You can also create groups of conditions that are evaluated together to determine an outcome. For more details on creating Enum Rules, click here.
Note
You can also change the Rule Type to a Boolean Rule. See below.
Define the Enum Rule conditions:
Enter comparator values for the first Enum condition statement. Click in the left-side variable field, and do one of the following:
Select a variable or formula from the Variables List
Create a new variable (for instructions, click here), or
Choose the
.elementAtvariable from a Collection variable and enter the index location of the item you want to access. (Only simple Collections are supported when using the.elementAtvariable.)Choose a Dynamic Variable or enter a specific Dynamic Variable path for comparison.
Select the required comparison logic (equals, less than, etc.) to be used in evaluating the condition. The comparison logic options depend on the selected variable type as detailed here.
Click in the right-side field and determine the value to compare against:
Enter a set value
Enter '@' then select a variable from the Variables list
Create a new variable, or
Choose the
.elementAtvariable from a Collection variable and enter the index location of the item you want to access.Choose a Dynamic Variable or enter a specific Dynamic Variable path for comparison. (Available only when a Text or Number value is entered on the left-side).
Caution
If you have entered a value to compare that results in an error (for example, a text value when a number is expected for the variable), the X-Designer will warn you to correct the error. If an error persists in a condition, an execution error will occur when the Flow is published and run.
After you specify left and right comparators for the condition, enter the desired value for THEN which will be passed if the current condition evaluates to True. This value will be used by a Decision exit point.
Move to the next condition of the Rule. If needed, you can add a new condition by clicking on Add condition next to the Plus
icon. When adding the new condition, be sure to select how it will be applied using the AND/OR button at the upper left of the Rule condition.You can also create a new group of conditions that will be evaluated together by clicking Add group. For more information about creating groups of conditions, click here.
Repeat Step 3 through Step 7 above for each IF statement you create for the Rule.
Click Create. The Decision Point will be added to the Flow Map, together with its exit points.
When the Flow is run, the Flow direction will continue to the exit point that evaluates to True. If none of the conditions you have defined are True, the Flow direction will continue to the Fallback exit point.
Note
If you define a Rule that evaluates to multiple True conditions, the flow direction will continue to the first exit point that evaluates to True.
Use Boolean logic for a Decision Point when its outcome is easily determined by a single True/False statement.
Select New rule from the Rule dropdown box. Then click New rule next to the Plus
icon.From the Rule Type dropdown list, click Boolean.
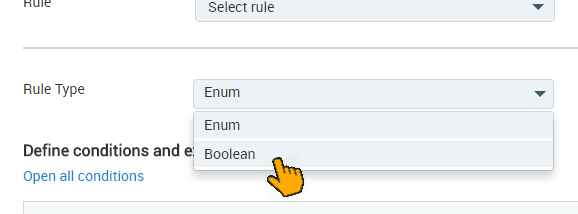
The Boolean rule definition panel will appear.
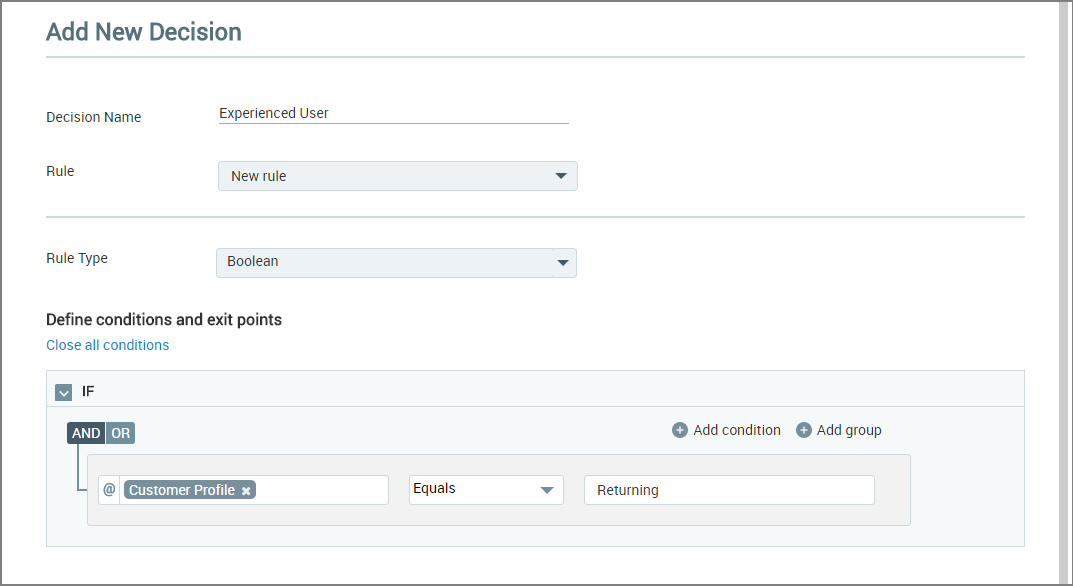
Enter comparator values for the single condition. Click in the left-side variable field, and do one of the following:
Select a variable or formula from the Variables List
Create a new variable (for instructions, click here), or
Choose the
.elementAtvariable from a Collection variable and enter the index location of the item you want to access. (Only simple Collections are supported when using the.elementAtvariable.)Choose a Dynamic Variable or enter a specific Dynamic Variable path for comparison.
Select the required comparison logic (equals, less than, etc.) to be used in evaluating the condition. The comparison logic options depend on the selected variable type as detailed here.
Click in the right-side field and determine the value to compare against:
Enter a set value
Enter '@' then select a variable from the Variables list
Create a new variable, or
Choose the
.elementAtvariable from a Collection variable and enter the index location of the item you want to access.Choose a Dynamic Variable or enter a specific Dynamic Variable path for comparison. (Available only when a Text or Number value is entered on the left-side).
After you specify left and right comparators for the condition, enter the desired value for THEN which will be passed if the current condition evaluates to True.
Click Create. The Decision Point will be added to the Flow Map.
If the condition you have defined evaluates to True, the Flow direction will continue to the True exit point. Otherwise, flow direction will continue to the Fallback exit point.
Caution
If you have entered a value to compare that results in an error (for example, a text value when a number is expected for the variable), the X-Designer will warn you to correct the error. If an error persists in a condition, an execution error will occur when the Flow is published and run.