Using a Custom Greeting
X‑Platform supports custom greetings that are invoked when a chatbot conversation begins.
You create a custom greeting using an Intent Flow, and then map that Flow in the AI Model Configuration panel of the relevant VA.
Note
When using the Intelligent Assistant (IA), you assign the Flow to the relevant chatbot, as described here.
All X-Designer features (e.g., Decision Points, Rules, Subflows, access to external services, etc.) are available for use in your custom greeting.
You'll find an example custom greeting Flow below.
Creating the Greeting Flow
You create a custom greeting using an Intent Flow.
From the Main Toolbar, click the File icon and select New. The Add New - Select Flow Type popup is displayed.
Click New Intent Flow. A new Intent Flow page is displayed.
In the Flow Name field, enter a unique name for your custom greeting Intent Flow.
Click Create. The new Intent Flow is added to the File list, and the Flow Map displays the Drag Step Element prompt.
Continue to define the new Intent Flow by adding new visual elements, logic elements and IA elements, as needed.
Note
To execute properly, an Intent Flow must always end with either a Response Element or a Back to NLP Engine element.
Publish the new Intent Flow.
Mapping the Greeting Flow to a U-Self Serve VA
You map a custom greeting to a specific virtual agent (VA) from the Configuration panel in the account AI Model. Each VA supports one greeting at any time.
From the X-Console U-Self Serve menu, select AI Model. The AI Model page will be displayed.
To begin mapping, click the name of the Virtual Agent you want to configure. Its component panels will be displayed.
Click the Configuration panel tab. The list of mapped Configuration Flows is displayed.
To the right of Greeting, select the desired Greeting Intent Flow from the Select Flowdropdown list:
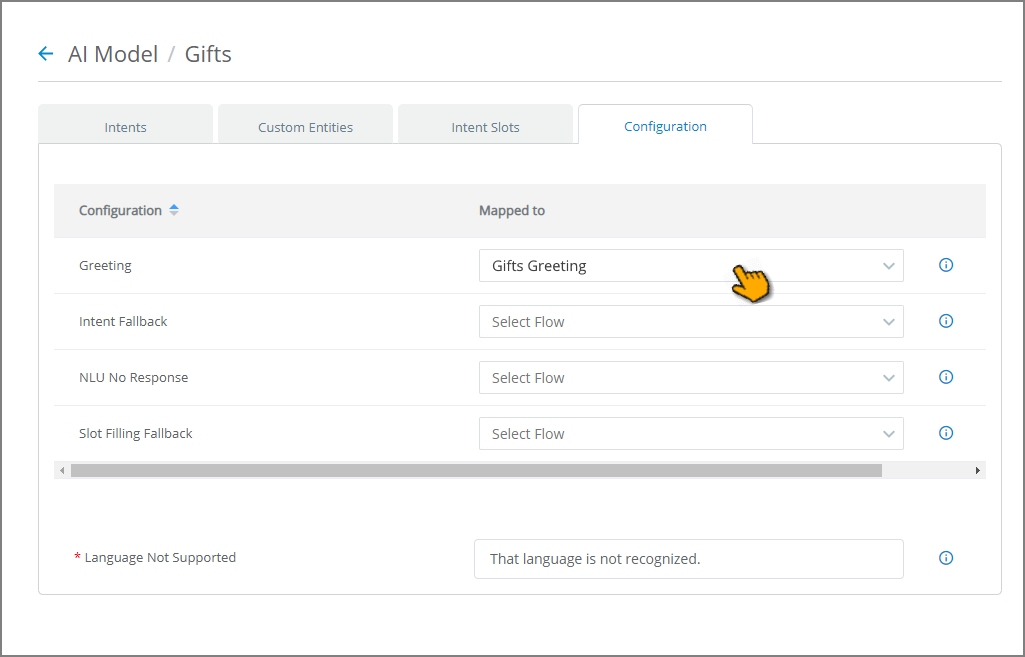
The selected Greeting Intent Flow will be triggered as the greeting for the selected VA.
Assigning the Greeting Flow to an IA Domain
You assign a custom greeting to a specific chatbot from the Configuration panel of the relevant Intelligent Assistant (IA) Domain. Each IA Domain supports one greeting at any time.
A custom greeting is different from the 'welcome' intent that may be provided by your NLP Engine. Because X‑Platform invokes your custom greeting Intent Flow before sending any data for NLP processing, you can perform logical tests and Interact-specific activities that tailor your greeting (and any outcomes) to the current user or a specific request.
From the X-Console U-Self Serve menu, select Domains. The Account Domains page will be displayed.
On the right side of the Domain that you want to view, click Details. The Domain Details page will be displayed.
Click Configuration. The Configuration panel will be displayed:
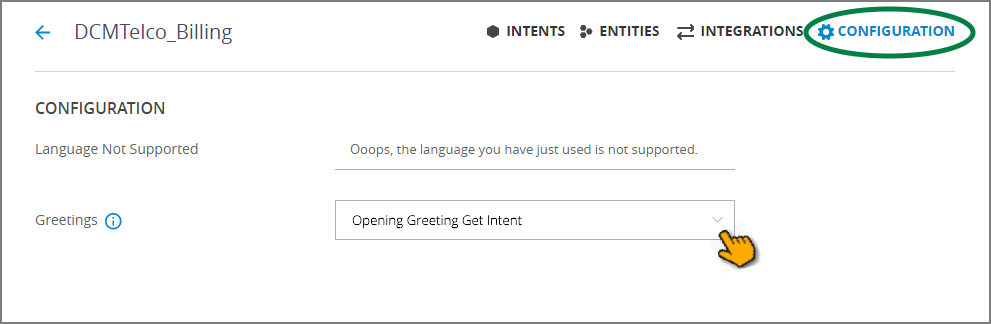
From the Greetings dropdown menu, select the Intent Flow that the IA Domain will use at runtime for chatbot greetings. Only Intent Flows will be listed. Your assignment will become effective immediately.
An Example Greeting Flow
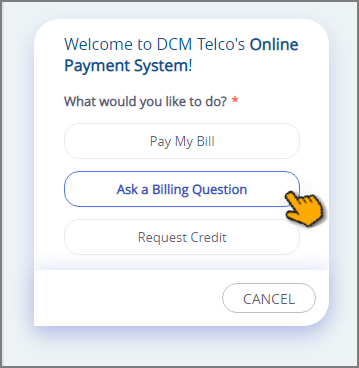
For example, we can design a greeting that asks the user to indicate what they want to do:
 |
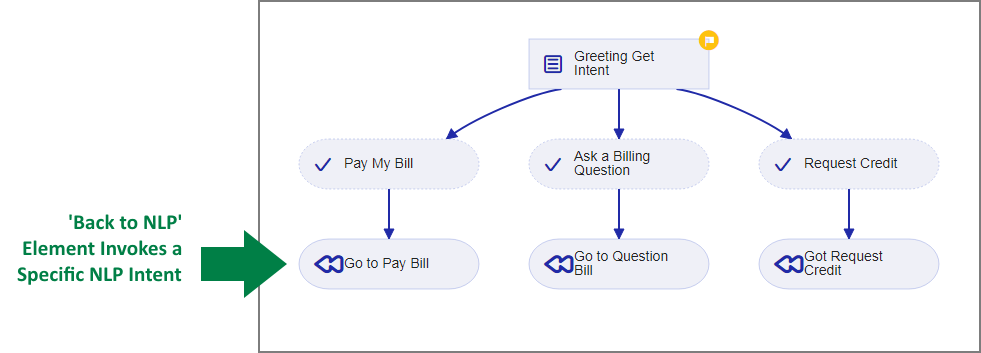
For an Intelligent Assistant (IA) Domain, the Intent Flow would look like this:
 |
During runtime, the user clicks a button that invokes the DCMTelco_Billing chatbot.
Our IA Domain is configured to run the greeting (as detailed here).
At Flow start, we greet the user and ask them to select their intention. The greeting Intent Flow executes before any data is sent to the NLP Engine.
We then use a Back to NLP element to invoke the required Intent in the NLP Engine, according to the user's selection.