Testing Conversations in the Chatbot Simulator
You can test a Virtual Agent (VA) conversation using the X-Designer's built-in chatbot simulator. The simulator lets you converse with the chatbot to see how it responds to user requests, as well as validate your Intent Flows.
The simulator also provides a separate Context panel that shows you all the data gathered by the NLP Engine and X‑Platform during the conversation.
Testing a Chatbot
 |
Open any Intent Flow in the X-Designer. It does not need to be a Flow that you are testing.
Click the Preview icon located at the top right corner of the Flow Map:

The Preview panel is displayed.
From the dropdown lists at the top of the panel, select both the VA (or when using the Intelligent Assistant the IA Domain) and Application to test in the simulator.
The simulator will connect with the selected VA and begin operation.
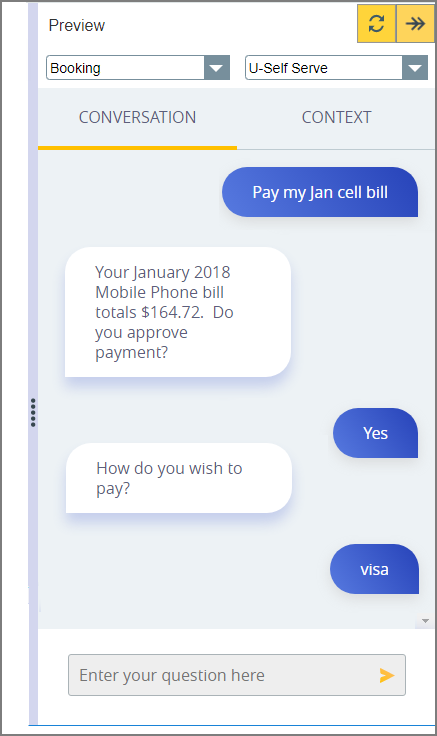
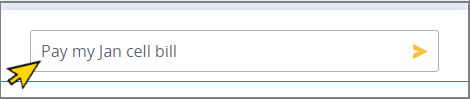
In the text entry field at the bottom of the panel, enter a typical user request to start the simulated conversation. Then click the Send icon or press Enter:
The chatbot simulator will transmit the request to the selected VA, and the chatbot will return a response.
Tip
The text entry field maintains a history of your recent requests. You can choose a previous entry from the autocomplete dropdown list that appears after entering a few letters in the field.
Respond to the chatbot by entering additional user text in the simulator, until testing is completed.
At any time during the simulation, you can click the Context tab at the top right of the panel to see the accumulated data for the current or any other step, as detailed below.
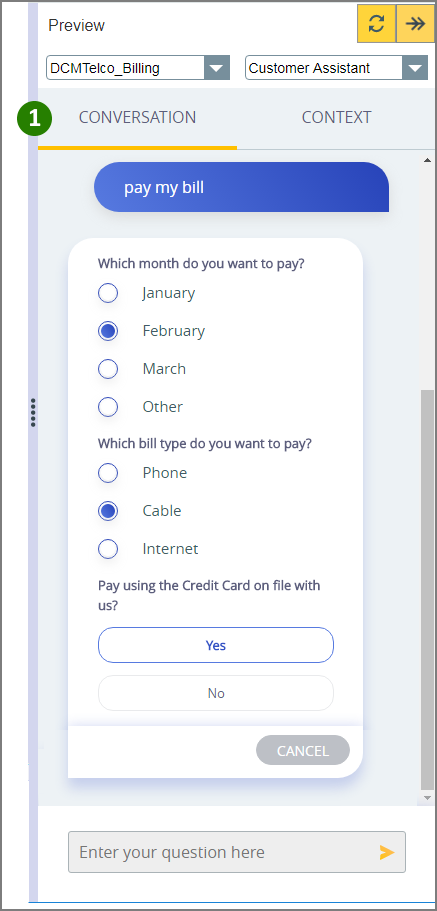
Testing Form Elements in a Chatbot
When the Intent Flow uses one or more Form Elements, the simulator will display the Forms using a basic UI design:
 |
 |
After the Form element appears in the simulator, entries cannot be made in the text entry field at the bottom of the page. Clicking Cancel in the Form will re-enable the text entry field.
Keep in mind that user response data from a simulated Form element is not always sent to the NLP Engine. You may need to use an Allocator to assign certain Form responses (for example, a Choice variable) to the appropriate Session Context variable, which is then sent to the NLP Engine.
In the above example, we activated the Clicking here proceeds to next page checkbox for the last Yes/No Choice element in the Form Editor:
 |
As a result, the chatbot will submit the Form to X‑Platform when the final Choice element is completed by the user. There is no need for the user to click Submit:
 |
When the Clicking here proceeds to next page checkbox is not activated, the user will need to click Submit to send chatbot Form answers to Interact:
 |
Reviewing Simulated Chatbot Data with the Context Panel
You can easily review all request and response data that is produced during a simulation using the Context panel.
Looking at this data helps you to understand:
how a user request is being interpreted by the NLP Engine; and
the accumulated actions and data collected by Interact.
The simulator displays context data in separate steps for each request and response:
User Step Data | Chatbot Step Data |
|
|
While requests and responses are still showing in the simulator, click the Context tab at the top right of the Preview panel. The Context panel will be displayed, showing conversation data for the current step:
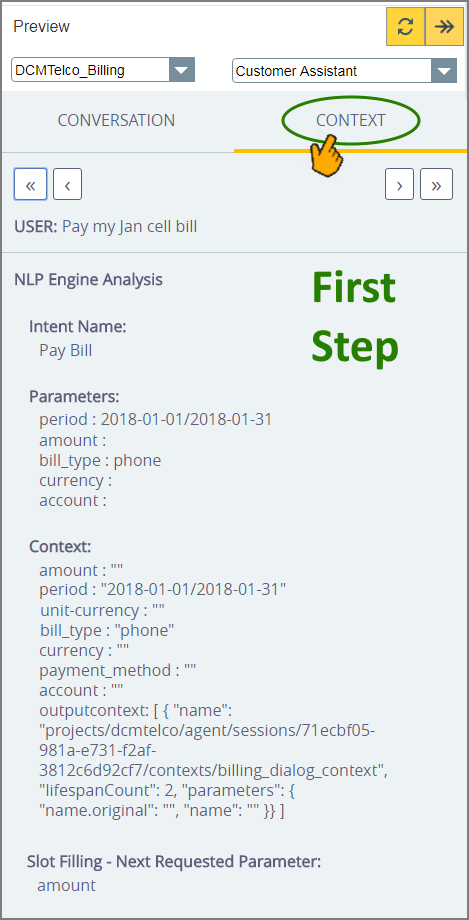
This data enables you to easily follow the conversation and view the interactions between the IA and the chatbot. When an Intent Flow does not perform according to your expectations, reviewing Context data can reveal the reasons why.
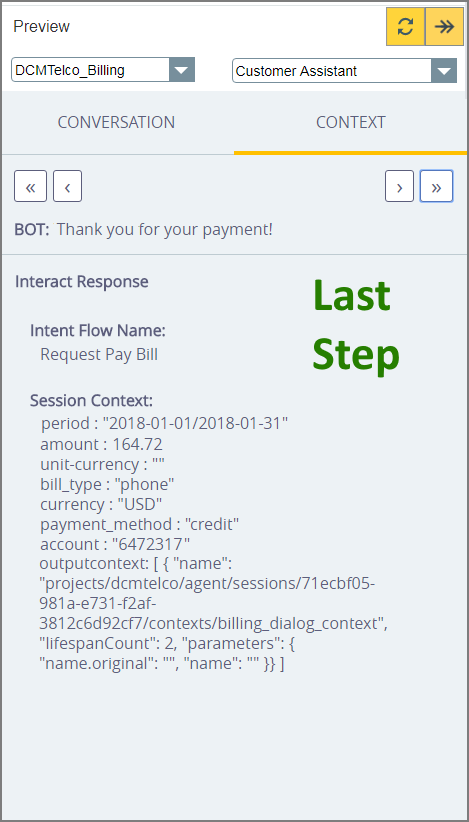
You can quickly navigate to any step of the conversation using the controls at the top of the panel:

To review Context data for the complete conversation, click the Last step control:
You can clear the simulator data for the current VA by clicking the Refresh  icon at the top right of the Preview panel.
A user request may sometimes trigger the NLP Engine to invoke an Intent or Node that is not currently mapped to any Intent Flow in Interact, resulting in a response directly from the NLP Engine.
The Chatbot simulator notifies you of such a scenario via the Context tab:
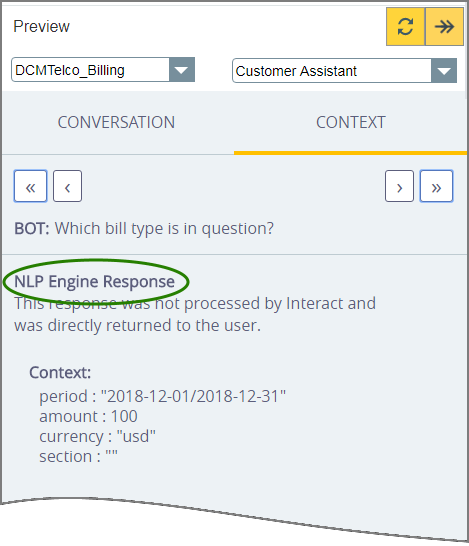 |
The Intent Name that was invoked by the NLP Engine is also returned in the Context data, in the event that further research is needed.
Browsing Conversation History for a Specific VA
Although the chatbot simulator enables testing for only one conversation session at a time, you can optionally browse all past conversation history for a VA. For more details, click here.