Response Elements: Answering a Chatbot User
A Response Element provides a contextual response to the user from within the Intent Flow:
A Response can draw from runtime data being used in the Flow, including User and Session Variables.
A Response can enable user redirection of the Flow in runtime using clickable buttons.
A Response also can support a 'warm transfer' of the chat to a live Agent upon call completion, supplying conversation context and relevant user details to the receiving Agent application.
Typically, the Response provides an update on the status of an activity, following a user request:
 |
Some Response Element examples include:
Providing information drawn from local or external sources, such as billing status or product summaries.
Providing real-time data, such as flight information or inventory availability.
Providing a button for the user to jump to a specific Flow or pre-defined URL.
Updating the user after a transaction is completed successfully (or not).
A Response Element does not collect any data.
Response Communication Methods
The Response Element supports multiple communication methods:
Simple Text. The Response is sent using text only. This method is ideal for use in short message service (SMS) scenarios.
Voice Response. The Response is sent to your designated text-to-voice service or plays a prepared audio file. This method is used with voice-based chatbot conversations.
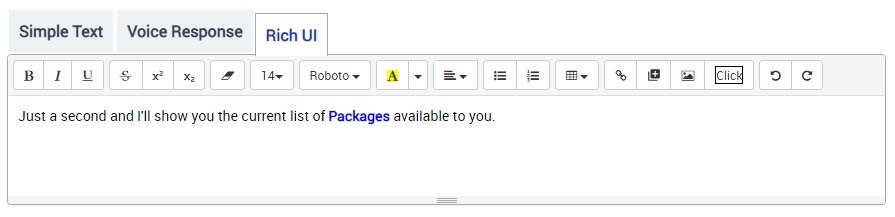
Rich UI. The Response can be formatted using rich text and can include variables, hyperlinks, tables, images, media items, and buttons that enable redirection. This method provides great flexibility for use in web-based chatbots.
You maintain each of these communication methods in a separate tab of your Response Element.
Alternate Responses
You can provide multiple variations of the same answer in a Response Element, making it possible to use alternate texts, and so respond to a user in a more natural way. (See the procedure below for an example.)
Call Completion Mode Options
You can optionally configure what will happen after the Response Element is displayed to the end user. For example, the Flow can be told not to wait for additional user input, or it can transfer the conversation to an Agent. (See the procedure below for an example.)
Creating a Response Element
You add a Response Element when building or editing an Intent Flow, using the Response Element navigation logic step.
At the top left of the Flow Map, click the round Add Steps icon. The Add Steps Toolbox opens.
From the UI Elements group, select and drag the Response Element to the desired location on the Flow Map. The Response Element Editor opens:

From the General Properties area on the right, in the Response Name field, enter a unique name for the Response Element. This is a required field.
For Variation Order, select whether you want any alternative Responses to appear in the order you entered them or in random order.
From the View Response in Language dropdown list, select a language for the Response.
If Source Language is chosen when you first enter text into the Response Element, the language you have entered will be defined as the Source. You can proceed to select another language to enter at anytime, and returning to the Source selection will display the first text that you entered.
You can enter as many languages as needed into the Response Element by simply changing your selection in the View Response in Language dropdown list. Each language is stored separately and will be re-displayed when you select its language from the list. For more details and an example of using multiple languages in a Response Element, click here.
Tip
The Response Element is included when exporting and importing texts for translation with X-Designer's Multilingual Language Manager. You can optionally create or edit multi-language Response texts directly in the Manager's translation file and they will be recognized like all other Flow elements upon import .
From the Call Completion Mode radio buttons, choose the action that will occur in the call after this Response Element is used:
User Input Needed - No action will occur upon completion. The Flow will wait for additional user input.
User Input Not Needed - Indicates that the conversation will continue with another element following this Response. The Flow will not wait for user input.
Agent Transfer - The conversation will be transferred to an Agent upon completion. If more than one potential end point exists for the Agent Transfer, you can add logic to your Flow that directs the end user to the relevant Agent. For more details, click here.
Call Termination - The conversation will be ended immediately upon completion.
From the Set Response to User area, for each communication method that you will use in the Response, enter or paste the text of the Response into its associated tab. For example, if you will use the Simple Text communication method, add the Response to that tab.
For Rich UI communications, use the editing options provided to format the text and insert other content, according to your requirements.
To add alternative Responses to this element, click Add Response next to the
 icon below the current Response. A new text editor is displayed, as shown in the example above. As in the previous step, for each communication method used, enter and format the Response text in its associated tab, as needed.
To delete a specific Response, click on the Trash
 icon at the top right side of that Response.
To save the Response Element, click Create Response Element. The Response Element is added to the Flow Map.
Editing a Response Element
Open the Intent Flow containing the Response Element that you wish to change.
From the Flow Map, either:
double-click the element, or
right-click the element and click the Edit
 icon from the menu that appears.
The Response Element Editor opens.
Make the desired changes in the Editor.
To save your changes, click Update Response Element. The Response Element is updated on the Flow Map.
Deleting a Response Element
Deleting a Response Element
Open the Intent Flow containing the Response Element that you wish to delete.
From the Flow Map, select or hover over the element and then right-click.
Click the Trash
 icon from the menu that appears. A warning message will be displayed asking you to confirm the deletion.
Click Yes to confirm deletion.