Using Rich Text and Visual Content in an Element
The X-Designer provides a built-in rich text UI editor to format text, as well as display hyperlinks, tables, images and media items to the user, when working with:
For some elements, you can also add linked buttons and paragraph styles, as detailed below.
You access rich text and other visual features directly from the toolbar that appears at the top of the element editor:
 |
Formatting Text
The editor supports using many rich text formatting options, including:
Bold, italics, underline and strikeout text options
Superscript and subscript text options
Font size selection
Font family selection
Font color selection
Text alignment options (left, center, right and justified)
Unordered list option (bulleted list)
Ordered list option (numbered list)
In the editor, select the text to which you want to apply formatting.
Click on the desired formatting option in the toolbar. The selected text will change to match your formatting choice.
You can remove all formatting from text by first selecting the text and then clicking the Eraser  icon.
icon.
Inserting Hyperlinks
The editor supports inserting standard links to enable the user to access another URL.
In the editor, position the cursor at the point where you want to insert the link. Then, from the toolbar, click the Link
 icon. The Insert Link dialog appears:
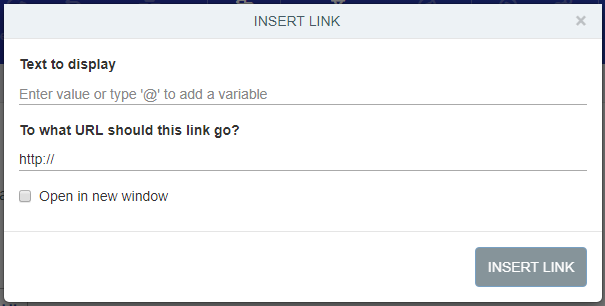
Enter the information needed for the hyperlink:
Text to Display. Enter the text used for the link label. (Type '@' to select a variable from the variables list as part or all of the label.)
To what URL should this link go?. Enter the target URL for the link.
Open in new window. Select this checkbox to open the target URL in a new browser tab.
When finished, click Insert Link. The new link will be inserted at the point you indicated in the text area.
Inserting Tables
The editor supports HTML-formatted tables.
In the editor, position the cursor at the point where you want to insert the table. Then, from the toolbar, click the Table
 icon. The table size selector appears:
Select and click the number of rows and columns you want in the table. The table will be inserted at the point you indicated in the text area.
Add text and other content to the table as needed.
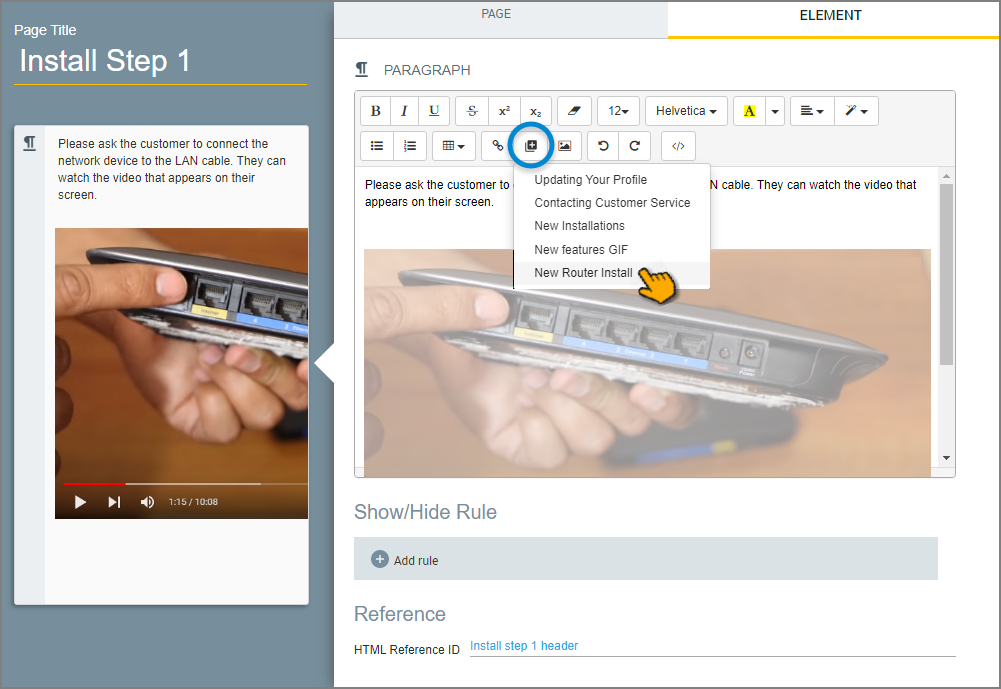
Inserting Images
The editor supports inserting images that are stored on the X‑Platform Server in a dedicated Image Library. For details about how to add images to your Library using the X-Console, refer to Managing Your Image Collection.
In the editor, position the cursor at the point where you want to insert the image. Then, from the toolbar, click the Image
 icon. The Image Library opens:
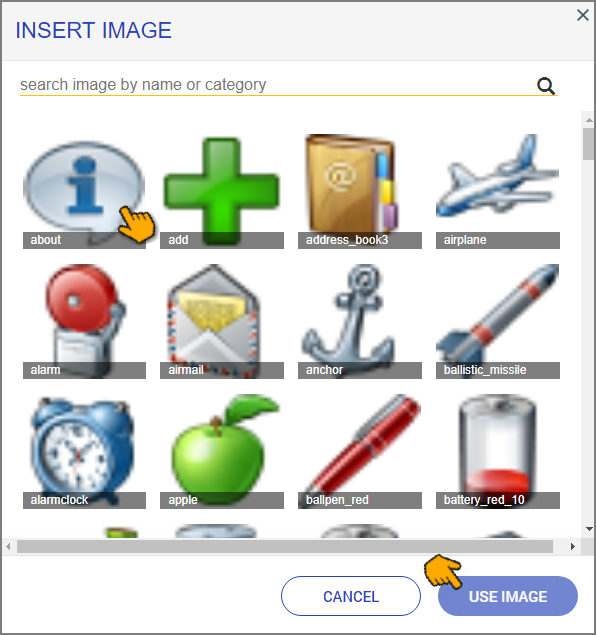
Scroll to and select the required image. You may filter the image list by entering a relevant search term (image name or category) in the Search tool, at the top of the Library.
After you have selected an image, click Use Image. The image is inserted at the point selected in the Paragraph editor.
To edit the selected image, click on it and use the options displayed to resize or realign it. You can also adjust the size of the image by clicking on a corner of its frame and then dragging until the desired size is reached.
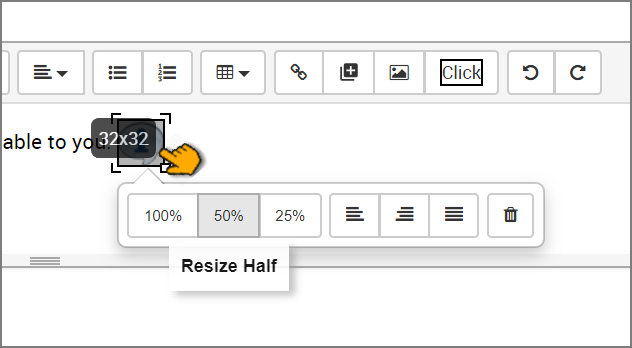
To delete an inserted image, select it and click on the red X that appears.
Inserting Media
The editor supports inserting media items that are stored on the X‑Platform Server in a dedicated Media Library. Media items can be videos, GIFs or any other item that supports linking with embedded HMTL code, such as an online map.
For details about how to add media items to your Library using the X-Console, click here.
In the editor, position the cursor at the point where you want to insert the media item. Then, from the toolbar, click the Media
 icon. A dropdown list of available media items opens.
Select the desired item. The item will be inserted at the point selected in the editor.
To delete an inserted media item, select it and click on the red X that appears.
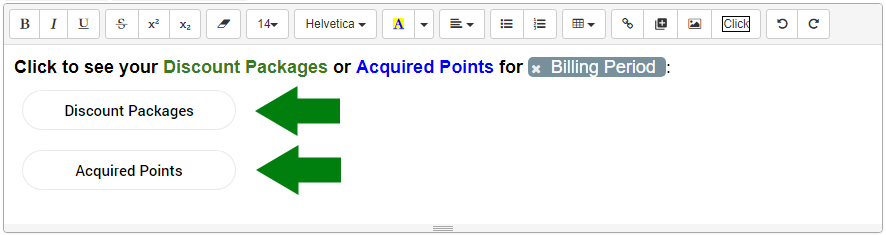
Inserting a Button (Response Elements Only)
The Response Element editor enables you to add a linked Button that can:
take the user to a designated Flow
take the user to a designated URL
return to the NLP Engine with a predefined text message
When the chatbot is run, the button will be clickable by the user, providing a way to re-direct the Flow according to the customer's needs. You can insert multiple Buttons into a Response element.
In the editor, position the cursor at the point where you want to insert the Button. Then, from the toolbar, click the Button
 icon. The Button dialog opens:
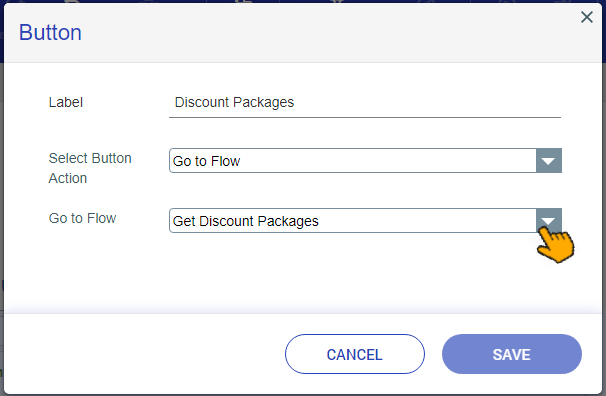
Enter the information needed for re-directing the chatbot:
Label
The label that appears on the Button.
Button Action
From the dropdown menu, select the type of action desired when the user clicks the Button:
Back to NLP. Return the conversation to the NLP Engine with a predefined text message.
Go to Flow. Take the user to the designated Flow.
URL. Take the user to the designated URL and open it in a new browser tab.
Text to Send: Go to Flow: URL:
- The text string that will be passed back to the NLP Engine
- The name of the Flow to jump to
- The target URL to open
You can type '@' to select a variable that will be used for part or all of this text field.
Click Save. The new Button will be inserted at the point selected in the Response editor:
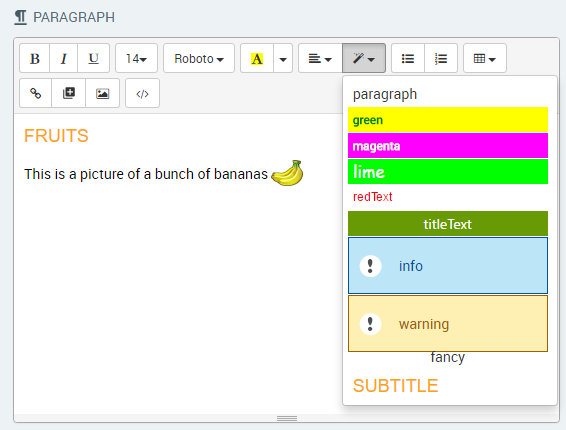
Using Formatting Styles (Paragraph Elements Only)
You can add a preset style to selected text in a Paragraph Element. All styles that are currently defined on the Common Styles page of the X-Console will be available in the Style list.
Styles can be applied whenever needed. When no specific style is applied, the content is displayed in the default paragraph style.
In the Paragraph element editor, select the text to which you want to apply the style.
Click the Style
 button. The Styles list is displayed.
Select and click the desired style. The style will be applied to the selected text.
In the following example, the word 'FRUITS' has been assigned the SUBTITLE style: