Working with Alerts
A U-Assist Alert is a notification that is displayed to an Agent or Supervisor while a call is in progress:
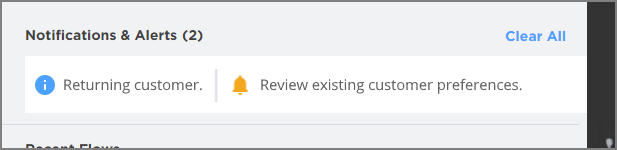
Alerts are generated using predefined Triggers that can recognize specific events or AI-based analyses during the call. When sent, an Alert can also execute a specified Service Flow to perform additional predefined activities, when required.
A user with Flow Admin role (or higher) can create and manage Alerts as part of an Experience.
Alerts function intelligently in U-Assist, with the ability to simultaneously analyze call conversations, customer and Agent emotions and other attributes to help an Agent deliver more effective service. Alerts can also provide valuable real-time coaching for sales recommendations, responses to customer service queries, or soft skills suggestions for an Agent.
For example: If a customer sounds angry and has uttered a keyphrase like 'I want to discontinue this service', an Alert can be displayed to the Agent that says, 'Try to get more details about the customer's frustration'.
Alerts also can be used to heighten Supervisor awareness about events that require immediate attention during the call.
U-Assist currently supports three types of Alerts: Information Alerts, Coaching Alerts and Critical Alerts.
For details on how to create and configure Alerts, click here.
For details on viewing Alerts in the AI Agent Application, click here.
For details on viewing Alerts in the Supervisor Application, click here.
About the Alerts Page
Note
Starting with Release 24.4, Agent Alerts are created and managed directly from the X-Console.
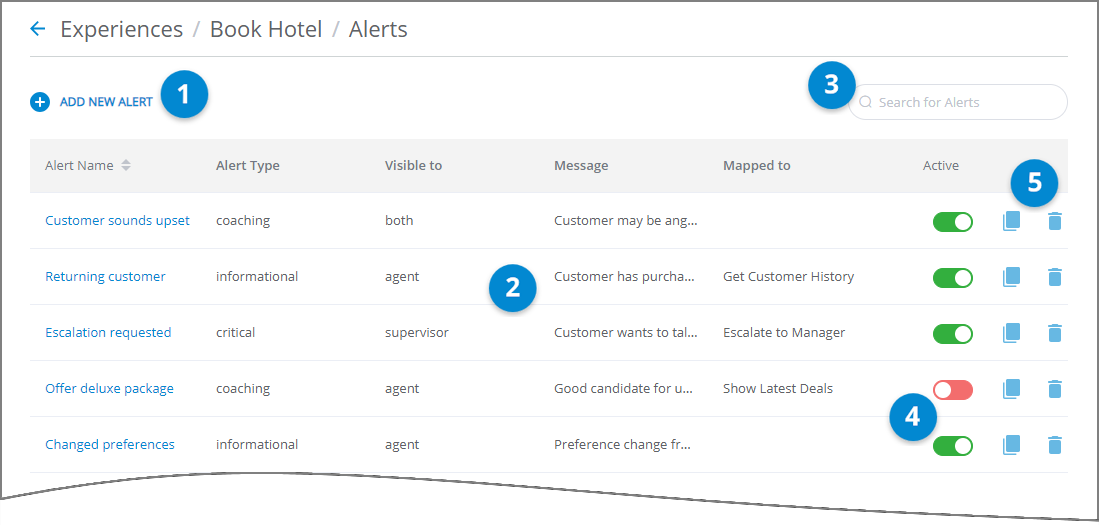
The Alerts page provides high-level details of all Alerts that have been defined for the current Experience, and enables you to add new Alerts or edit the details of existing Alerts:
Item | Feature | Description |
|---|---|---|
1 | Add New Alert | Enables creation of a new Alert for the current Experience. Only users with Flow Admin Role or higher can create a new Alert. |
2 | Alerts List | Displays all Alerts that are defined for the currently-selected Experience. For each Alert, the list provides high-level details, including:
The list is sorted by Alert Name in order of creation, by default. |
3 | Search Box | Enables searching the list for any Alert that matches the details you provide. |
4 | Activate Toggle | Click the toggle to switch the runtime state of the Alert from Active (green) to Inactive (red). Upon creation, a newly-defined Alert is always set as Active by default. |
5 | Other Actions |
|


Create an Alert
A user with Flow Admin role (or higher) can create and manage Alerts.
An Alert uses the following configuration settings:
General Information - The new Alert name, description, type and its associated Service Flow mapping, if any.
Triggers - Events or AI-based analysis (e.g., key phrase occurrence, emotion/tonal indicators or speech metrics, etc.) that can be used to raise the Alert.
Alert Message - The actual text to be displayed to an Agent and/or Supervisor during the call, along with related display settings.
Note
Starting with Release 2024.4, U-Assist Alerts are defined only via the X-Console.
From the U-Assist menu section in the Admin Console, select Experiences. The Experiences page is displayed.
Locate and click the name of the Experience that will contain the Alert you wish to define. The activity cards for that Experience will be displayed:
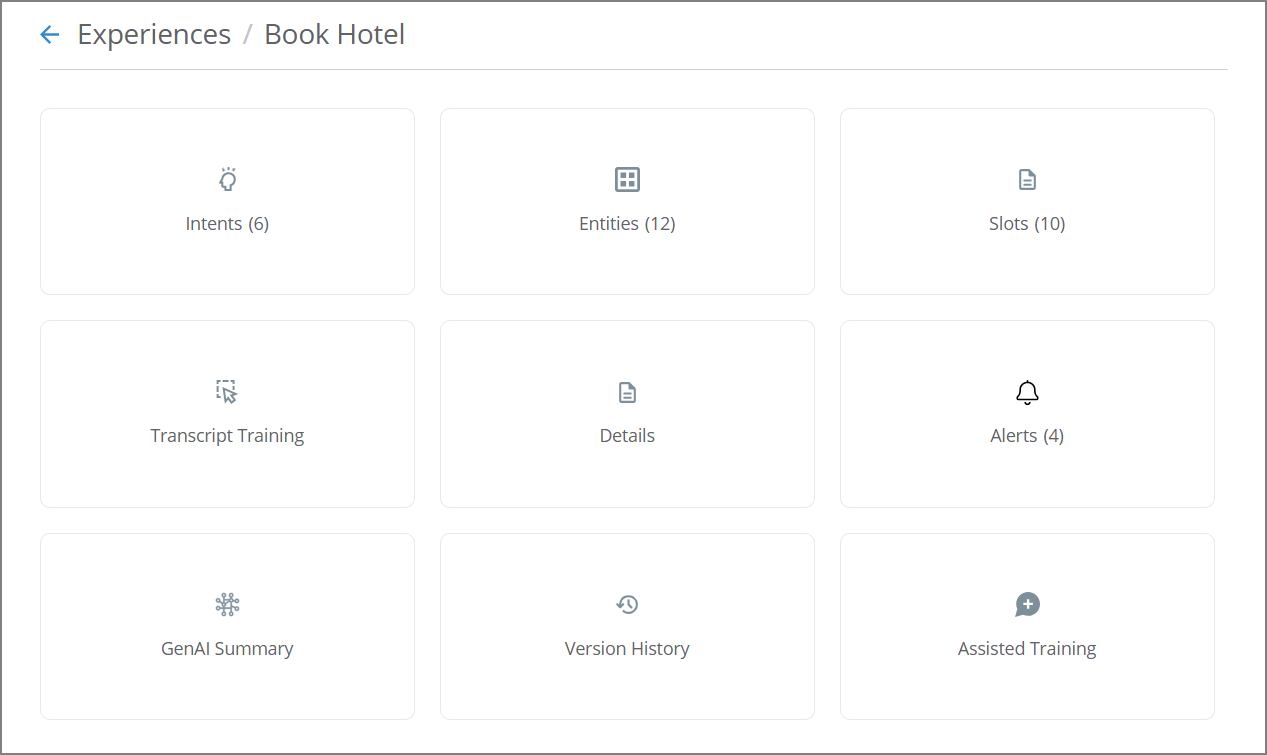
Click Alerts. The Alerts page for the current Experience will be displayed.
Click Add New Alert. The Create New Alert dialog will be displayed.
As mentioned above each Alert dialog contains multiple sections that enable you to define detailed Alert control and output behavior for the current Experience.
Add General Information for the new Alert:
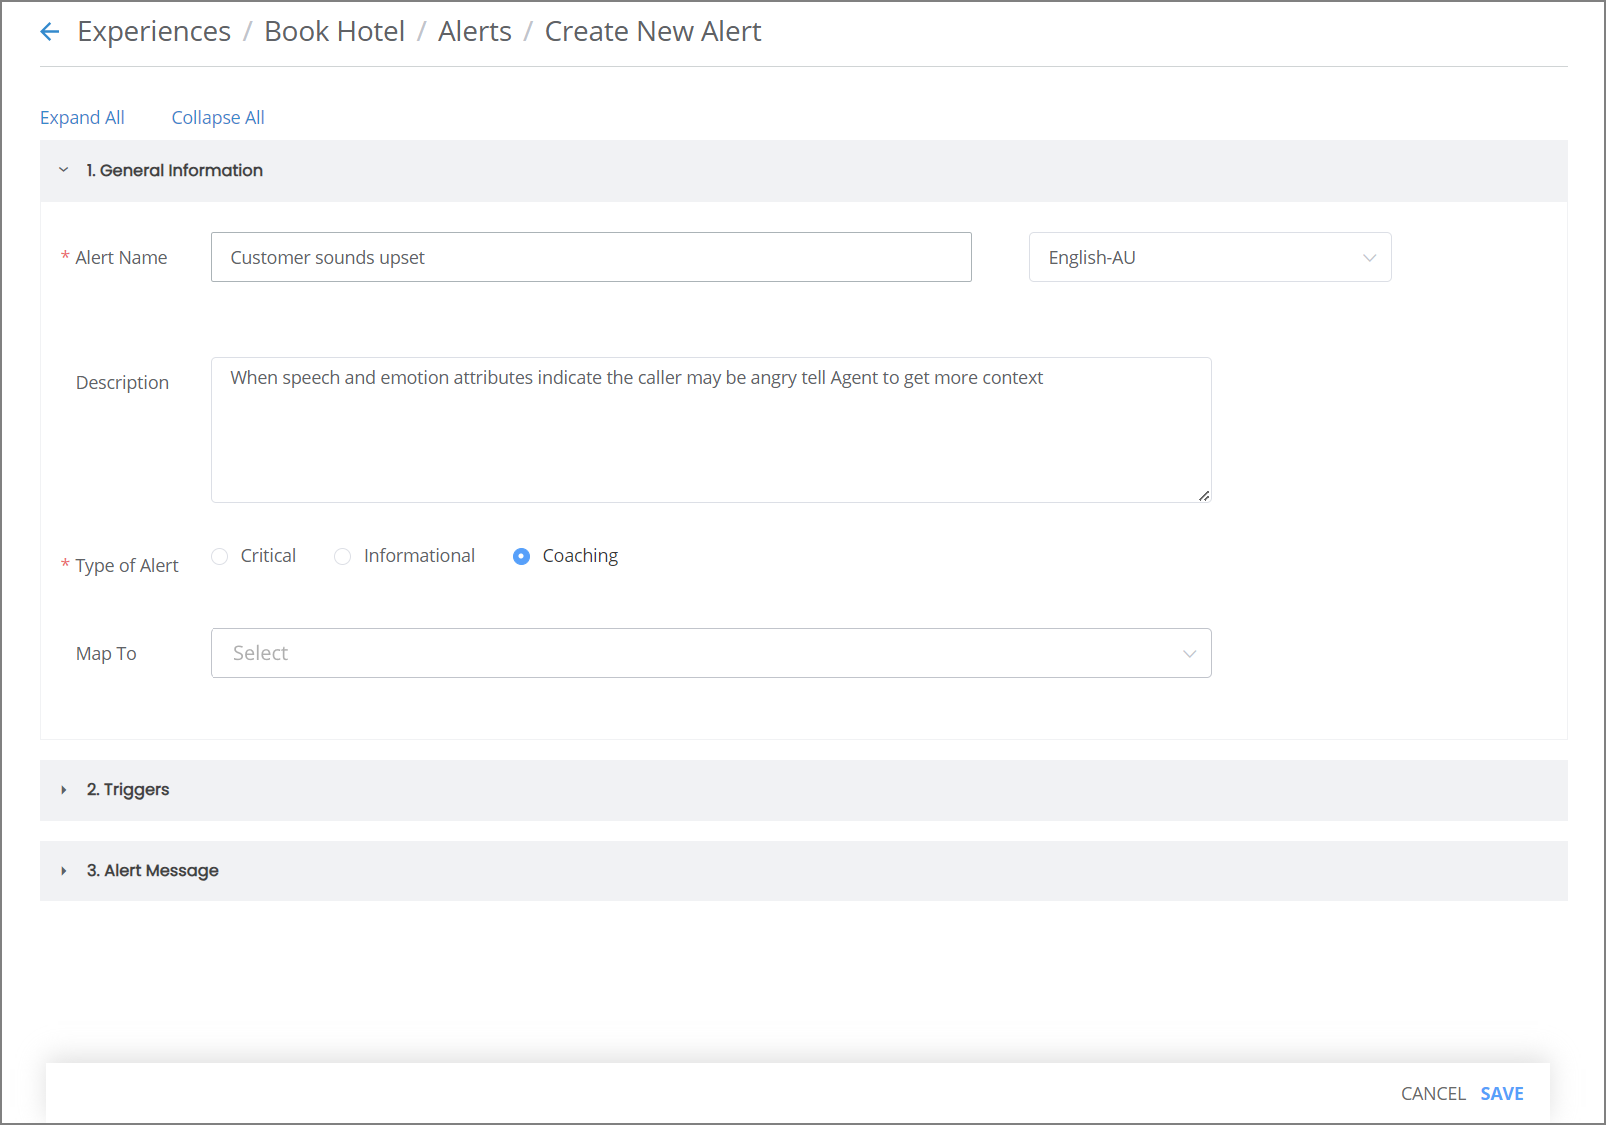
In the Alert Name field, enter a unique name for the Alert.
From the Language dropdown list at the right, select the language that will be used for the Alert.
In the Description field, optionally provide information about this Alert that helps to explain why it exists and how it is used.
From the Type of Alert radio buttons, select the current Alert type. U-Assist currently supports the following Alert types:
Critical Alerts - Notify the Agent and/or Supervisor about an event or status change that requires immediate attention.
Information Alerts - Provide information about the caller, their account, or a real-time event, that is relevant to the call.
Coaching Alerts - Prompt the Agent to perform a task based on events in the call, or other AI-based data.
Note
Currently, mapping an Alert to a Service Flow is available, however, execution of the relevant Flow at run time will be implemented only in a future release.
Optionally add Triggers for the new Alert:

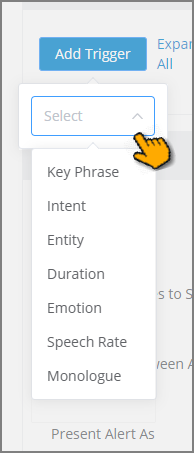
Click Add Trigger. A dropdown appears showing the types of Triggers that are available for the Alert. For more details about Alert Trigger settings, click here.
From the dropdown list, select the desired type of Trigger:
After selection, the chosen Trigger type will appear at the bottom of the Triggers section.
To remove a specific Trigger type from the current set at any time, click the Trashcan
 icon on the right side of the Trigger.
Adjust the settings for each Trigger type that you select according to the needs of the current Alert.
Each type of Trigger maintains its own settings. For more details about Alert Trigger settings, click here.
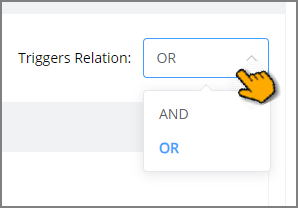
When you add multiple Triggers for an Alert, from the Triggers Relation dropdown list, choose how the set of Alarm Triggers will operate together.
Choosing the AND operator applies all valid Triggers inclusively (i.e., enabling all Triggers be applied for the Alert).
Choosing the OR operator applies all valid Triggers exclusively (i.e., enabling only one of the Triggers to be applied for the Alert). When applied, the OR operator will consider only the first two valid Triggers.
Note
You can choose only a single operator to be applied for the current set of Alarm Triggers. You cannot 'mix-and-match' the operators for different Triggers in the set.
Add an Alert Message for the new Alert:
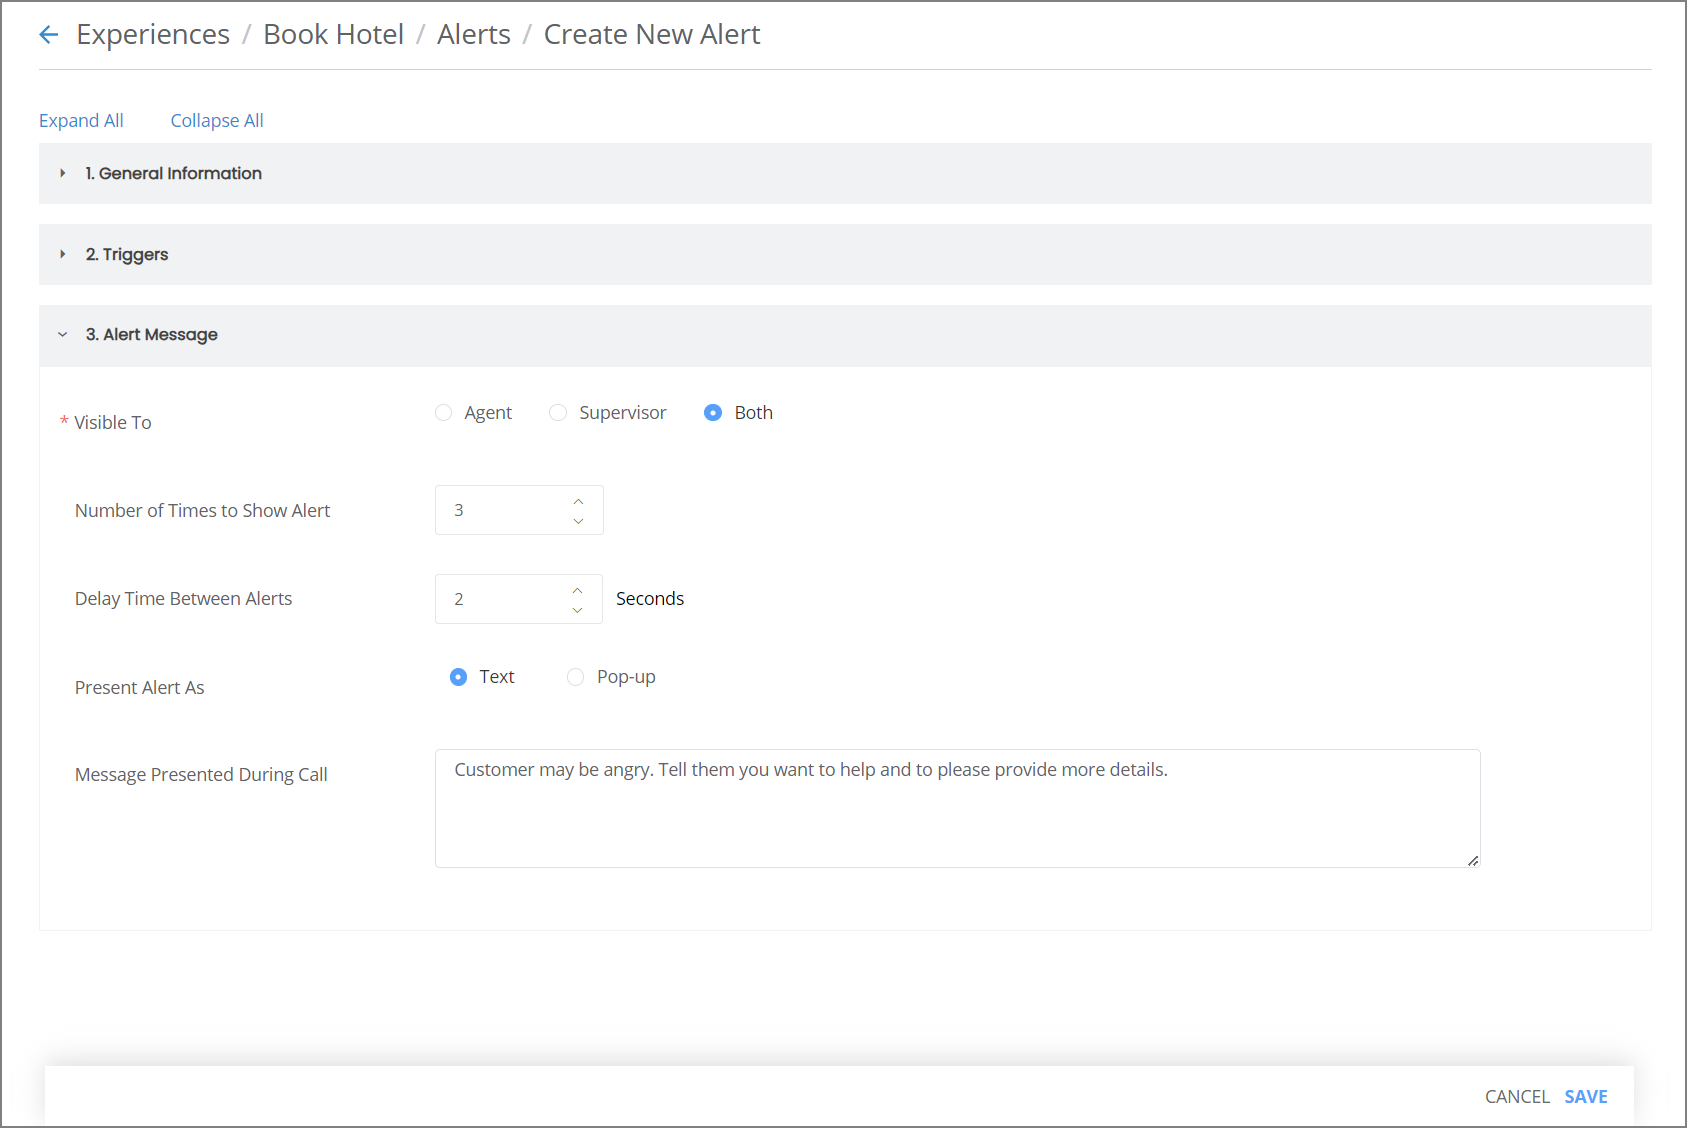
From the Visible To radio buttons, choose the target recipients for this Alert:
Agent - The Agent handling the call for which the Alert has been raised.
Supervisor - The relevant Supervisor (or Manager) of the Agent who is handling the call.
Both - Both the Agent and the relevant Supervisor.
For Number of Times to Show Alert, select the number of times the Alert Message will be displayed to the recipient.
For Delay Time Between Alerts, enter the time duration between the display of each Alert Message.
For Present Alert As, chosen whether the Alert Message will be displayed as simple Text or as a Pop-Up.
Note
The Pop-Up presentation option is available only for Critical type Alerts.
When Text is selected, the Alert will be displayed as a plain text banner in the Alerts area of the Agent AI Assist application.
in the Message Presented During Call field, enter the exact text that will be displayed to the recipient when the Alert is raised.
When Pop-Up is selected a a Rich Text toolbar is provided to enable you to format exactly how the Alert Message will appear.
The following additional components will be displayed:
Button Label - Enter the text that will be displayed in the confirmation button for the Pop-Up. The Agent must click this button in order to close the Alert Message.
Alert Message Preview - A preview of how this Rich Text-formatted message will appear to the Agent, including the Button Label.
When finished, click Save. The new Alert will be added to the Alerts associated with the current Experience.
Tip
When you create a new Alert, it is activated during runtime by default. You can manually deactivate an Alert by switching its Activate/Deactivate Toggle on the Alerts page for the relevant Experience.
Working with Trigger Types
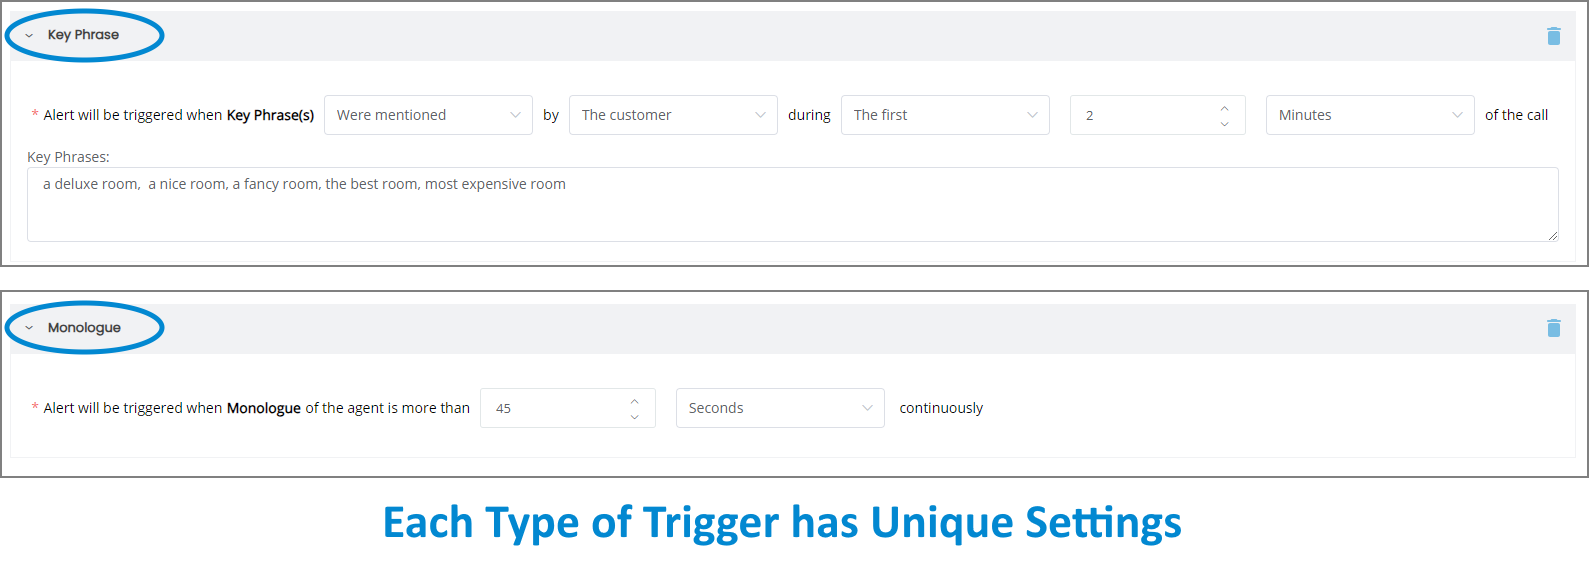
Each type of Alert Trigger that you assign maintains its own unique characteristics, based on the requirements of the type. This makes it possible for you to combine Triggers and adjust each one according to the needs of the current Alert.
In the example below, a Key Phrase Trigger listens for at least one of the given phrases to be spoken by the Customer during the first 2 minutes of the call. An additional (and unrelated) Monologue Trigger also detects when the Agent speaks non-stop for longer than 45 seconds. Both types can be triggered in the same Alert when the AND operator has been chosen in the Triggers Relation dropdown
 |
When assigning some Trigger settings, you can also invert the trigger. For example, a Key Phrase Trigger can also be invoked if a specified Key Phrase is not spoken for a specified period of time.
U-Assist currently supports the following types of Triggers, each with their own unique settings:
Key Phrase - One or more specific expressions or word sequences that occurs during the conversation. The speaker of the phrase can be specified, as well as its timing (i.e., within a designated period toward the beginning or end of the call). It is possible to trigger an Alert when the phrase(s) do not occur in the conversation.
Intent - The selected Intent occurs during the conversation. The Intent timing can be specified (i.e., within a designated period toward the beginning or end of the call). It is possible to trigger an Alert when the selected Intent does not occur in the conversation.
Entity - The selected Entity occurs during the conversation. The timing of the occurrence (i.e., within a designated period toward the beginning or end of the call) also can be specified. The Entity's value must be specified. It is possible to trigger an Alert when the selected Entity does not occur in the conversation.
Duration - The length of the entire conversation, or a Hold time, is longer than the specified time period. It is also possible to trigger an Alert when the number of times the call is placed on Hold exceeds the specified count.
Emotion - The conversation is dominantly positive or negative for longer than the specified time period. The speaker who triggers the Emotion Alert can also be specified.
Speech Rate - The spoken word rate of the Agent's speech is faster than the specified measure for longer than the specified time.
Monologue - The Agent speaks without pause for a time period greater than the specified measure.