Using the X-Console Rich Text Editor
The X-Console provides a built-in rich text editor that is available when creating and using various Uniphore text-based components, including:
U-Assist Call Summary templates
U-Assist Intent Summary templates
U-Assist Business Process Header templates
U-Assist Agent AI Application Notes
You access the rich text editor from its dedicated toolbar, displayed at the top of the active component.
As a Flow Admin or Designer, the editor enables you to format fonts, paragraphs and lists, add hyperlinks, perform multiple levels of undo/redo, and more. Using the rich text editor, you can also browse and insert any Session Variables and Business Process Entities which are available. The editor also supports viewing and directly editing the component's content as coded HTML.
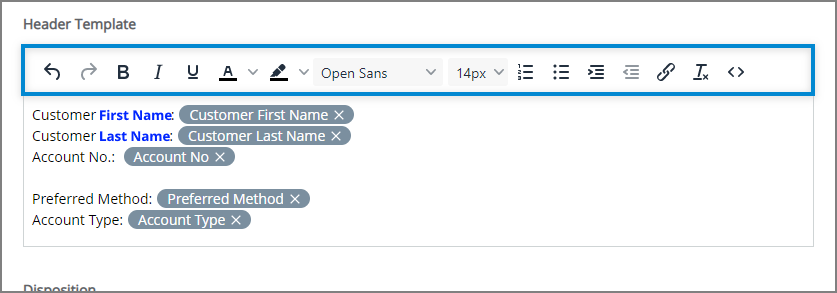
Below is an example of the rich text editor used in the Business Process Header template:
 |
As an Agent, during or after a conversation, the editor provides many of the same capabilities while a Session is active.
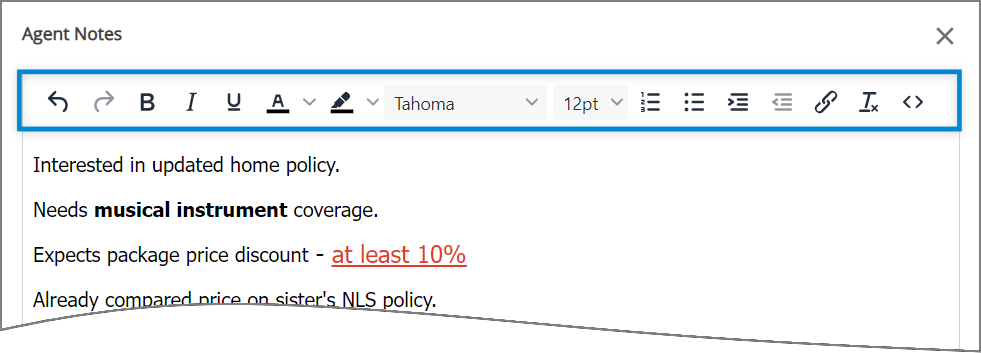
Below is an example of the rich text editor used in the Agent AI Application Notes:
 |
During runtime, X‑Platform will populate all Session Variable and Entity fields that are in the template with their current values.
Formatting Text
The editor supports using many familiar rich text formatting options, including:
Bold, italics, underline text options
Font family, size and color selection
Text highlight color selection
Text indentation options
Unordered list option (bulleted list)
Ordered list option (numbered list)
In the editor, select the text to which you want to apply formatting.
Click on the desired formatting option in the toolbar. The selected text will change to match your formatting choice.
When finished, at the lower right corner of the page, click Save. A confirmation message is displayed and the component will be stored on the X‑Platform server.
You can remove all formatting from text by first selecting the text and then clicking the Clear Formatting  icon.
icon.
Inserting Variables and Entities
Using the rich text editor, you can locate and insert one or more X‑Platform variables into the active component.
To access the list of all available variables, simply type '@' at the cursor, and the autocomplete function will be called:
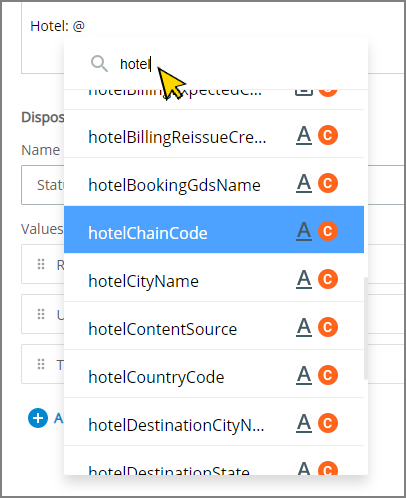
The list will display all Session Variables and Entities that are available to the current Business Process.
Select the Session Variable or Entity that you want to insert at the cursor. When needed, you can insert multiple instances of the same Variable or Entity in the active component.
When the autocomplete list is long, you can locate a specific Variable or Entity by entering a few letters from its name in the Search field, located at the top of the list.
Click the selected Session Variable or Entity. A field representing your selection will be inserted at the cursor in the editor.
You can remove an inserted Variable or Entity by clicking the X on the right side of the field. Alternatively, you can use the delete or backspace keys in the editor.
When finished, at the lower right corner of the page, click Save. A confirmation message is displayed and the component will be stored on the X‑Platform server.
When the template component is displayed to the user during runtime, X‑Platform populates each Variable or Entity field with its current runtime value.
Inserting Hyperlinks
The rich text editor supports inserting standard links to enable the user to access another URL.
In the editor, position the cursor at the point where you want to insert the link. Then, from the toolbar, click the Hyperlink
 icon. The Insert Link dialog box appears.
Enter the information needed for the hyperlink:
In the URL field, enter the target URL for the link.
In the Text to Display field. Enter the text that will be used as the link's label.
In the Open link in... dropdown list, choose whether to open the target URL in the current window or a new browser window.
When finished, click Save in the dialog box. The new link will be inserted at your cursor in the text area.
Editing Raw HTML Code
The rich text editor supports viewing and directly editing a component's content as standard coded HTML.
To access the code viewer, click the Code  icon. The HTML viewing popup will be displayed.
Note
When you are finished editing the HTML, you must click Save at the lower right corner of the popup in order to save any changes you have made.