Agent AI Login Application Settings
You use the following settings tabs to edit or update an AI Agent Login application.
Note
The Agent AI Login application is not required when Auth0 authentication is configured on the X‑Platform.
Details Tab
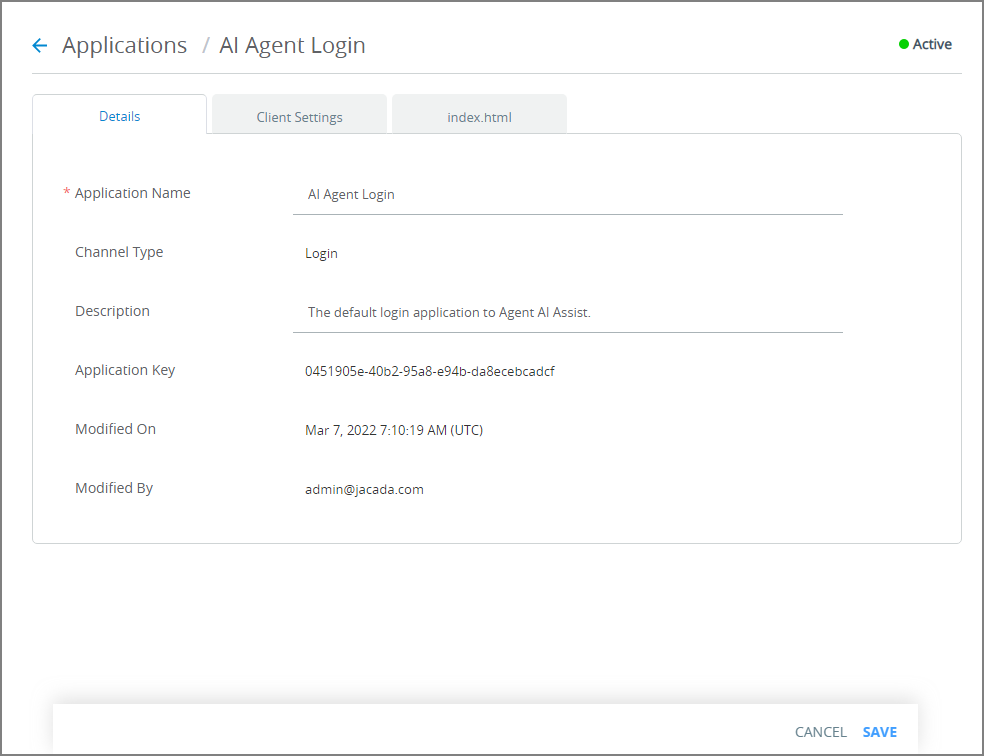 |
Setting | Description |
|---|---|
Application Name | The name of the application. |
Channel Type | The channel that will be used to run the application. This is always assigned the value Login. |
Description | A brief description of the application. |
Application Key | An identifier that is defined in the X-Console and used for access to the server. The application key is generated automatically when an application is added. For details about changing the Application Key, click here. |
Modified On | The last date and time that changes were made to this Application. |
Modified By | The last Admin who made changes to this Application. |
Client Settings Tab
This tab displays settings that define the default presentation, layout, and functionality of the AI Agent Login Application. For additional information, see Client Settings for Applications.
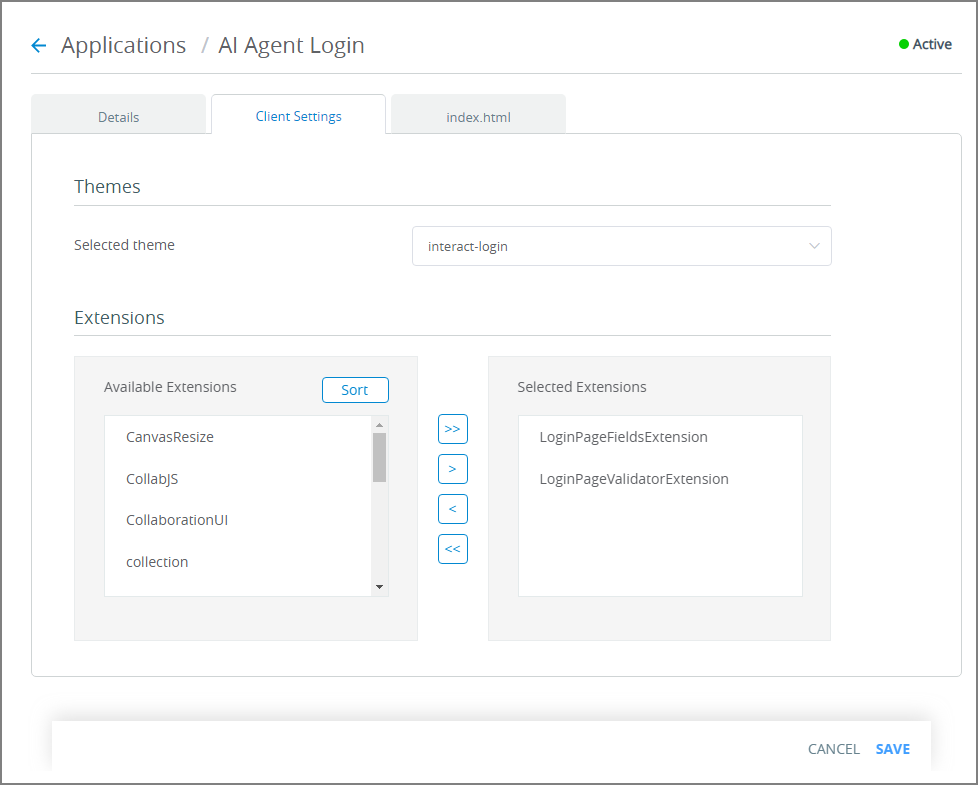 |
Setting | Description |
|---|---|
Themes | |
Selected Theme | Determines the look and feel of the Application. For more details about Themes, click here. |
Extensions | |
Selected Extensions | This frame lists the Extensions that are applied to the Application. When using the AI Agent Login application, the following Extensions must be applied:
These Extensions enable you to add custom fields to the AI Agent Login dialog (e.g., an Agent ID field) to meet the requirements of your organization's workflow. For more information about applying Extensions, click here. |
Editing AI Agent Login Application Settings
If it is not already displayed, from the Applications page, click the Name link of the relevant Application. The Details panel for the Application is displayed.
Update settings in the Details panel, as required. For details, click here.
Update settings in the Client Settings panel, as required. For details, click here.
To customize how UI components appear to a customer (for example, to change the application Title, headers and footers, or add custom Javascript code) edit the index.html panel settings. For more information, click here.
At the lower right corner of the page, click Save. When all entries are valid, a confirmation message is displayed. To exit editing at anytime without saving changes, click Cancel.