Adding New Applications
When you create an Application, you specify its name and Channel Type and then configure its functionality.
The tabs that are available for configuration will vary according to the Application type you have chosen.
At the top left of the Applications page, click Add New Application. The Add New Application dialog is displayed:
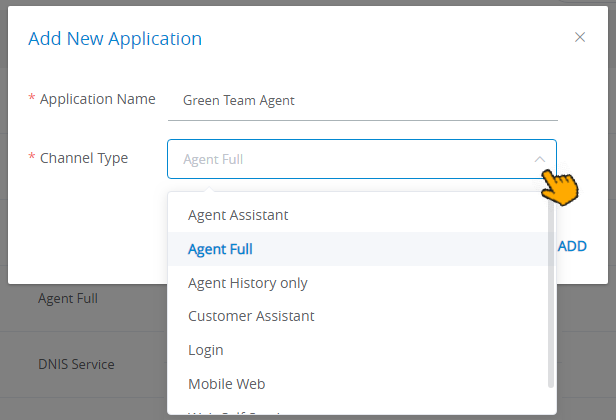
In the Application Name field, enter a unique name for the Application.
From the Channel Type dropdown list, select the appropriate channel (Agent History Only, Mobile Web, etc.).
Note
Channel types which permit only one instance of an Application per account (e.g., the X-Console and Designer Applications) will not appear in this list.
Click Add. The Details panel for the new Application will be displayed. For example:
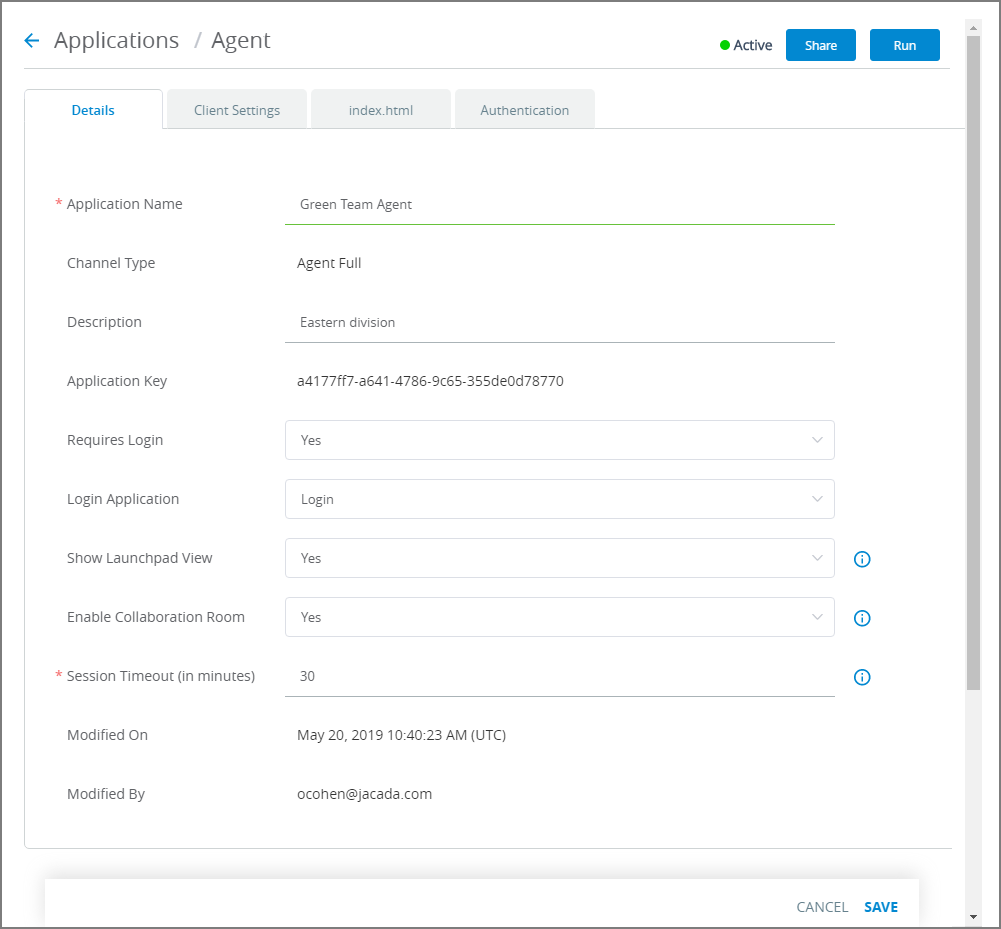
Configure the settings on the Details tab and the Client Settings tab, as required.
Additional configuration tabs will be displayed according to the chosen Application type. For a detailed explanation of all settings, refer to the relevant Application in the section Configuring Application Settings.
At the lower right corner of the page, click Save. When all entries are valid, a confirmation message is displayed. To exit editing at anytime without saving changes, click Cancel.