Client Settings for Applications
The Client Settings tab provides settings that define the default presentation, layout, and functionality for an Application.
Note
The settings available on this tab will vary according to the Application's channel type.
Generic elements of the Client Settings tab, as well as their available channel types, are described below:
Setting | Channel Types | Description | |
Layout | Agent Agent (History Only) | Web page layout options for the application. This setting changes some key features for the page and supports both Desktop and Embedded page modes. | |
Themes | Agent Agent (History Only) Agent Assistant Customer Assistant Mobile Web Web Self Service Login | The Theme currently selected for the application. This setting determines the application's look and feel. For more information about Themes and modifying the default Theme, refer to Application Themes: Overview. | |
Escalation to an Agent | Customer Assistant Mobile Web Web Self Service | These settings determine which of the available customer assistance services are enabled for the Application. When a service is enabled, designers may incorporate that service into the menu bar of Flows. The following Escalation to an Agent services can be configured:
Clicking a link at the right of an option redirects you either to the Connectivity Settings menu (if the application uses default connectivity settings or to the Connectivity tab (if the application uses custom connectivity settings). | |
Breadcrumbs Settings | Agent Mobile Web Web Self Service | Determines whether or not breadcrumbs are supported. Selecting Yes will display a breadcrumbs trail at the top of the page as a user navigates through an Flow that includes elements with breadcrumb links. | |
RPA Details | Agent Agent Assistant Customer Assistant Mobile Web App Web Self Service | For Agent and Agent Assistant applications, provides the ability to select either Unattended or Attended Automation Mode for RPA. For more details, click here. For all applications, provides the ability to change the timeout period for any RPA Bot which was acquired for execution but remains idle. An idle RPA Bot is released from memory after the defined length of time. | |
Extensions | Agent Agent Assistant Customer Assistant Mobile Web Web Self Service Login | Provides a selection list of all extensions that are available to the Application. For more information about applying extensions to applications, refer to Working with Extensions in the X-Console. | |
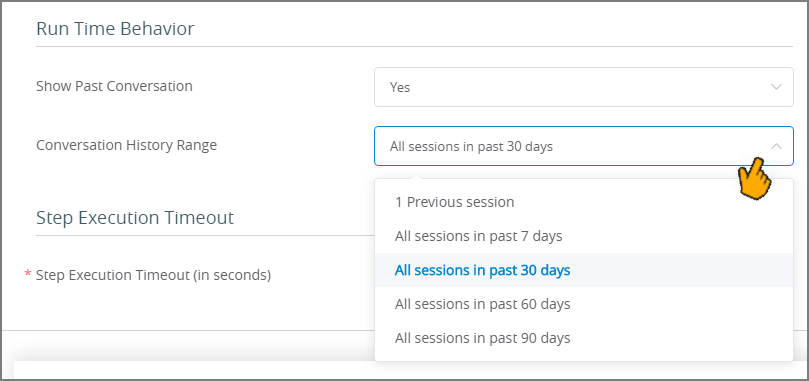
Runtime Behavior | Agent Assistant Customer Assistant | Enables you to change certain runtime attributes for the selected application.
When Show Past Conversation is set to Yes, all conversation sessions for the selected IA Domain will be saved to provide a scrollable history in the user's browser. Past history is available only for links that are created using the Share button for the selected application. The time period for storing sessions (up to 90 days) is set by the Conversation History Range dropdown menu that appears. Whenever the shared chatbot application link is opened using the same browser, the entire period of conversation history for the Domain will be displayed. When Show Past Conversation is set to No, past conversations for the selected IA Domain will not be saved. Each time the chatbot application link is opened in the browser, it will display only the current conversation session. Note: This setting stores data in the user's browser. Clearing the browser cache for the chatbot page will also clear all conversation session data. The Show Past Conversation setting does not have any impact on session history accessed from the Agent and Agent History applications, which is maintained separately. |
Editing Client Settings
From the Applications page, click the Name link of the relevant Application. The settings tabs for the Application are displayed.
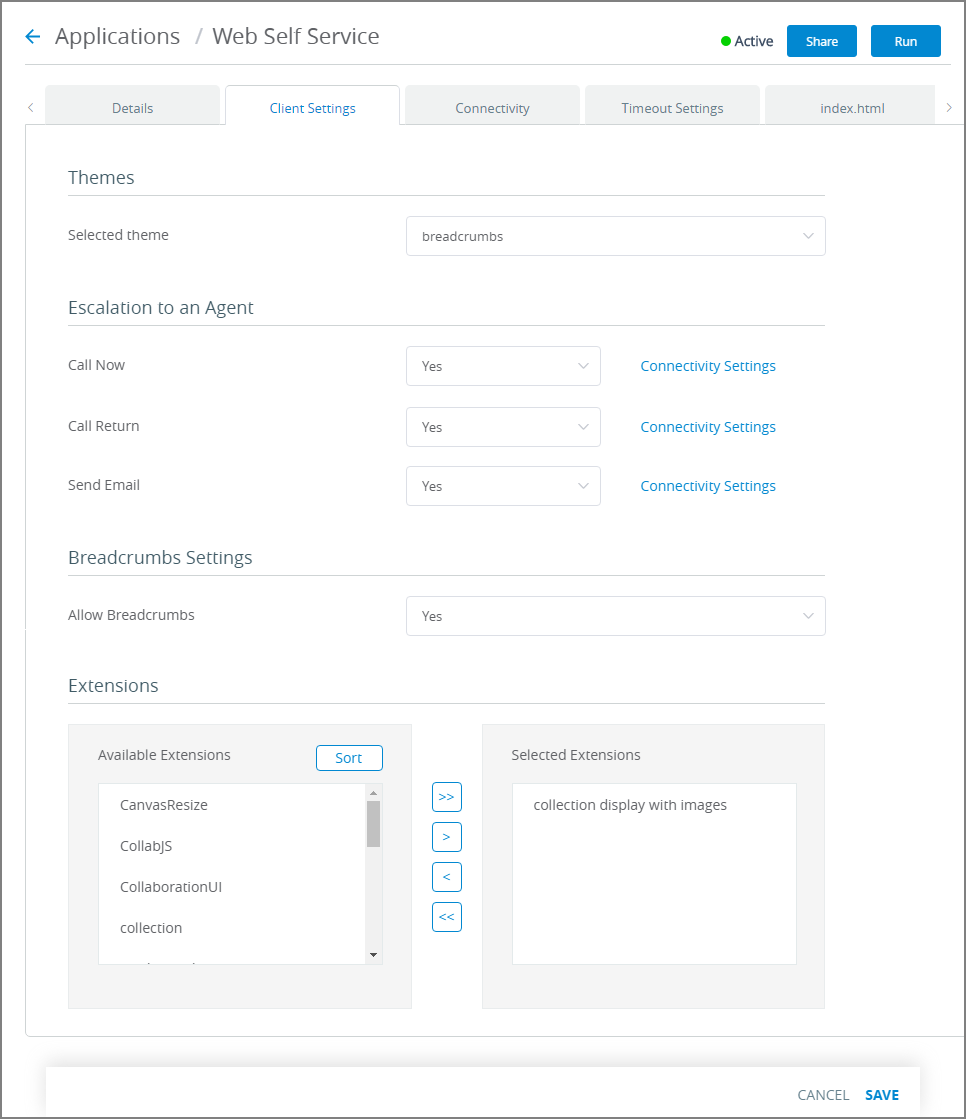
Click on the Client Settings tab. The Client Settings panel is displayed:
Note
The example above shows a Client Settings tab for only one Application type. The actual settings available will vary according to the Application channel type selected.
If applicable, set the Layout options (relevant for Agent and and Agent(History Only) application channel types only).
From the Selected theme dropdown list, select the required Theme.
If applicable, for each service listed in the Escalation to an Agent area, select Yes or No from the dropdown lists, as appropriate.
After enabling a service, verify that its associated settings are also configured on the Connectivity Settings page.
Note
If you disable a service that is currently being used in a published Flow, a warning message is displayed.
If applicable, to support display of a breadcrumb trail during runtime, select Yes in the Allow Breadcrumbs dropdown.
If applicable, select the RPA Automation Mode (relevant for Agent application channel types only) and/or adjust the RPA Bot Default Idle Timeout period.
In the Extensions area, move the extensions that you want activated in the Application into the Selected Extensions list as required.
To remove an extension from the Selected Extensions list, select it and then click the left arrow icon. The extension moves to the Available Extensions list, and will no longer be applied to the application.
To add an available extension to the Selected Extensions list, select it and then click the right arrow icon. The extension moves to the Selected Extensions list, and will be applied to the application.
To edit the order of the Selected Extensions list, select an extension and use the up/down arrow icons to move it to the desired position in the list. The order of the extensions in the list can be important when the same extension point function is used by more than one extension. In this case, the functions are executed in the order of the extensions in the Selected Extensions list.
For more information about creating and applying extensions, refer to Working with Extensions in the X-Console.
If applicable, set the Run Time Behavior settings (relevant for Agent Assistant and Customer Assistant application channel types only).
At the lower right corner of the page, click Save. When all entries are valid, a confirmation message is displayed. To exit editing at anytime without saving changes, click Cancel.