Connectivity Settings for Applications
You can customize your customer connectivity settings per Application. During runtime, the Application-level settings will override the default connectivity settings that are configured for the account.
For example, the account-level call handling method of your Mobile Web application may use DTMF code, but a new Application requires a DNIS Manager. You can set the DTMF connectivity parameter directly in your Application without changing the DNIS account default.
The shared account-level settings for Applications that support connectivity are configured from the Connectivity page in the Settings menu of the X-Console. (For more information on configuring account-level connectivity settings, click here).
Editing Application Connectivity Settings
From the Applications page, click the Name link of the relevant Application. The settings tabs for the Application are displayed.
Click on the Connectivity tab. The Connectivity panel is displayed.
When the Application currently uses account-level settings, the Default Account Settings link is displayed. Click the link to open the Application's Connectivity page, where you can view and update the default connectivity settings.
When the selected Application uses custom connectivity settings, the Application Settings are displayed.
If desired, from the Connectivity Type dropdown list select which settings will be used for the current Application:
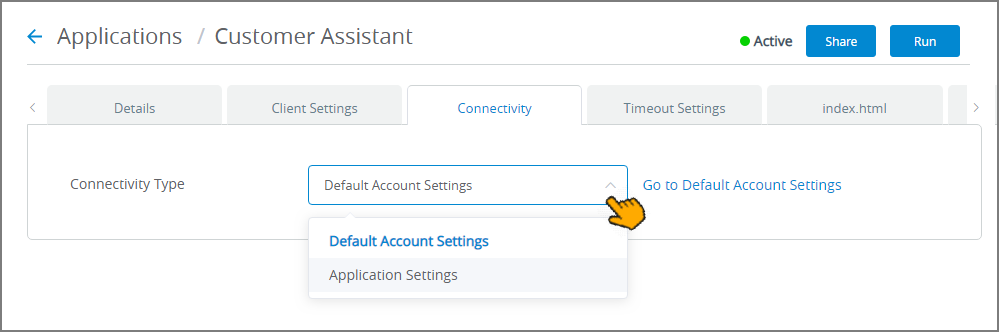
To use account-level settings, select Default Account Settings. To view and update default connectivity settings for the account, click on the link that appears in the panel. For details on managing account-level settings, click click here.
Note
Selecting Default Account Settings when custom settings were previously defined will restore all account connectivity defaults for the selected Application.
To use custom settings in this Application only, select Application Settings.
If you have selected Application Settings from the dropdown list, then the currently-defined connectivity settings for the Application are displayed:
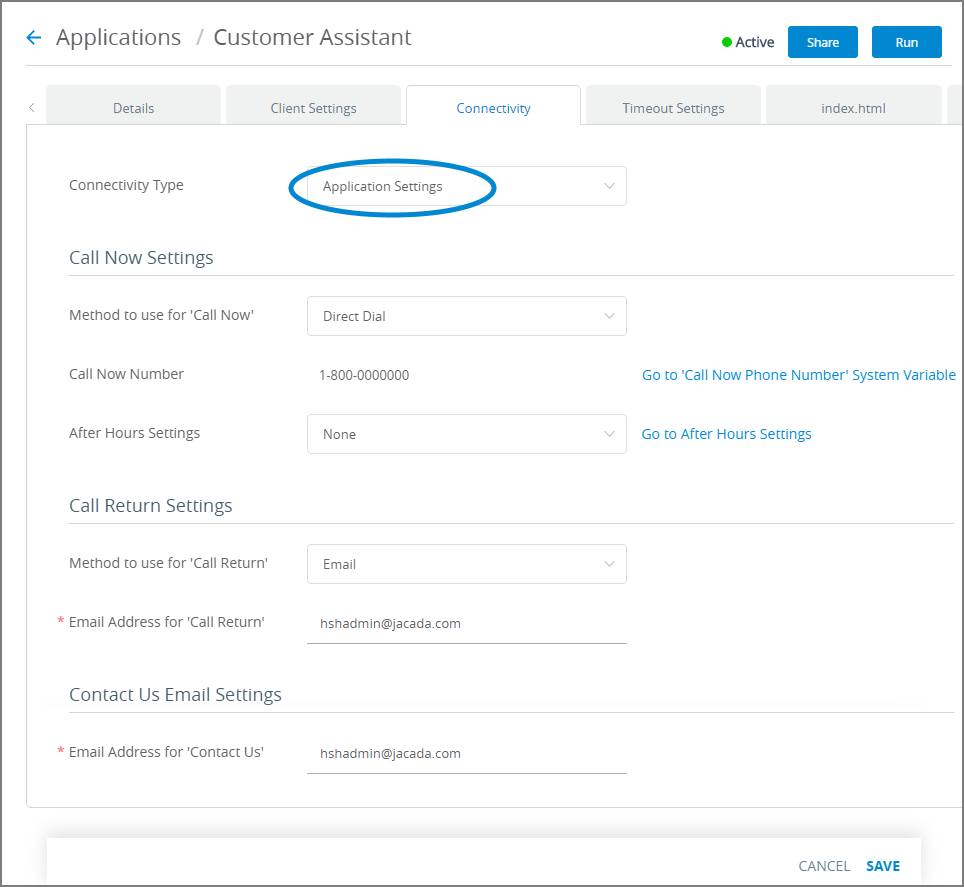
Update Call Now Settings. For complete details on this section, click here.
Note
The DNIS Manager option cannot be set as the handling method for an individual Application. To use the DNIS Manager, it needs to be defined as the default connectivity setting in account-level Call Now settings.
Update Call Return Settings. For complete details on this section click here.
Update Contact Us Email Settings. In the Email Address for 'Contact Us' field, enter the address where customer emails requesting assistance via this Application will be sent.
At the lower right corner of the page, click Save. When all entries are valid, a confirmation message is displayed. To exit editing at anytime without saving changes, click Cancel.
Viewing All Custom Application Connectivity Settings
For centralized viewing and management, you can use the Connectivity page, which stores all custom connectivity settings for Applications in your account in one location.
From the Settings menu in the X-Console, click Connectivity. The Connectivity page is displayed.
At the bottom of the page, a summary table is displayed showing the level of Connectivity Settings being used by each active Application:
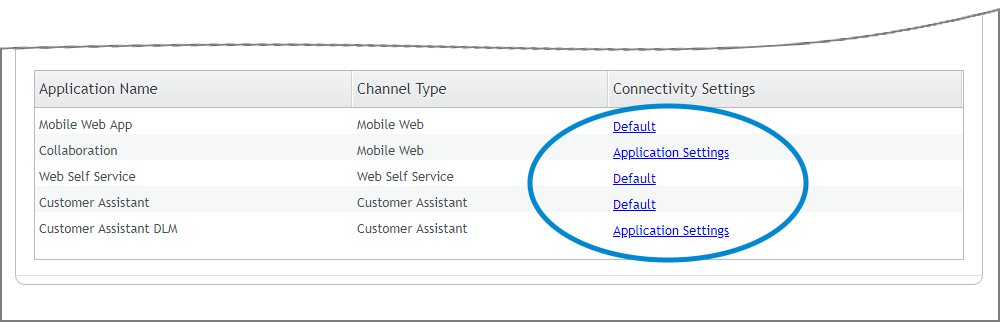
To view settings details, click on the link next to an Application in the Connectivity Settings column. The current settings for the selected Application will be displayed.