Working with Extensions
You add, activate, update and delete Extensions directly from the Extensions page.
Adding Extensions
You add an Extension by specifying its name and description and inserting the Extension's JavaScript code.
Whenever you add an Extension, you must also activate it for a selected Application in order for the Extension to be used.
Note
For sample code examples and more details about writing Application Extensions, click here.
At the upper left corner of the Extensions page, click Add New. The New Extension page is displayed:
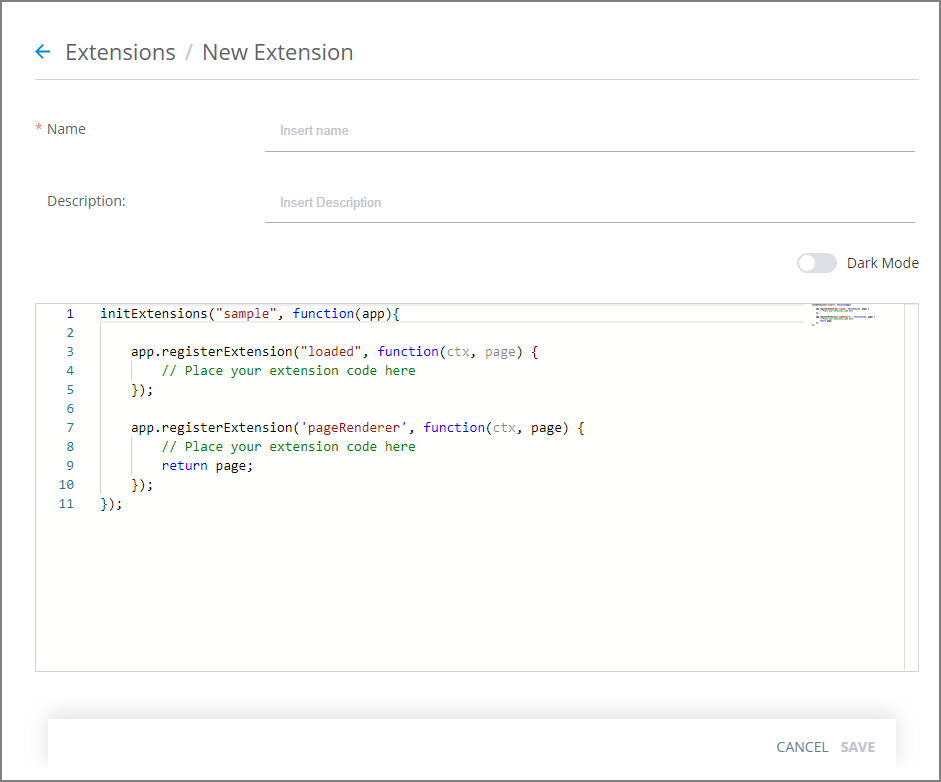
In the editor, you'll already see placeholders for both the init function and the register method.
In the Name field, enter a name for your Extension.
In the Description field, optionally enter a helpful note or comment about the Extension.
In the initExtensions declaration, replace sample with the name of your Extension. Then, modify or replace the sample code with your own.
When modifying the sample, remember to delete sample code for the technique that you are not using. For example, if you are not registering the loaded event, delete that portion of the code.
If you need to format the style of new elements that you adding, add it to the Uniphore CSS tab in any Theme that is associated with your relevant Applications.
At the lower right corner of the page, click Save. A confirmation message is displayed, and the new Extension is listed on the Extensions page.
In addition, the new Extension will now appear in the Available Extensions list that is found on the Client Settings tab of most Applications.
Note
The new Extension will have no effect on an Application's behavior until you activate it in the relevant Application settings.
Activating Extensions in Applications
By default, all defined Application Extensions are available for use in your Applications. However, for an Extension to actually affect the behavior of an Application, it needs to be activated for that specific Application. You do this by assigning the Extension in the Client Settings tab of the desired Application.
From the Applications page, click the Name link of the Application where you wish to activate your Extension. The settings tabs for the Application are displayed.
Click the Client Settings tab. The Client Settings panel is displayed.
Scroll to the bottom of the page to the Extensions area:
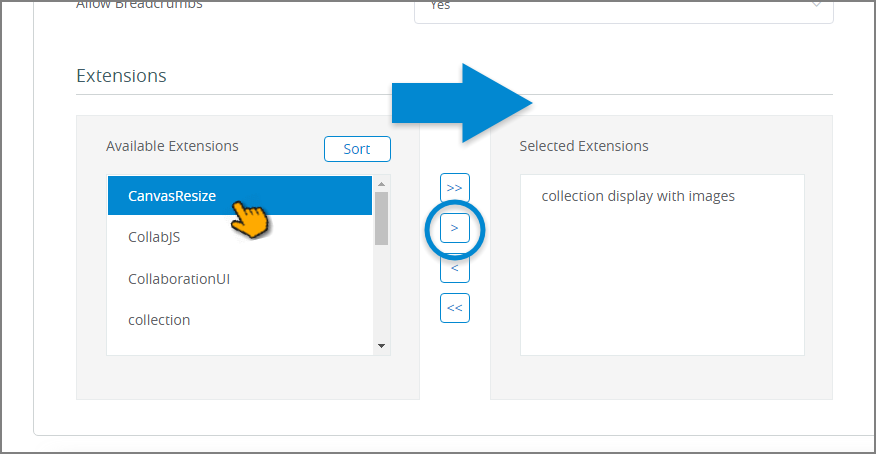
In the Extensions area, move the extensions that you want activated in the Application into the Selected Extensions list as required.
To remove an extension from the Selected Extensions list, select it and then click the left arrow icon. The extension moves to the Available Extensions list, and will no longer be applied to the application.
To add an available extension to the Selected Extensions list, select it and then click the right arrow icon. The extension moves to the Selected Extensions list, and will be applied to the application.
To edit the order of the Selected Extensions list, select an extension and use the up/down arrow icons to move it to the desired position in the list. The order of the extensions in the list can be important when the same extension point function is used by more than one extension. In this case, the functions are executed in the order of the extensions in the Selected Extensions list.
At the lower right corner of the page, click Save. A confirmation message is displayed and the Applications page opens.
Updating Extensions
You can update the name, description or content of an Application Extension at any time.
From the Extensions page, in the Name column, click the name of the Extension that you want to apply to modify. The Details page for the Extension opens.
Update the name, description and/or content of the Extension, as required.
At the lower right corner of the page, click Save. A confirmation message is displayed, and the Extensions page opens.
Deleting Extensions
The Delete button enables you to remove Extensions that are no longer relevant.
Note
An Extension that is currently assigned to one or more Applications cannot be deleted.
From the Extensions page, at the left side of the list, select the checkbox(es) of the Extension(s) that you want to delete. The Delete Selected Item(s) button will be displayed.
Click Delete. A warning popup is displayed.
From the popup, click Yes. A confirmation message is displayed, and the Extension is deleted from the account.