Adding and Updating Users
A user with Account Admin Role (or higher) can create and update account users.
Adding a New User (Legacy Configuration)
This method is relevant for configurations prior to Release 2023.3.
From the Account menu section in the X-Console, select Users. The Users page is displayed.
At the top left of the Users page, click Add User. The Add New User page is displayed:

Enter all required field parameters:
First Name. The user's given name.
Last Name. The user's family name.
User Name. Enter a unique credential that will be used to access Interact. The name that will be entered by the user when logging into the system. An email address may also be used for this parameter.
Email. The email address to which X‑Platform System notifications will be sent. This parameter must be unique for each user.
In the Role section, use the mouse to select one or more Roles listed in the Available Roles column and click the single > right-arrow icon to assign it to Selected Roles for the user. To assign all available Roles to the user, click the double >> right-arrow icon.
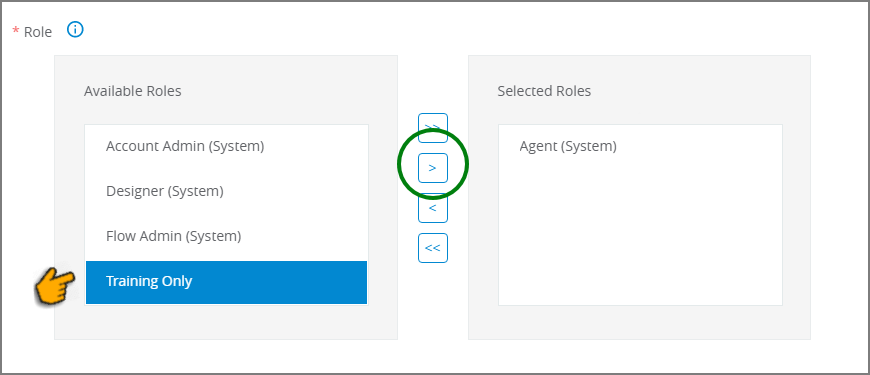
Both System and Custom Roles are displayed.
To remove a Role from the user, select it and click the single < left-arrow icon. To remove all selected Roles from the user, click the double << left-arrow icon.
Note
While you can assign any combination of roles to a user, in practice the user will receive all permissions that are associated with highest System Role that you assign. Therefore, if you assign a user with the Designer role and also assign the Account Admin role, the user will effectively be assigned the higher role (Account Admin).
Similarly, if you assign a user with a Custom Role that limits their access to only a single Flow, but also assign the Flow Admin role, the user will effectively have access to all Flows.
For complete details about creating and using Roles in X-Console, click here.
Use the Additional Details section to supply optional field values for the user, such as Alias, Title, Department, Division, Phone and Extension.
For Account Admin users, activate the Receive email notifications toggle to receive an email notification each time a Flow is published to the account.
At the lower right corner of the page, click Save. A confirmation message appears, and changes are saved.
Adding a New User (Auth0 Configuration)
These settings are relevant for configurations that utilize Auth0 authentication (Release 2023.3 and later).
From the Account menu section in the X-Console, select Users. The Users page is displayed.
At the top left of the Users page, click Add User. The Add New User email page is displayed:
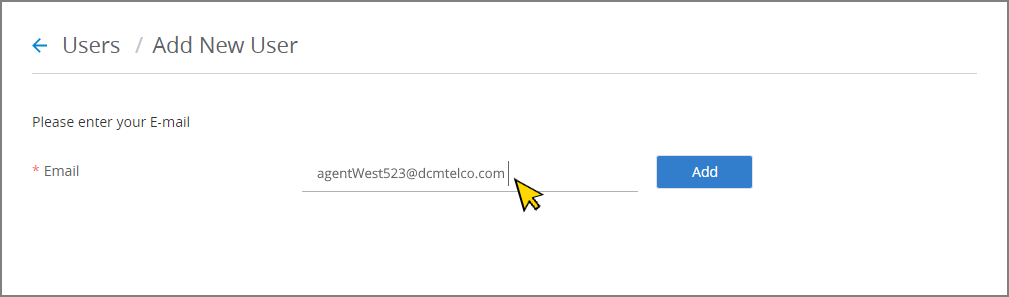
In the Email text field, enter the unique email address of the new user.
Click Add. The new user is added to the Auth0 configuration, based on the email address.
If the email address already exists for the current account, an error message will be displayed. Only one user based on each unique email is allowed per tenant.
On successful Auth0 configuration, the Add New User details page will be displayed:
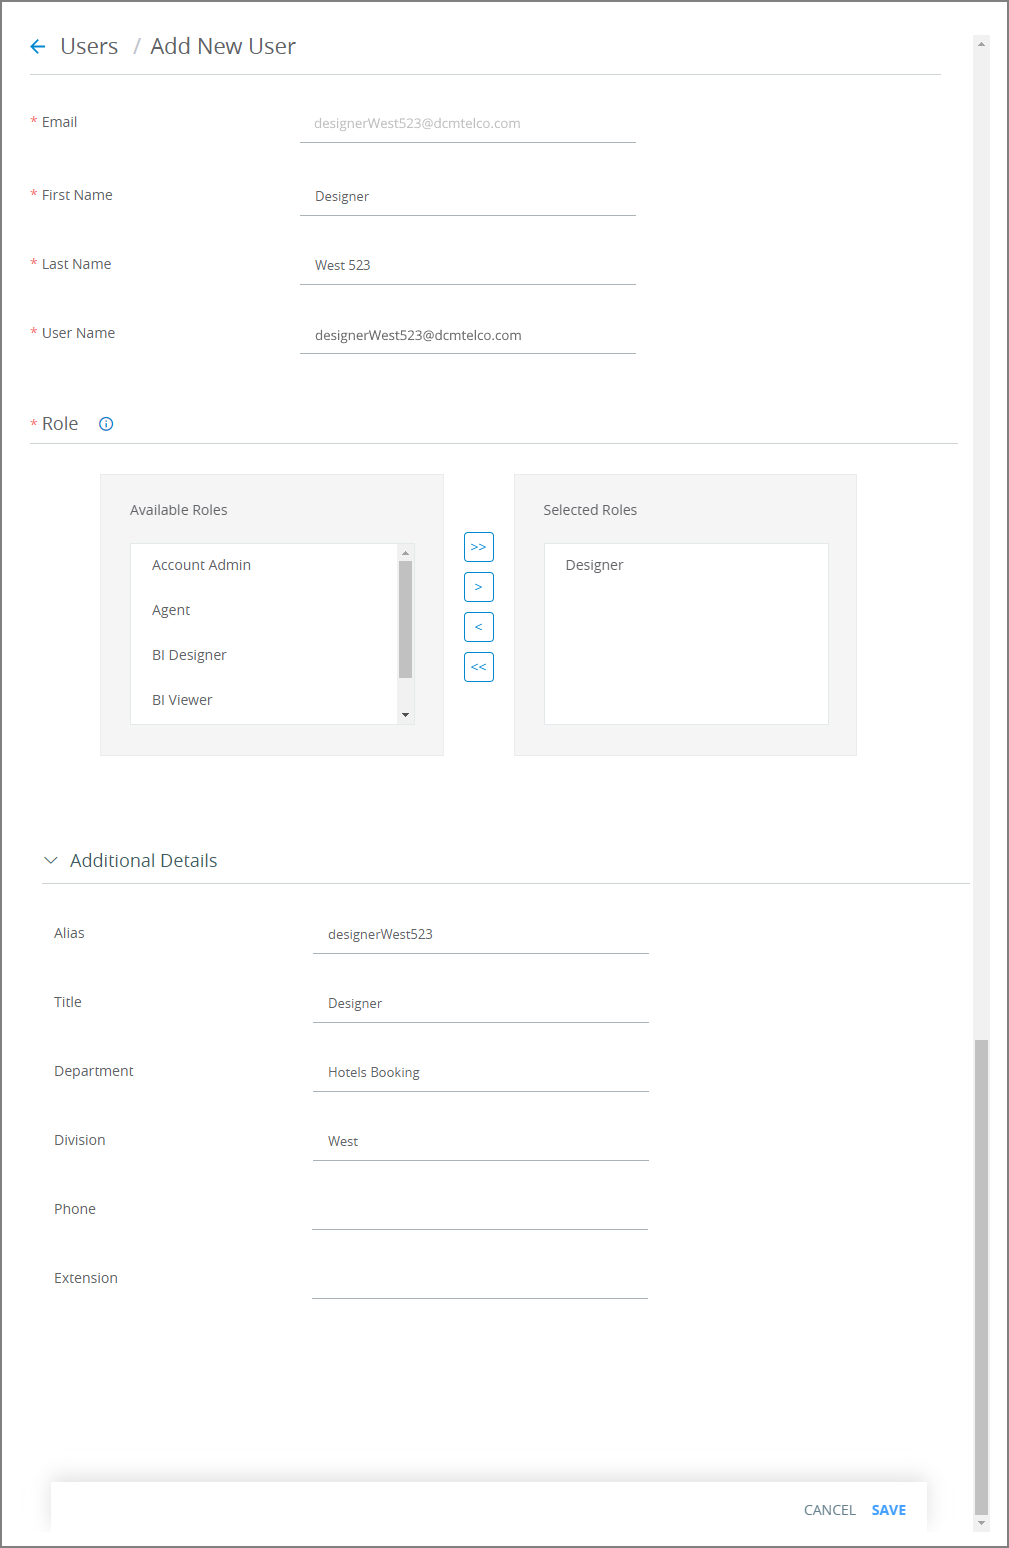
Enter all required field parameters:
First Name. The user's given name.
Last Name. The user's family name.
User Name. Enter a unique credential that will be used to access Interact. The name that will be entered by the user when logging into the system. An email address may also be used for this parameter.
In the Role section, use the mouse to select one or more Roles listed in the Available Roles column and click the single > right-arrow icon to assign it to Selected Roles for the user. To assign all available Roles to the user, click the double >> right-arrow icon.
To remove a Role from the user, select it and click the single < left-arrow icon. To remove all selected Roles from the user, click the double << left-arrow icon.
Note
Note: While you can assign any combination of roles to a user, in practice the user will receive all permissions that are associated with highest System Role that you assign. Therefore, if you assign a user with the Designer role and also assign the Account Admin role, the user will effectively be assigned the higher role (Account Admin).
Similarly, if you assign a user with a Custom Role that limits their access to only a single Flow, but also assign the Flow Admin role, the user will effectively have access to all Flows.
For complete details about creating and using Roles in Interact, click here.
Use the Additional Details section to supply optional field values for the user, such as Alias, Title, Department, Division, Phone and Extension.
At the lower right corner of the page, click Save. A confirmation message appears, and changes are saved.
Updating a User
Note
Any user with access to the X-Console can update their own details, however they cannot change the values for their own User Name or Role.
From the Users page, click the Full Name of the user you wish to update. The selected user Details page is displayed.
Update the user details as needed. Details for all parameters are provided here.
At the lower right corner of the page, click Save. A confirmation message appears, and changes are saved.
Removing a User
A user with Account Admin Role can remove the account of another user. After removal the user will no longer be able to access the current account in Interact.
Note
When Auth0 is enabled, this functionality is not available. Removing a user is performed directly from Auth0.
From the Users page, click the Full Name of the user you wish to remove. The selected user Details page is displayed.
Near the upper right corner of the page, click Remove User. A confirmation message will be displayed prior to deletion.
Click Remove. The selected user will be removed from the account.
Managing Passwords
The User Details page also provides the following methods to change a user password:
Change by the User. Any user with access to the X-Console can change their own password on demand using the Change Password process.
Reset by the Admin. A user with the Account Admin role can reset the password of any other account user via the Reset Password process.