Yes/No Questions
Yes/No choice type questions enable you to ask users a simple question, and have them select one of two possible answers. The answers may be literally Yes and No, or they may consist of other words or phrases that you provide.
The example below on the left presents Yes and No answers in a Switch (toggle) display. The second example shows a variation in which users select one of two radio buttons. The third example shows a Yes/No choice which uses a list of buttons as the display type.
 |
Tip
If you need to ask more complex questions and answers, consider using the Choices page element.
Creating a Yes/No Question
From the left side of the Page Editor, select the Yes/No choice element, and drag the element to the Page map. On the right side of the Page Editor, the Element tab opens.
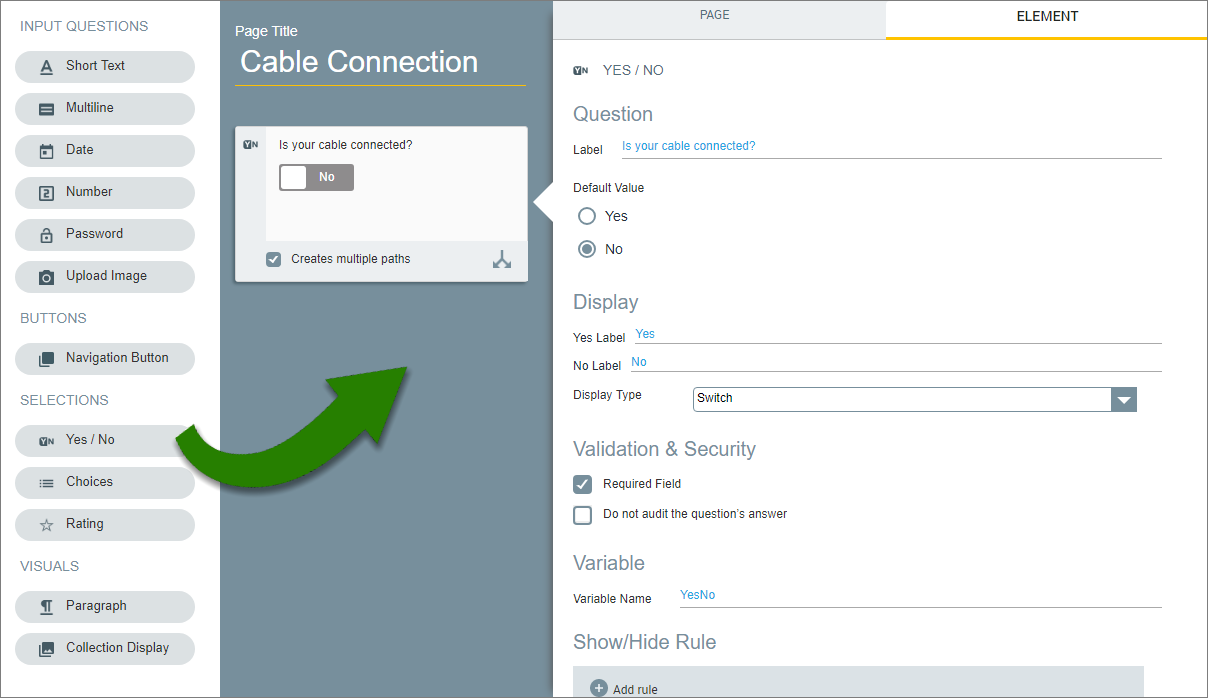
In the Label field of the Element tab, enter the text of the question.
Specify a default answer to the question by specifying the relevant Default Value option. Your selection will be chosen when the Flow is run.
Note
The List of Buttons Display type option does not support specifying a Default Value.
If desired, in the Display section, change the default labels of the Yes and No options to answers that are relevant to your question.
From the Display Type dropdown, select the display format which will be used to present the Yes/No choice answers. You can select from: Switch, Radio Buttons, or List of Buttons formats.
When selecting certain Display formats, you can also select workflow options. These will appear as checkboxes beneath the selected Yes/No display in the mapping area.
Create multiple paths. This Yes/No question will create two exit points on the Flow Map.
Clicking here proceeds to next page. Following the user selection, the workflow will continue to the following page in the Flow without the need to click 'Next'. (Available only when List of Buttons is used.)
The available options will appear as checkboxes beneath the Yes/No display in the mapping area. Select the checkboxes that are appropriate for your workflow.
Configure validation and security settings: If relevant, select the Required Field checkbox and/or the Do not audit the question's answer checkbox. For more information, refer to Choice Question Design: Basic Workflow.
The Variable Name field stores the runtime response as a User Input variable in order to make it readily available to other Flow elements. (For details on using choice selections in variables, see Using Choice Selections in Other Elements.) A unique name is automatically assigned by default, but you can enter a more descriptive name of your own.
For Variable Name fields you can also assign the runtime response to an existing or new Variable. Entering '@' in the field enables you to select and assign a variable of the correct type using the autocomplete variables list. For more information, refer to Viewing and Managing Variables.
The Show/Hide Rule field enables you to show or hide the input question during runtime if a specified Rule condition is met. (An input question is always displayed by default.) To add a Show/Hide rule, click the Plus
 icon and enter the condition to meet using the Rule Editor that appears:
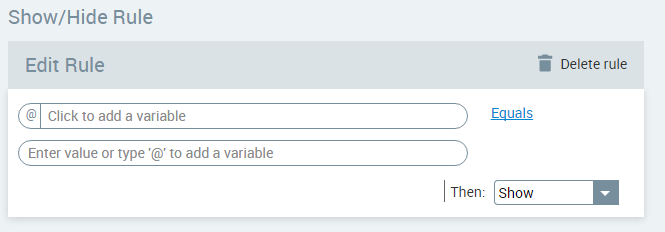
After adding the condition, select Show or Hide from the dropdown menu at the lower right to set the question's display status. To delete a Rule, click Delete rule at the top right corner of the Rule Editor.
For more details and an example, click here.
The HTML Reference ID field stores the response in order to make it available for use outside of Interact, for example in CSS or application extensions. A unique name is automatically assigned to this field by default, but you can assign a more descriptive name to make it easier to identify.
To save your changes, at the lower right corner of the Page Editor, click Update Page (or Create Page). The Page Editor closes, and the Flow Map is displayed.