Working with Integration Points
The following sections detail various administrative procedures for managing Integration Points.
Tip
When you add, delete, update or edit an Integration Point, we recommend that you Refresh any currently open Flows to update them with the new information in the X-Designer. Use the Refresh button in the Flow Toolbar. For more information, click here.
Testing Integration Points
Testing an Integration Point involves navigating to the Test Integration Point page and then verifying that the Integration Point behaves as expected. You will need to enter test input values, according to the structure of the specific Integration Point being tested.
Navigate to the Test Integration Point page, in one of the following ways:
From the Integration Points page: At the left side of the page, select the checkbox in the row of the relevant Integration Point. Then, at the top of the page, click Test.
Note
The Test button is enabled only when a single Integration Point is selected.
From the Integration Point Details page: At the top of the page, click Test.
On the Test Integration Point page, enter test input values as required.
Important
Request parameters in the URL are automatically URL encoded before being sent. If these parameters contain non-English letters and/or special characters, make sure that the receiving web service will perform URL decoding.
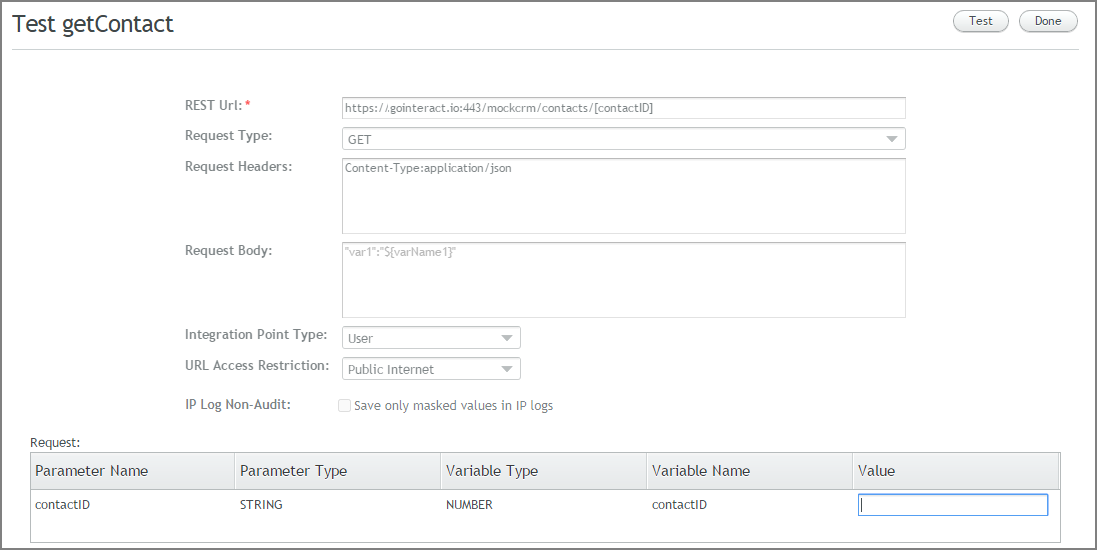
At the upper right corner of the page, click Test. Test results are shown at the bottom of the page, in the Response frame.
To navigate back to the Integration Points page at any time, click Done.
Approving Integration Points
Approved Integration Points are available in the X-Designer, and can be used when running Flows. Integration points in Draft status can be approved by authorized administrators, following review and testing. Multiple Integration Points may be approved at once.
At the left side of the Web Service Integration Points page, select the checkbox(es) in the row(s) of the relevant Integration Point(s). Then, at the top of the page, click Approve.
Note
The Approve button is enabled only when an Integration Point in Draft status is selected.
A Confirm Approval popup window appears.
In the popup window, click Yes. A confirmation message is displayed. In the Integration Points grid, the status of the selected Integration Point(s) changes from Draft to Approved.
Updating Integration Points
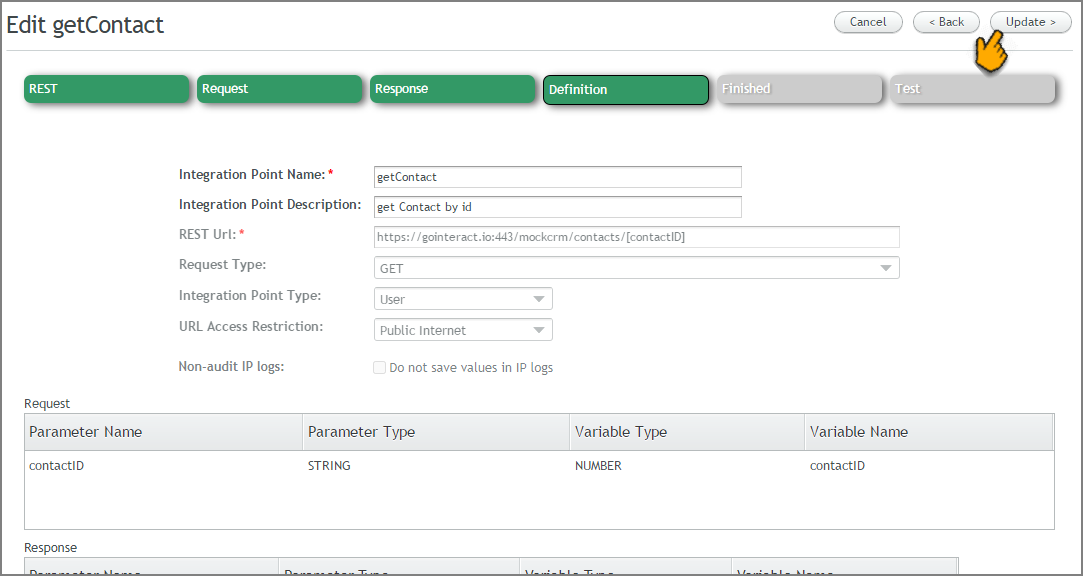
The Edit option enables you to update any parameter of either a SOAP or REST Integration Point. Editing is done by reviewing the settings that were configured in the Integration Points wizard and making necessary modifications.
When updating Integration Points, keep the following important guidelines in mind:
It is not possible to update an Integration Point that is used in an approved Flow.
When updating an Integration Point that is used in a draft Flow, you will be presented with a warning message.
Edited Integration Points are not automatically updated in the X-Designer, and no warning message is generated to Designer users. After modifying an Integration Point used in a draft Flow, it is therefore necessary to manually update (from the Designer) all Flow elements that use the relevant Integration Point.
From the Web Service Integration Points page, in the Name column, click the link in the row of the relevant Integration Point. The Integration Point Details page is displayed.
At the upper right corner of the page, click Edit. The Edit Integration Point page opens, showing the Integration Point wizard. The first tab of the wizard (SOAP or REST) is displayed by default.
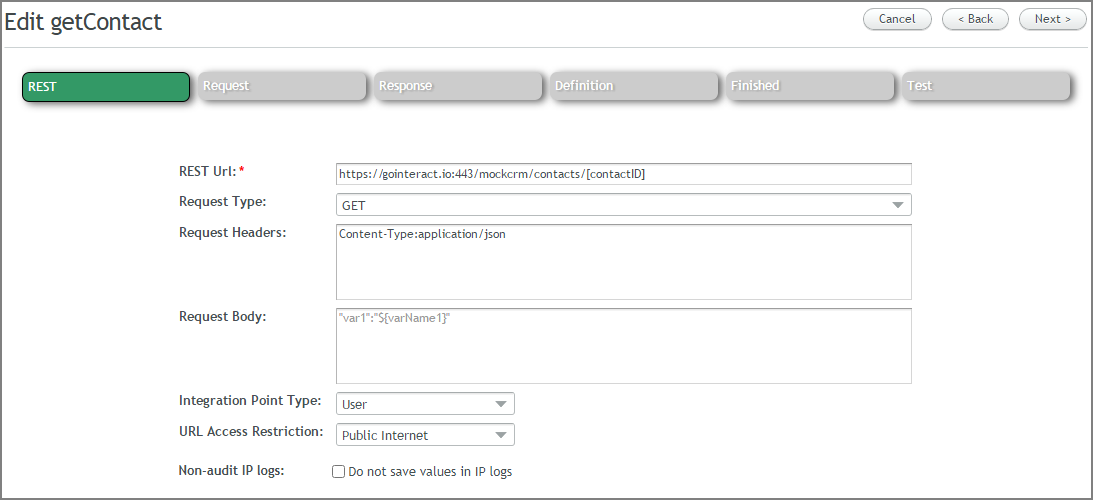
Using the Next and Back buttons, navigate through the wizard and update settings and parameters as required.
Click Next until the Definition tab is displayed. After reviewing all settings, at the upper right corner of the page, click Update.
The wizard closes, and a confirmation message is displayed.
If the Integration Point is in use in one or more draft Flows, launch the X-Designer, and manually update all Flow elements that use the Integration Point.
Deleting Integration Points
Deleting an Integration Point removes it from the Integration Points grid. The Delete function can be accessed from either the Web Service Integration Points page or the Integration Point Details page. If you are working from the Web Service Integration Points page, multiple Integration Points may be deleted at once.
At the left side of the Web Service Integration Points page, select the checkbox(es) in the row(s) of the relevant Integration Point(s). Then, at the upper right corner of the page, click Delete. A Confirm Deletion popup window appears.
In the popup window, click Yes. A confirmation message is displayed. The selected Integration Point(s) are removed from the Integration Points grid.