Refine Your Search
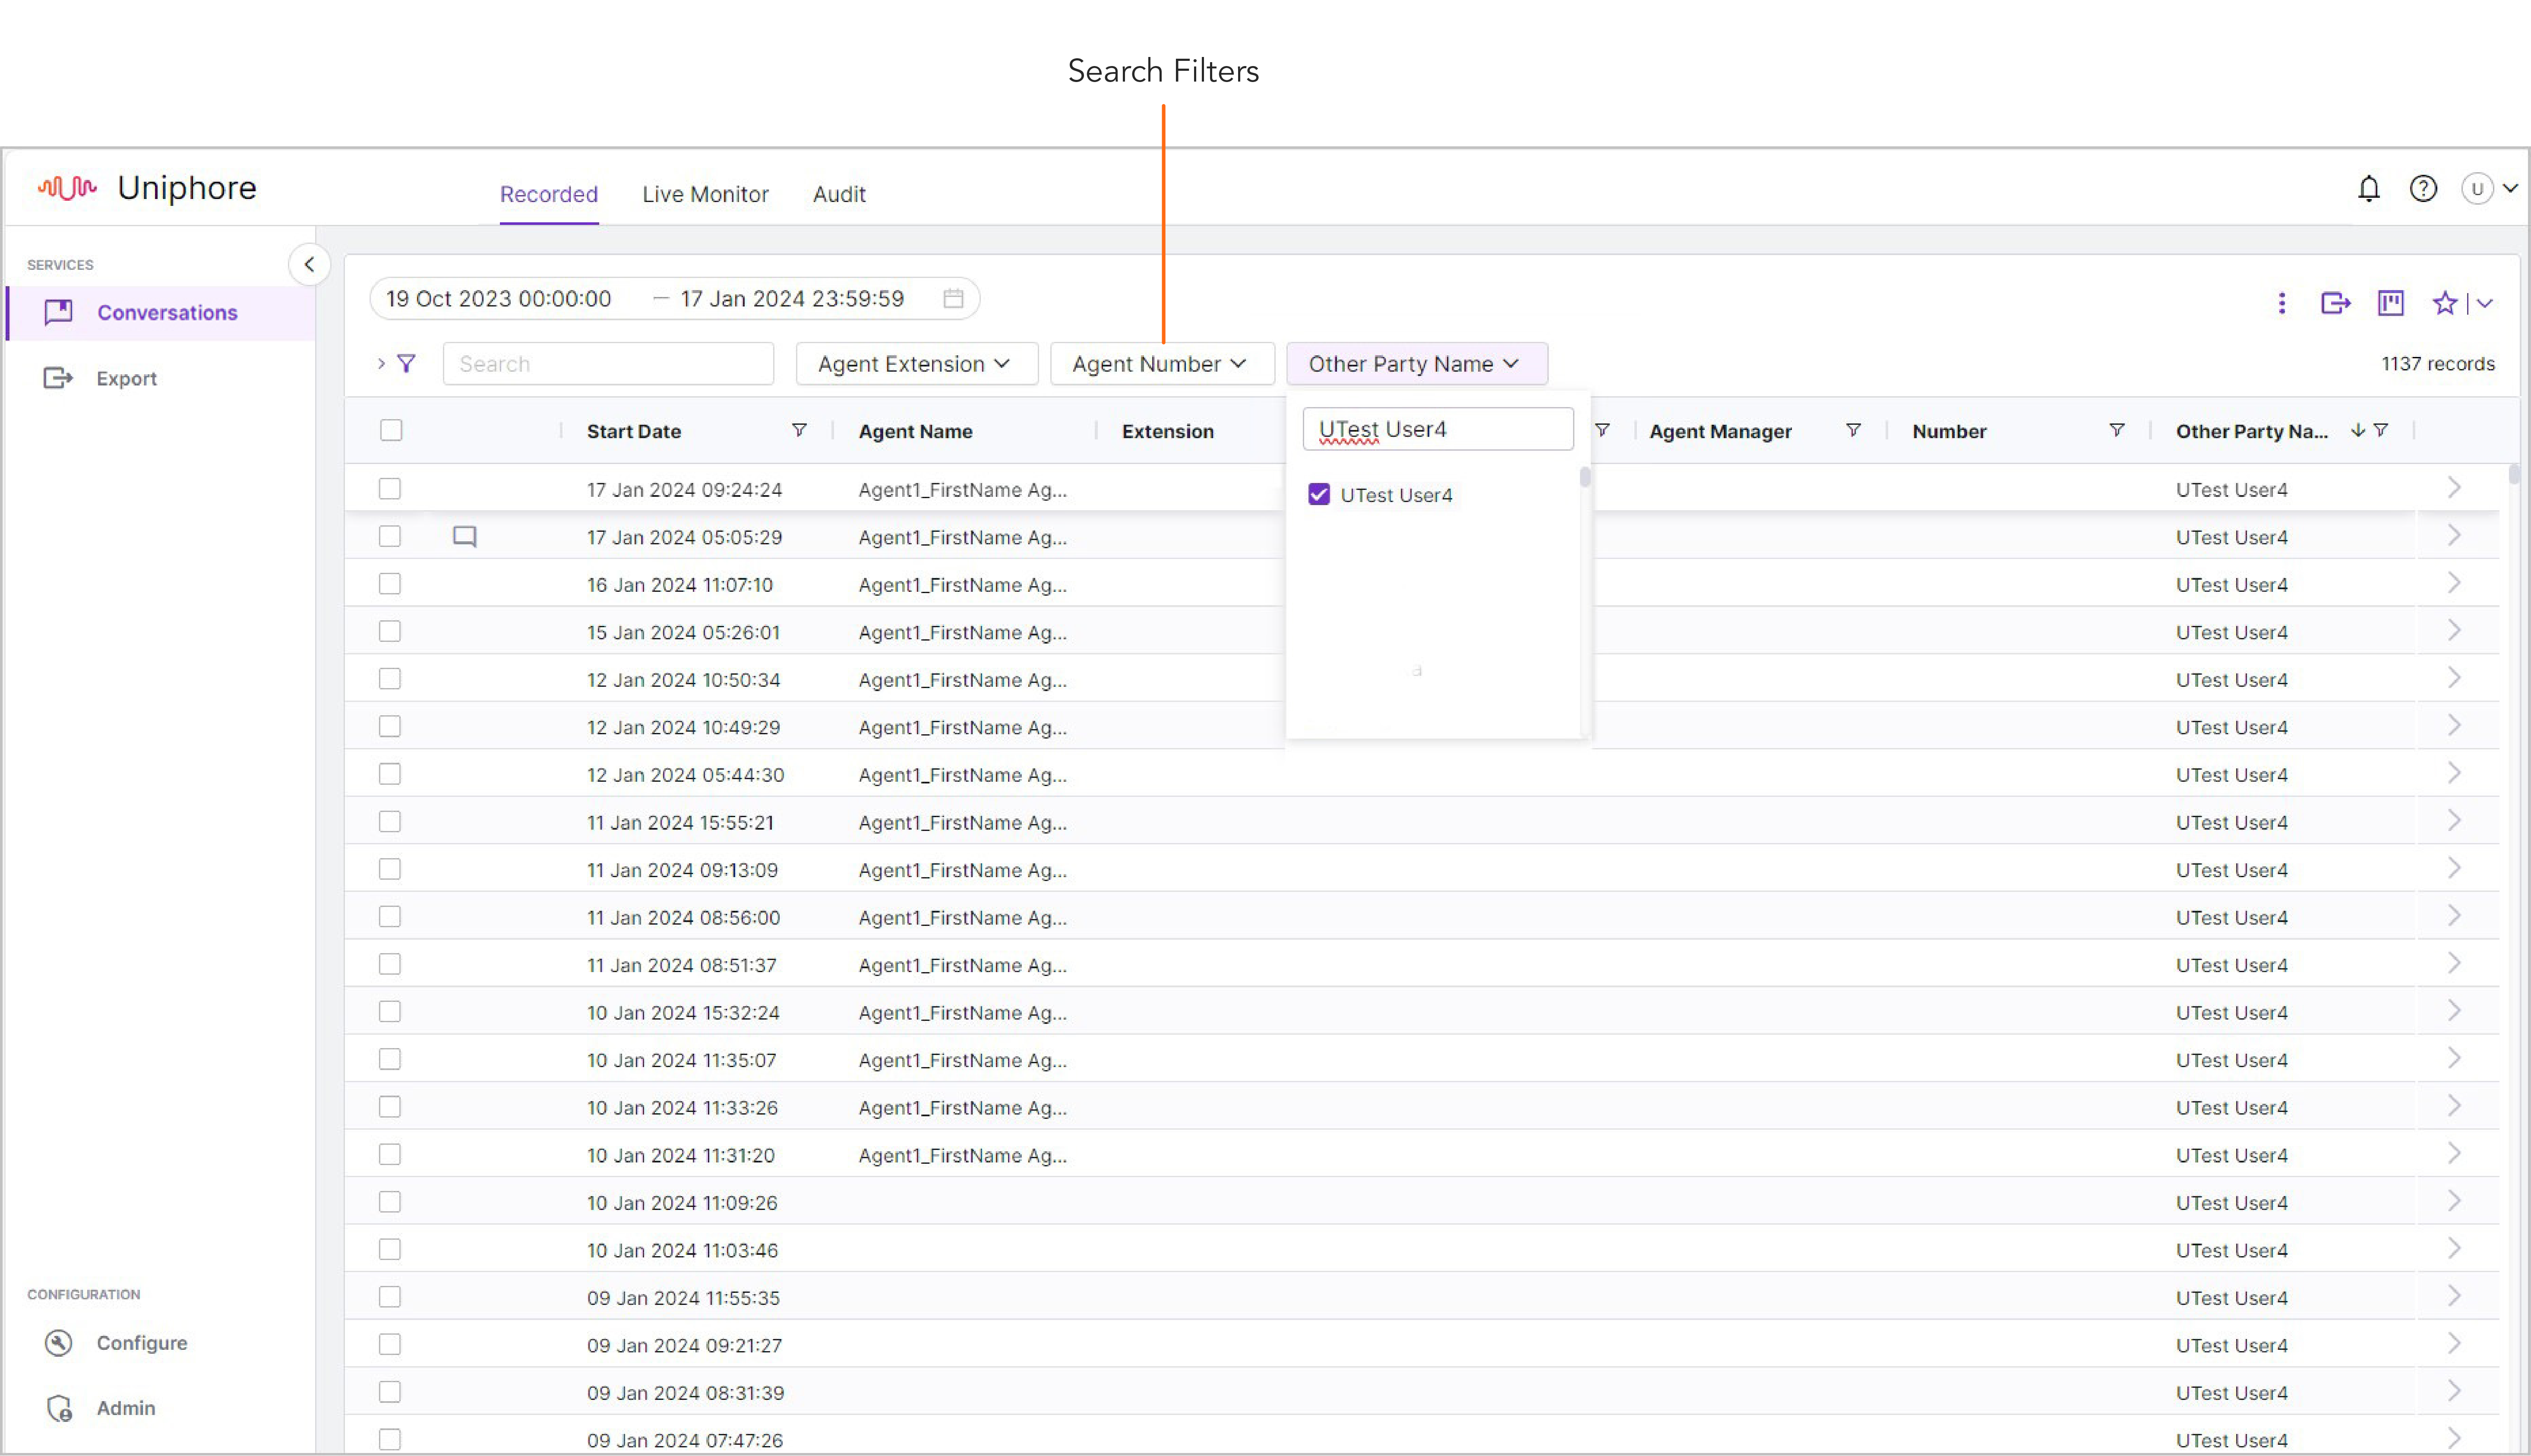
Using Search Bar Filters
Simple filters to start with:
Filter search results using filters on the search bar:
|
Note
If authorised, you can select the filter types for your Search bar – click Configure > System > Search Filters in the side menu, and set the status of the filter (Enable or Disable), or rearrange their order.
Using Advanced Search Filters
You can create your own detailed advanced search to get the specific results you need. Here you can add multiple filters (using any metadata field), multiple conditions, and group and structure your filters. If you’d like a reminder of general search logic, see Search Rules.
Use advanced Search Filters:
|
Search Rules
Search logic is pretty straightforward, but at the same time allows you to set up very complex searches. Here are the rules/guidelines to help you create your own advanced searches:
Filter: A filter defines what type of data you want to search, what data you want to search for, and what condition the search should be regarded as a match.
Condition: Defines what condition the search should regard as a match. For example, contains the number 384 anywhere in a data field, or exactly match (equals) the number 384 .
Group: AND/OR work as search operators. The simple graphic below illustrates how each of them work. In this example you have three searches – A, B, and C.
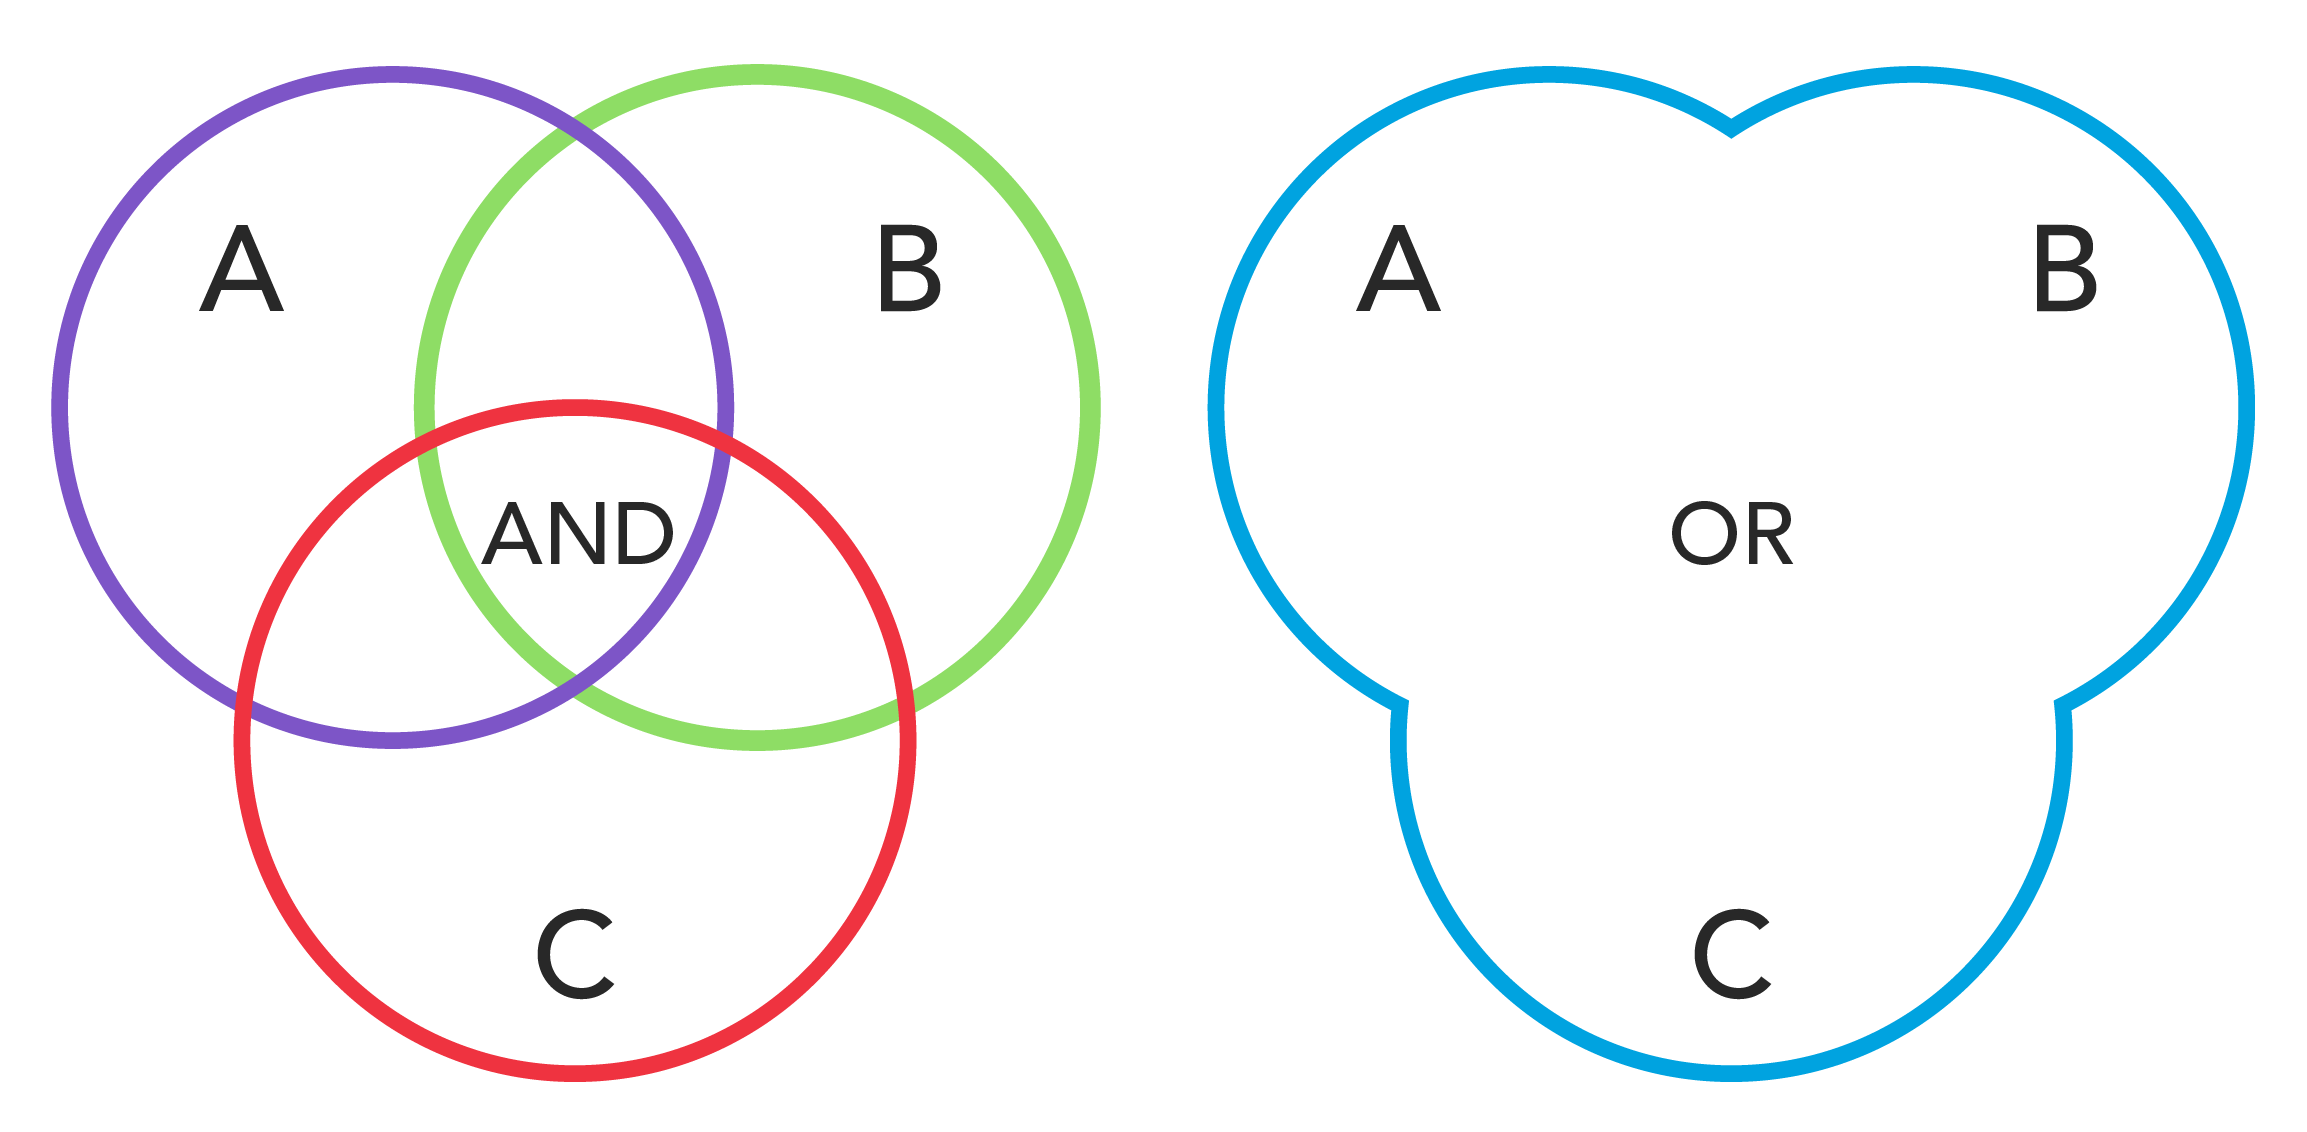 |
When you apply an AND to the searches you’re basically saying the recording must match everything you’re searching for in A AND B AND C (the piece in the middle where all three circles overlap).
When you apply an OR to the searches you’re basically saying the recording can match anything you’re searching for in A OR B OR C (anywhere, in any circle).
You can apply the AND and OR operators to multiple conditions as well as filters. For example, you could search for recordings to/from the Sales Team AND Pre-Sales Team.
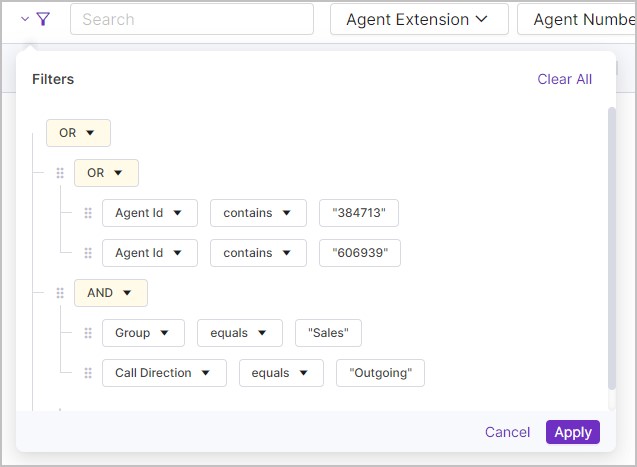
Group (Nest) Filters: A little bit more complex, but still pretty straightforward. Whenever you group a set of filters together using AND/OR, you’re basically saying search for all these things first and provide the result, then combine the result with any other filters you’ve defined. So in the example below, I grouped all calls from two agents using OR, then grouped a call Group filter (Sales) and a Call Direction filter (Outgoing) with AND to give me all Outgoing calls from the Sales team, using OR at the top means my results would provide all calls by either agent (Agent 384713 OR Agent 606939) as well as any outgoing sales calls.
 |
Search Results View
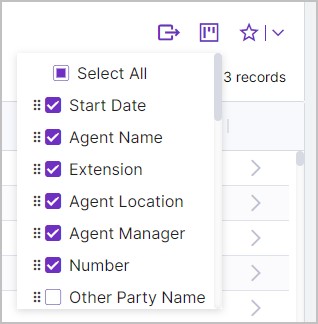
Your search results view can be edited to only show the information important to you at the time, this is managed by controlling which order data is displayed in and which data to omit from the results.
Note
If you remove columns from your search results and then export the metadata of selected calls, the export will not be limited to the columns visible in your search results, and instead the export will contain all the captured metadata for those calls.
Remove or Change the order of columns from your search results:
NoteYou can go back into the Column Reorder menu to tweak your display further, any unticked columns will remain where you left them so you don't have to go and find them again if you want them back. TipYou can change the width of your columns by clicking and dragging the column separator to the left of the column title. |
 |
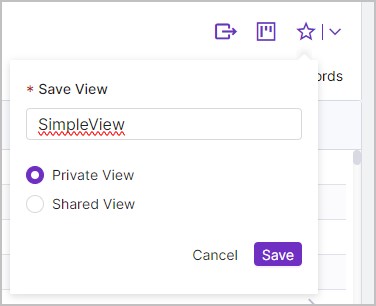
Save View and Load View When you're happy with your Search View you may want to save it for later, you can save it for others to use or just for you. To save a View:
To load a View:
NoteIf you want to delete a View, simply click the Delete icon to the right of the saved View, you will be prompted for confirmation before the view is deleted. 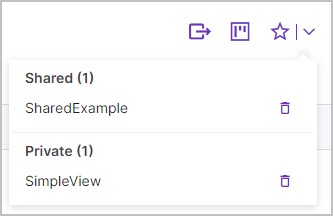 |