Integrating Text-to-Speech Services
X‑Platform supports integration with external text-to-speech (T2S) communications services, enabling you to convert input text to audio that can be heard by users during a voice-based conversation.
The Intelligent Assistant (IA) identifies a customer's language and submits the relevant texts to your selected service provider. Following real-time analysis and synthesis by the provider, an audio file is returned for playback over the phone.
The following audio file specifications are currently supported:
Waveform Audio File (WAV) encoded as LPCM with a sample rate of 8K Mono.
Depending on the T2S service you configure, you can also select the voice style that will be used for the playback. For details, click here.
X‑Platform supports direct integration with Google Text-to-Speech service. You can also define custom integrations as required.
Adding a T2S Integration to Your Account
From the Account menu section in the X-Console, select Integrations. The Integrations page is displayed, listing third-party vendor integrations that can be configured for the account:
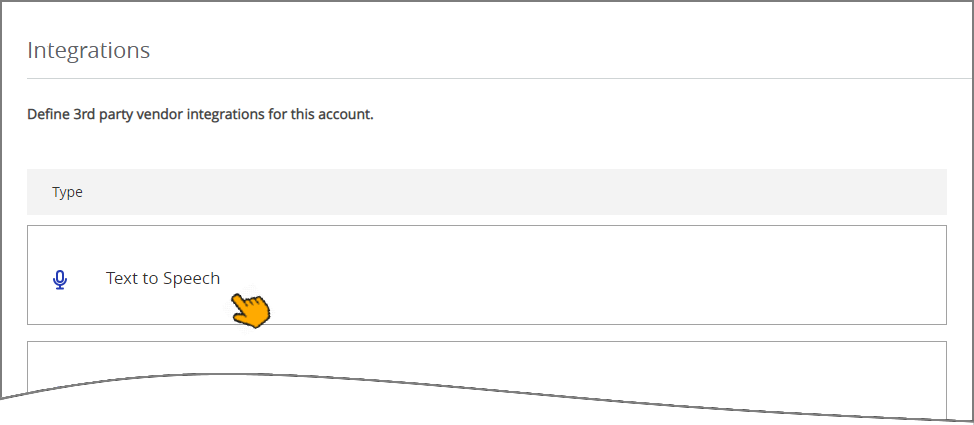
Click Text-to-Speech. The Text-to-Speech integrations page is displayed, listing all current T2S integrations for the account.
At the top left of the page, click Add T2S Integration. The New Integration page is displayed:
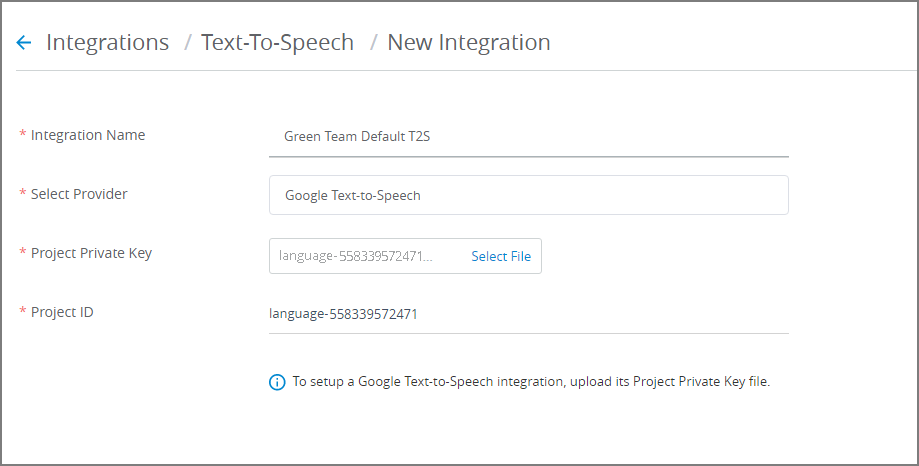
In the Integration Name field, enter a unique name for the new T2S integration.
From the Select Provider drop-down, select the T2S provider for this integration:
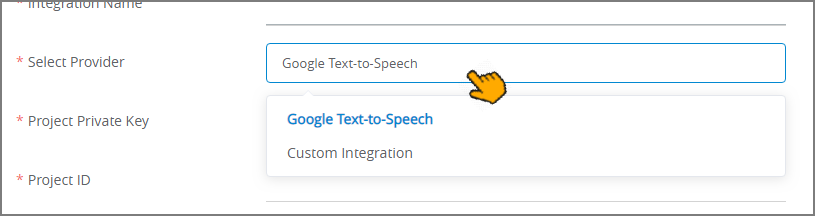
Google Text-to-Speech. This is X‑Platform's built-in T2S service provider.
Custom Integration. If you select this option, continue the configuration here.
The Google Text-to-Speech option is selected by default.
In the Project Private Key field, browse for the unique key file that was created using the Google Cloud Platform's Service Accounts page. This is the .json file that securely identifies the corresponding T2S project for API access. (For detailed information on how to create the Project Private Key file, see Google Text-to-Speech documentation.)
The value of the Project ID field will be entered automatically when you assign the Project Private Key file.
When you are finished, click Save in the lower right corner of the panel. You can exit the operation at anytime without saving the new Integration by clicking Cancel.
In order for a new T2S integration to work during runtime, you need to associate it with the IA Domain that will use it for playback. For complete details, click here.
Adding a Custom T2S Integration
X‑Platform supports integration with custom Text-to-Speech services.
Note
To configure a custom integration, you need to have the POST URL, Header and Body code that were provided by your T2S provider.
When you click the Custom Integration option from the Select Provider drop-down list, the following New Integration dialog is displayed:
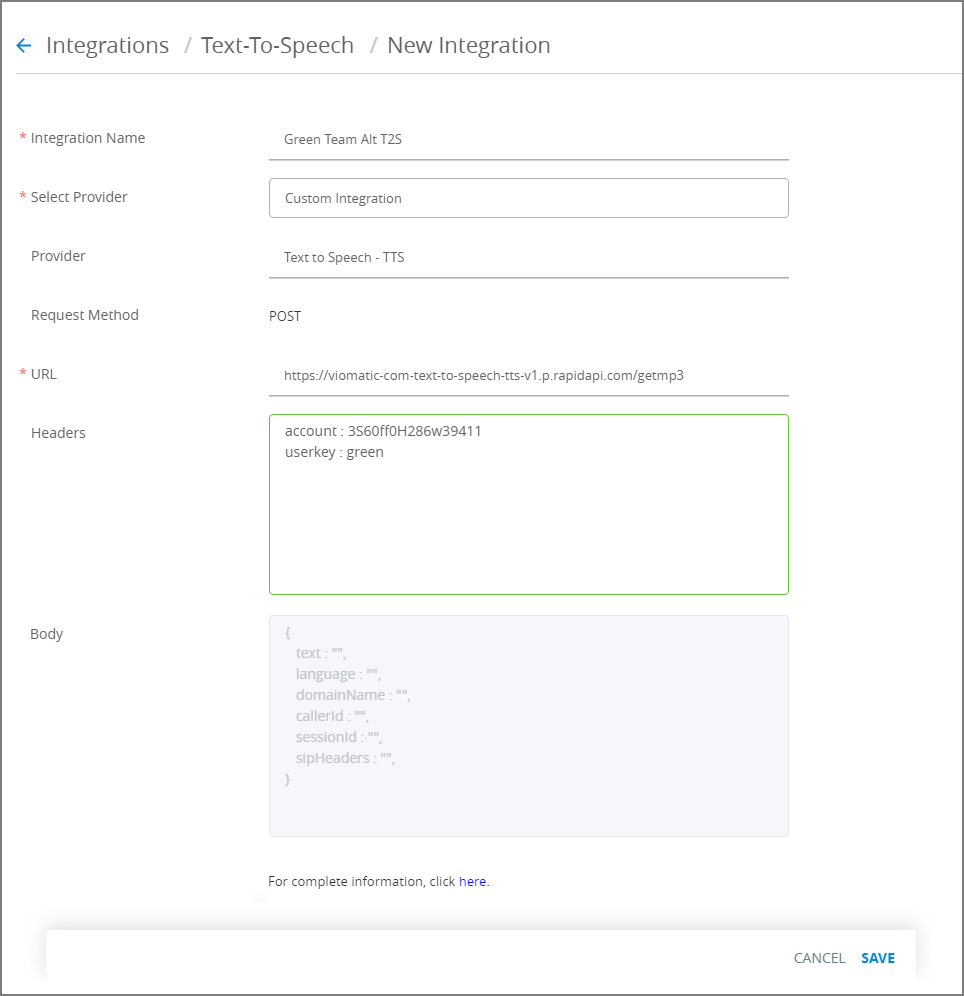
In the Provider field, enter a name for your T2S provider.
In the URL field, enter or paste the POST URL that you received from your T2S provider. This URL is used by the running Flow to send text for conversion to speech.
In the Headers field, optionally enter Header assignments for your T2S provider.
The Body field cannot be edited. The built-in JSON template is used to pass key information to your T2S provider, as required.
Built-in JSON keys include:
text - The text phrase to pass to the T2S provider.
language - The language to use for T2S.
domainName - The name of the current IA Domain.
callerId - The phone number used for the conversation, if applicable.
sessionId - The unique session identifier for the conversation.
sipHeaders - Session initiation protocol (SIP) headers for the conversation.
When you are finished, click Save in the lower right corner of the panel. You can exit the operation at anytime without saving the new Integration by clicking Cancel.
In order for a new T2S integration to work during runtime, you need to associate it with the IA Domain that will use it for playback. For complete details, click here.
Editing a T2S Integration
From the Integrations page, click the Name link of the relevant integration. The selected integration page is displayed.
Update settings on the page, as required. For details, click here.
Note
You cannot change the Provider that was selected when the integration was created. To change the Provider, you will need to create a new integration.
At the lower right corner of the page, click Save. When all entries are valid, a confirmation message is displayed. To exit editing at anytime without saving changes, click Cancel.