Deploying Between Environments in Your Account (Legacy)
The Deployment Wizard supports deployment of complete legacy environments and also import/export of selected account resources for sharing with other accounts, or as a backup.
Important
The Deployment Wizard is a legacy facility intended only for use on X‑Platform versions earlier than Release 2023.4. For subsequent releases, please use the Resources Deployment facility. For complete details, click here.
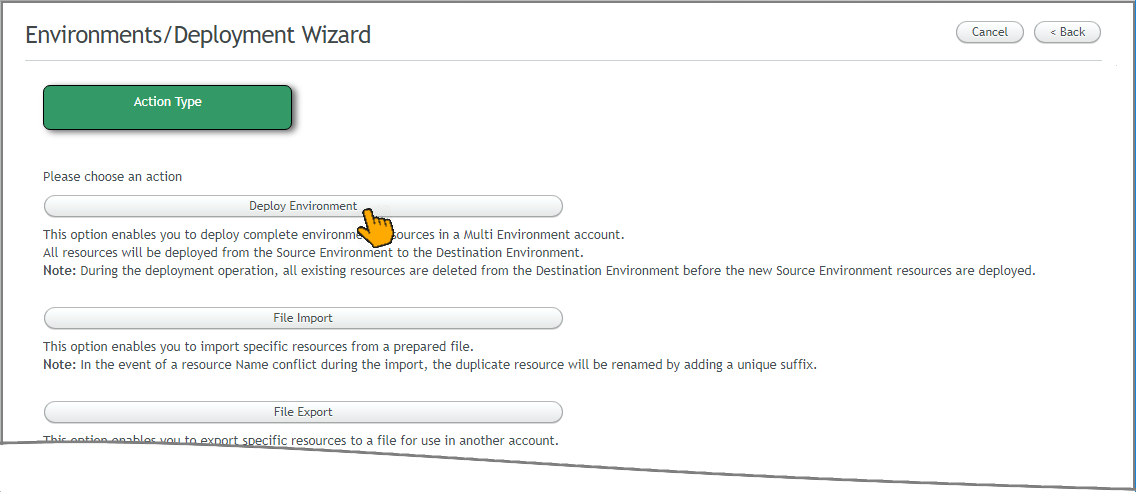
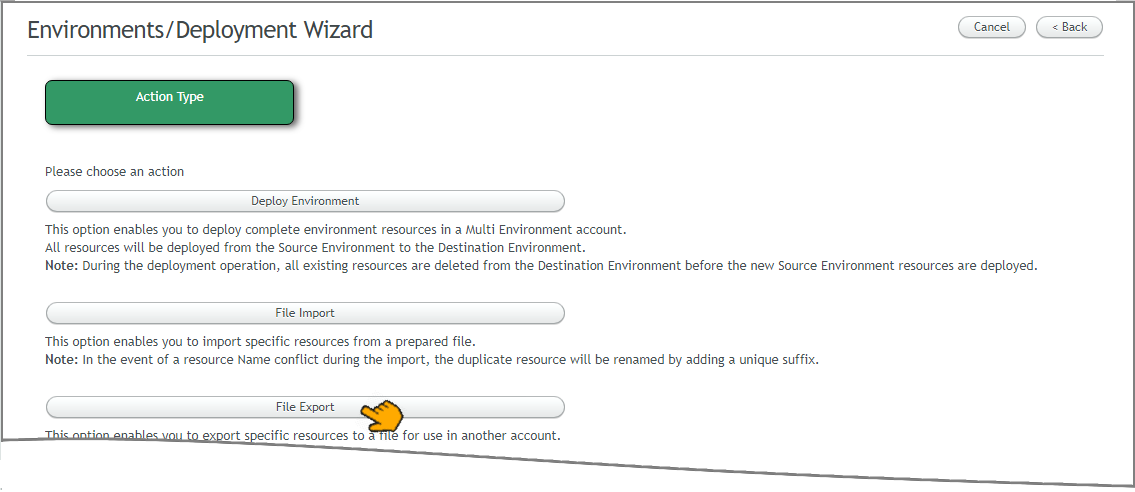
The Deployment Wizard provides the following deployment options:
Deploy Complete Environments. Enables Account Admins (or higher) to deploy all resources between active Environments in the account. During the deployment operation, all existing resources are deleted from the Destination Environment. Complete Source Environment resources are deployed.
Import from File. Enables Flow Admins (or higher) to import specific resources from a previously prepared file. In the event of a resource Name conflict during the import, the duplicate resource will be renamed by adding a unique suffix.
Export to File. Enables Flow Admins (or higher) to export specific resources to a file for use in this or another account.
In some scenarios, you may want to use the Resources Deployment facility to transfer specified resources, instead of the Deployment Wizard.
Note
An Account Admin (or higher role) can also deploy resources from a selected Snapshot. Click here for details on this option.
Accessing the Deployment Wizard
From the Admin Console Account menu, select Deployments (Legacy). The Deployments page is displayed.
Note
If the Deployments (Legacy) menu item is not listed, contact your Uniphore Support representative to enable this functionality.
Click Deployment Wizard to start the deployment process.
Deploying Complete Environments
Account Admins (or higher) can use the Deployment Wizard to quickly transfer complete resources between environments. In the example below, we'll deploy resources from the PROD to the DEV environment.
Of course, the Wizard enables you to deploy between any of the environments in the account, according to your needs.
Note
You cannot perform deployment to an unlocked TEST environment.
With the Deployment Wizard active, click Deploy Environment:
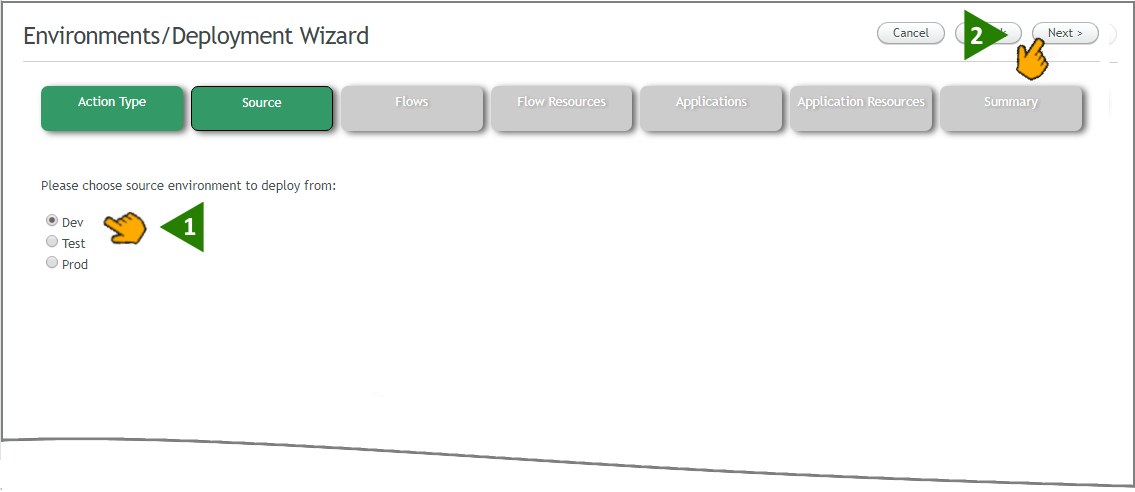
The Source page of the Wizard is displayed.
For our example, click Dev. Then click Next:
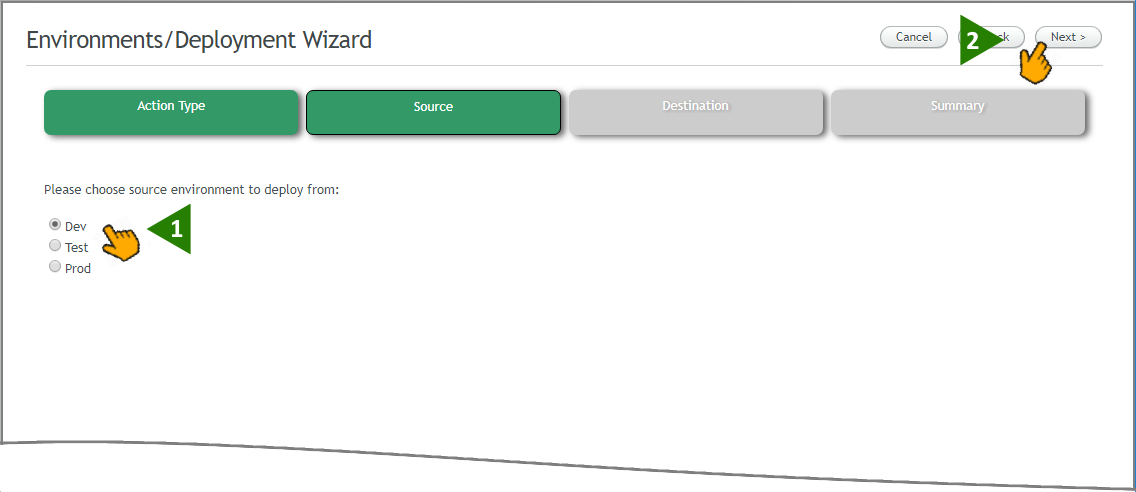
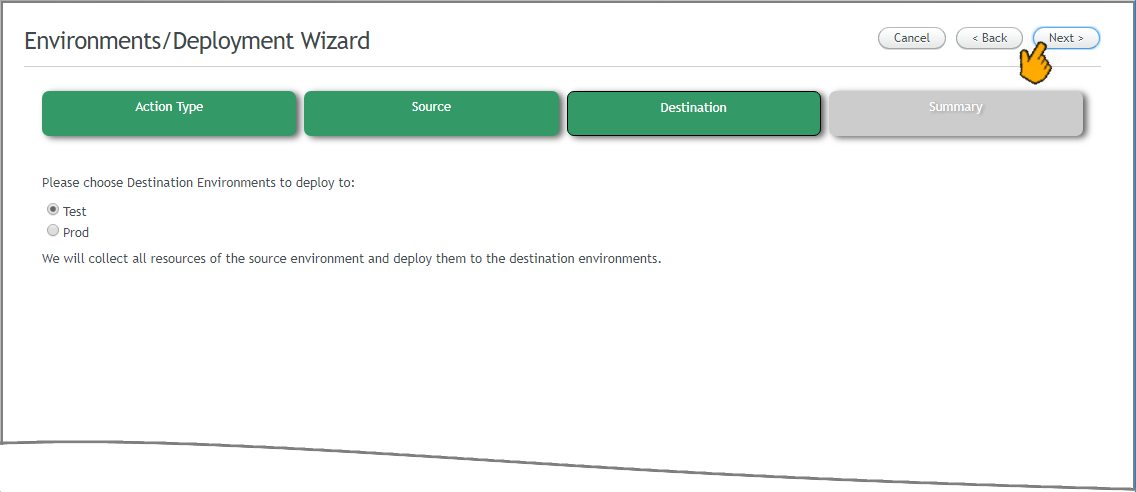
The Destination page of the Wizard is displayed.
For our example, select the Test checkbox. (Note that only one Destination can be selected for each deployment.) Then click Next at the upper right corner of the page:
Note
When performing a deployment operation from TEST to PROD or from PROD to TEST, all existing resources are deleted from the Destination Environment. The wizard creates a backup snapshot of the existing environment before deletion is performed.
When performing a deployment operation with DEV as the Destination Environment, any Flow versions stored in Draft status are not deleted.
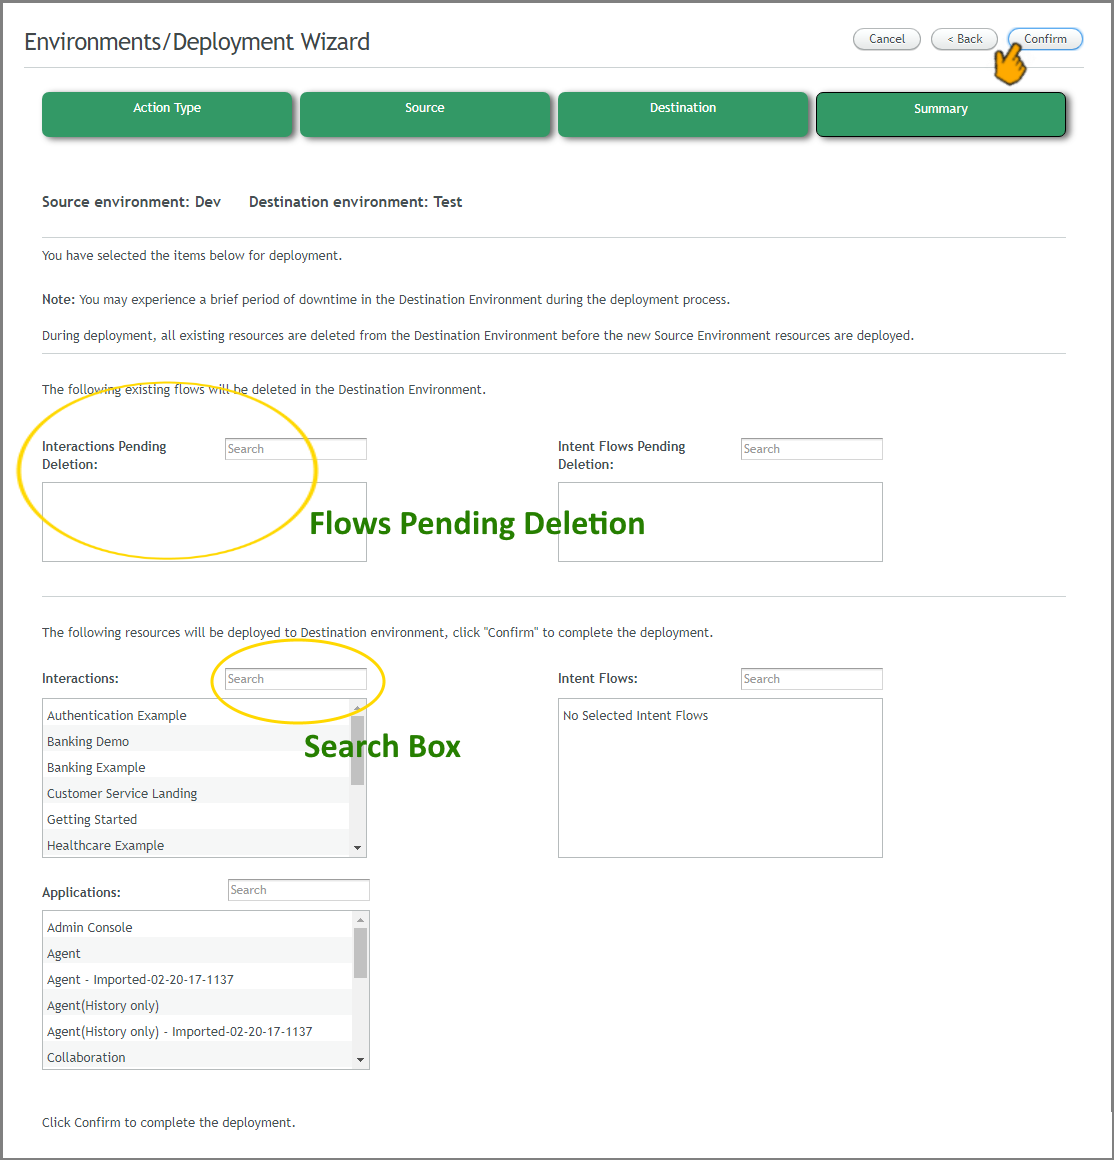
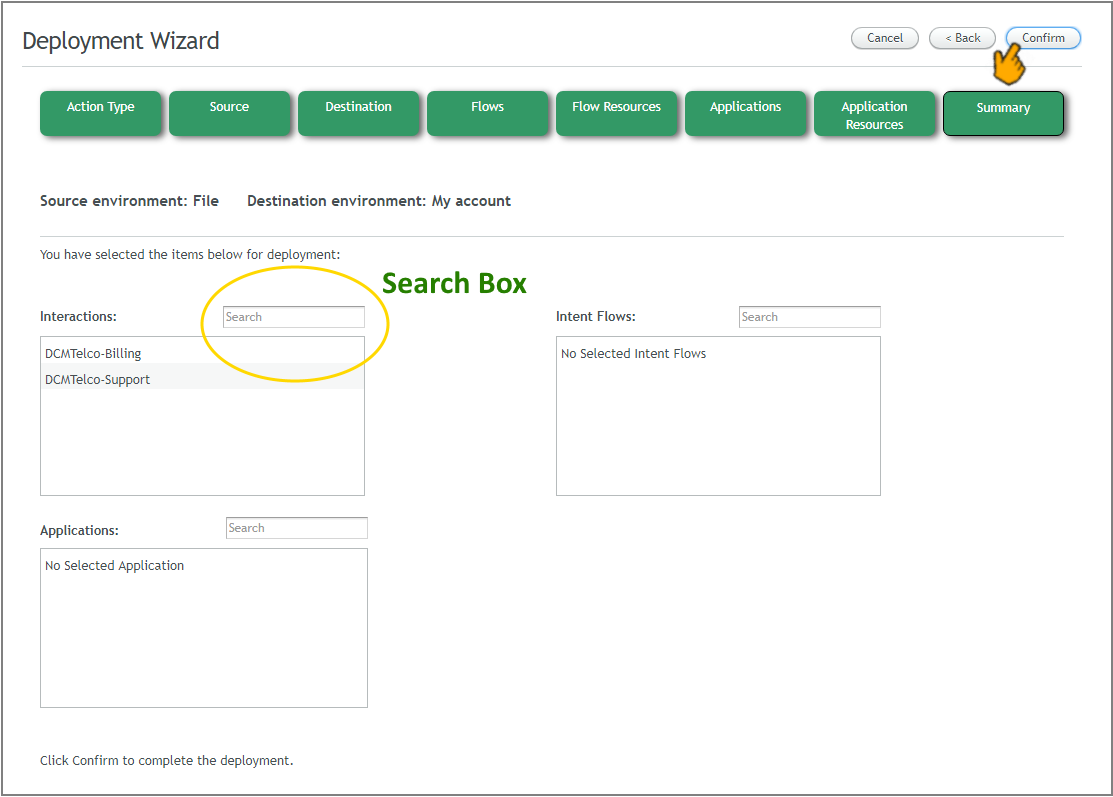
The Summary page is displayed, showing the deployment parameters you have selected.
The Summary page displays a list of all Flows that will be deleted when the deployment is performed. Review the list carefully before proceeding.
In addition, the Summary page displays scrollable lists of all Flows and Applications that will be deployed. To search a list, simply enter a few letters from the name of the item you wish to find into the Search box.
After reviewing the Summary lists, click Confirm at the upper right corner of the page to execute deployment:
All resources will be deployed to the Destination Environment. Upon completion, a confirmation message is displayed:
Important
If Environment Variables are already defined in the Destination Environment, they will not be overwritten. If Environment Variables are not yet defined in the Destination Environment, then the variables present in the Source Environment will be deployed as regular Session Variables.
Import from File
Caution
Deployment exports that were created prior to Release 14.0 are not compatible with Release 14.0 and subsequent releases, therefore it is not possible to perform imports using these components. For more information and guidance, contact your Uniphore support representative.
Importing from a file enables Flow Admins (or higher) to deploy specific elements from a prepared file. Always use the exported .zip file that was created using the Export function.
When you import resources from the prepared file, there is no attempt to perform a synchronization between old and new resources. Should a resource Name conflict occur during the import, the duplicate resource will be preserved and renamed by adding a unique suffix to its name.
With the Deployment Wizard active, click File Import:
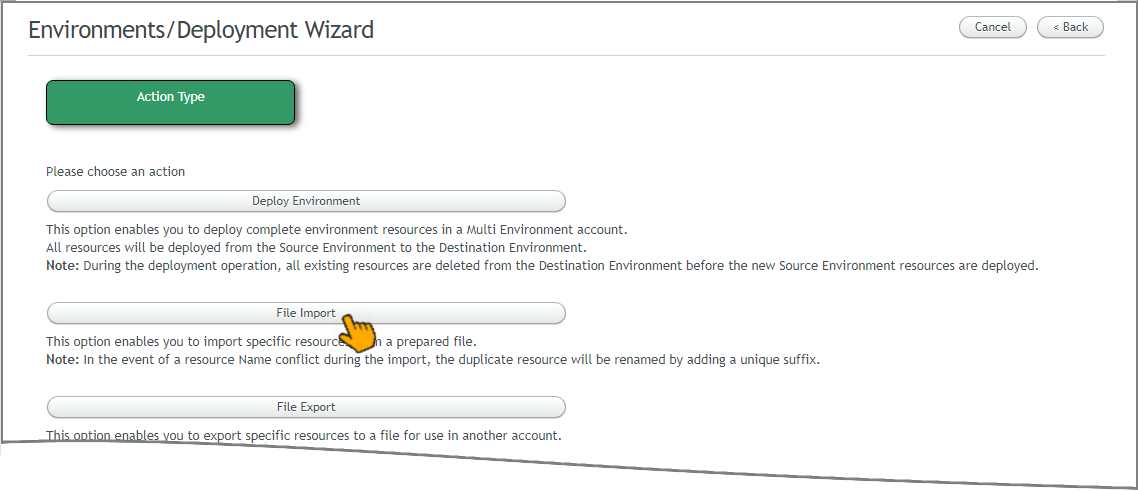
The Source page of the Wizard is displayed.
Click on the file selector dialog button to browse for the .zip file that you wish to import to the account:
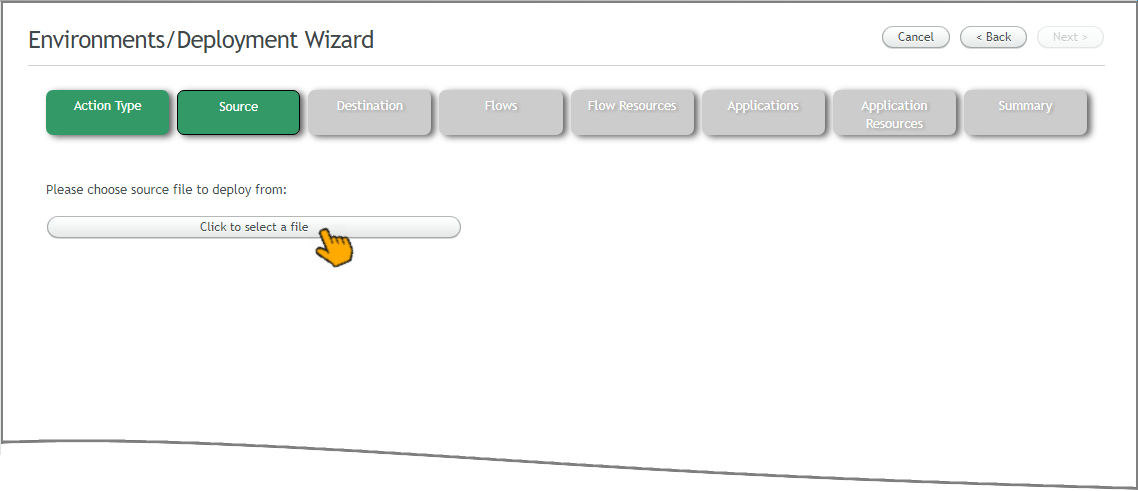
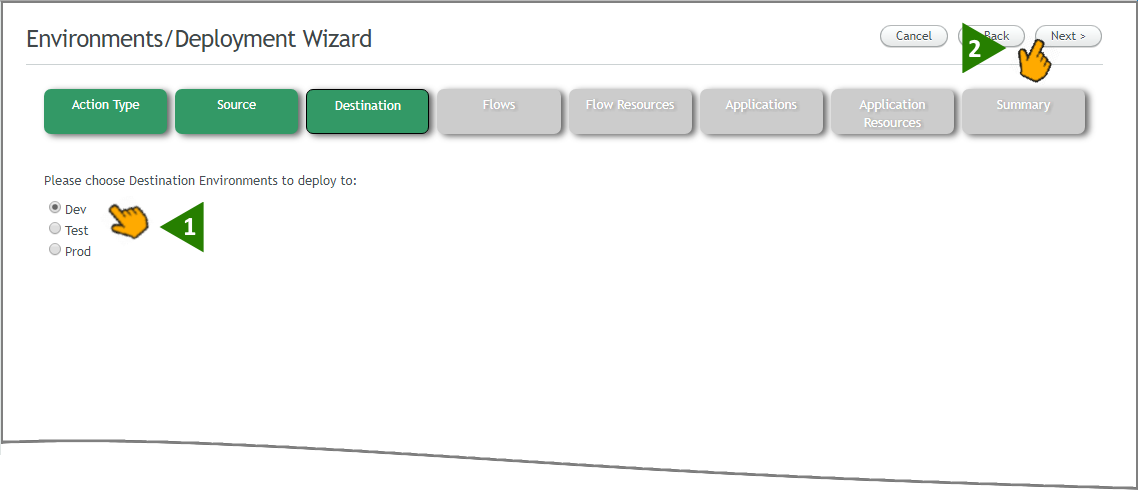
When you have selected the file, click Open. The Destination page is displayed.
For our example, select Dev. (Note that only one Destination can be selected for each deployment.) Then click Next at the upper right corner of the page:
The Flows page is displayed, listing all Flows contained in the file you have selected.
Click Next at the upper right corner of the page. The Flows page is displayed, listing all Flows contained in the file you have selected:
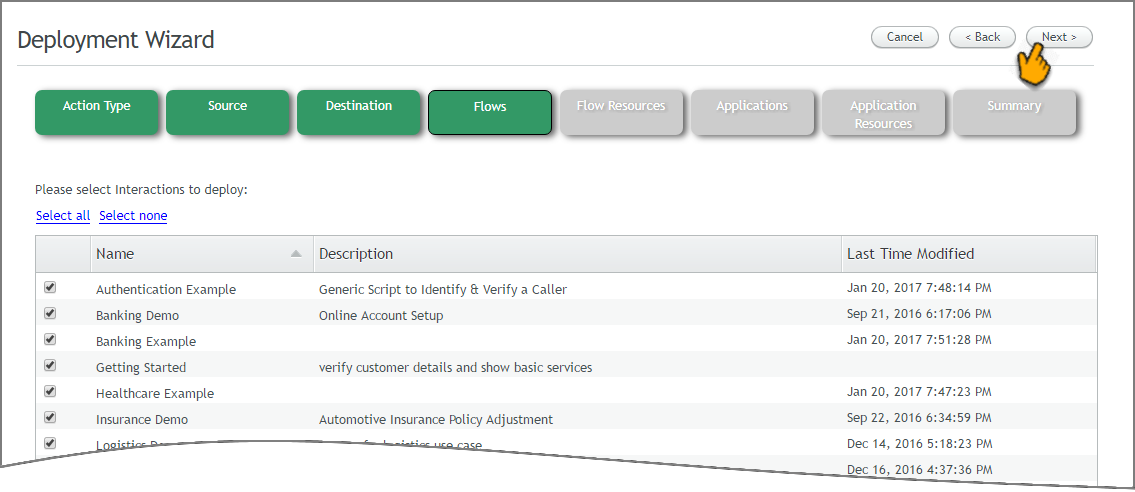
Use the checkboxes at the left side of the page to select the Flows you wish to import.
Note
For this and subsequent steps, if you do not wish to import a specific element or associated resource, ensure that the relevant checkbox(es) is not selected
Imported Flows are always assigned Draft status by default, regardless of their status in the prepared package.
When finished click Next. The Flow Resources page is displayed:
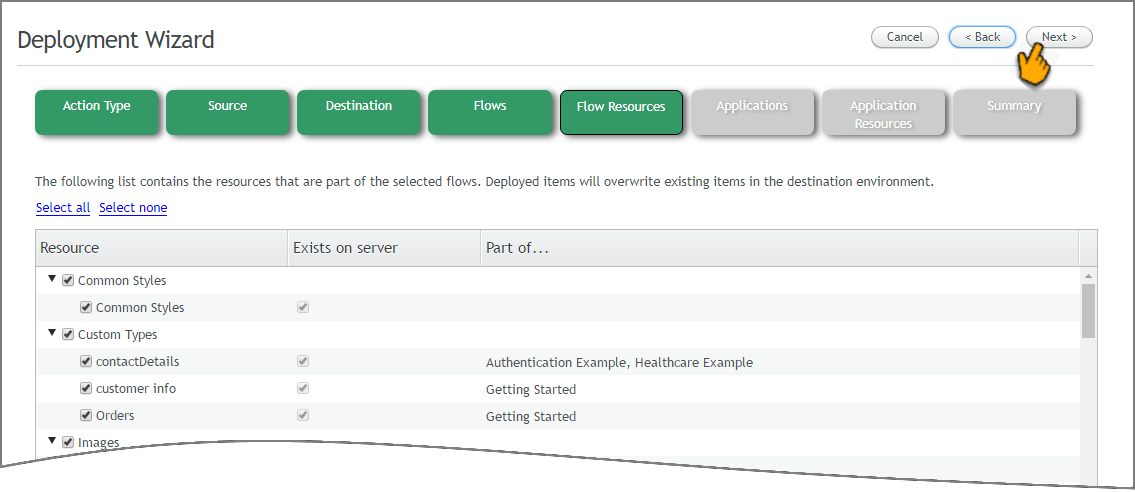
Select the Flow Resources you wish to import.
Note
The resources required by the elements that you have chosen are automatically selected by default.
When finished, click Next. The Applications page is displayed:
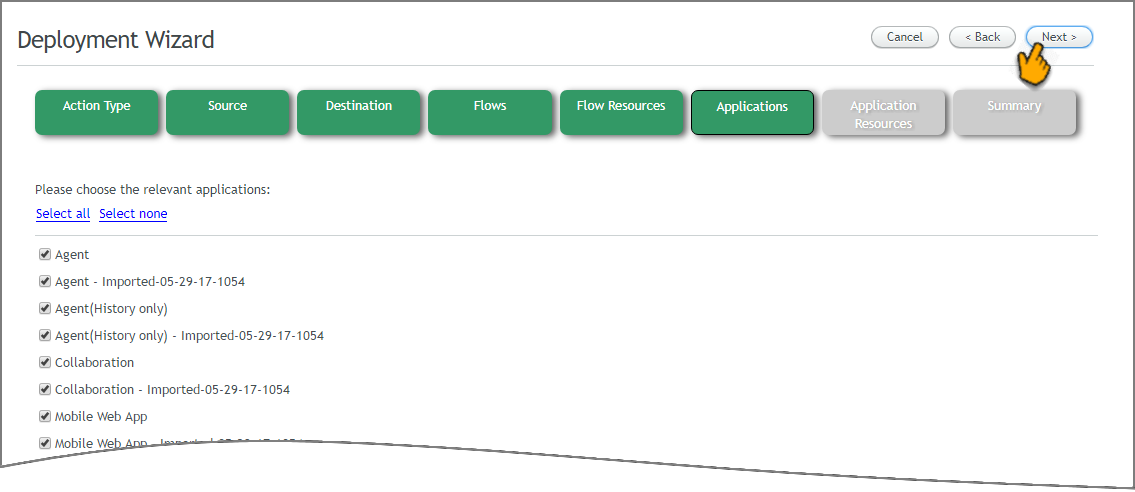
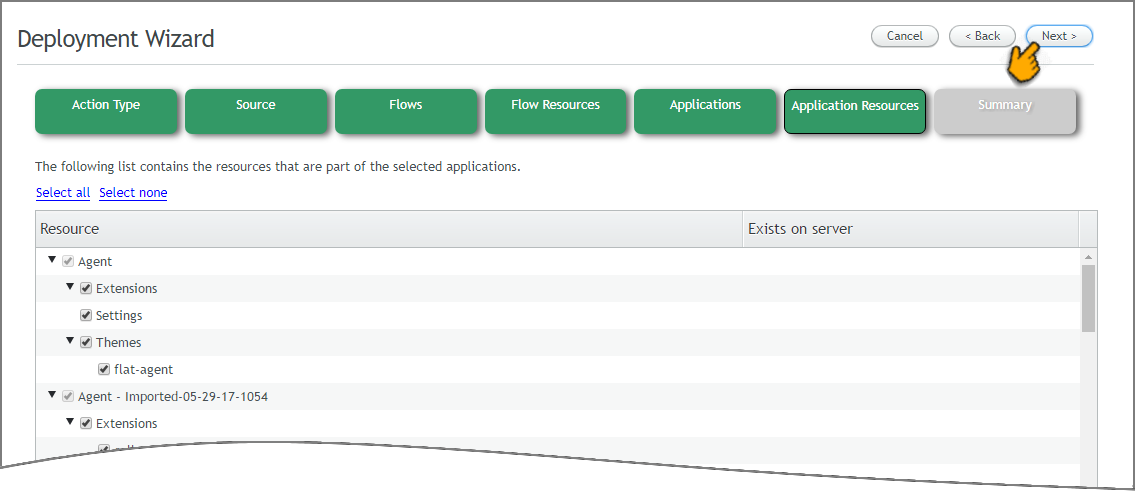
Select the Applications you wish to import and click Next. The Application Resources page is displayed:
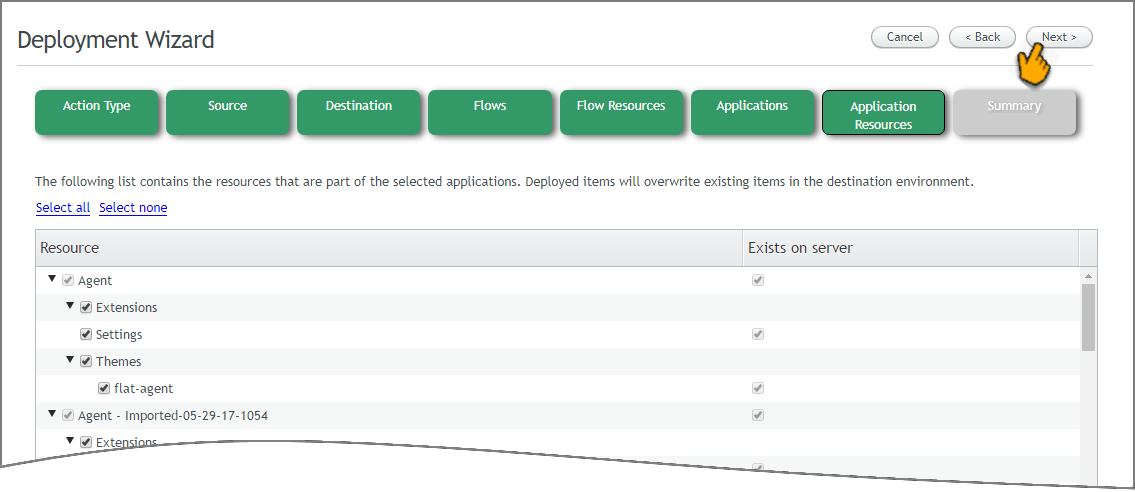
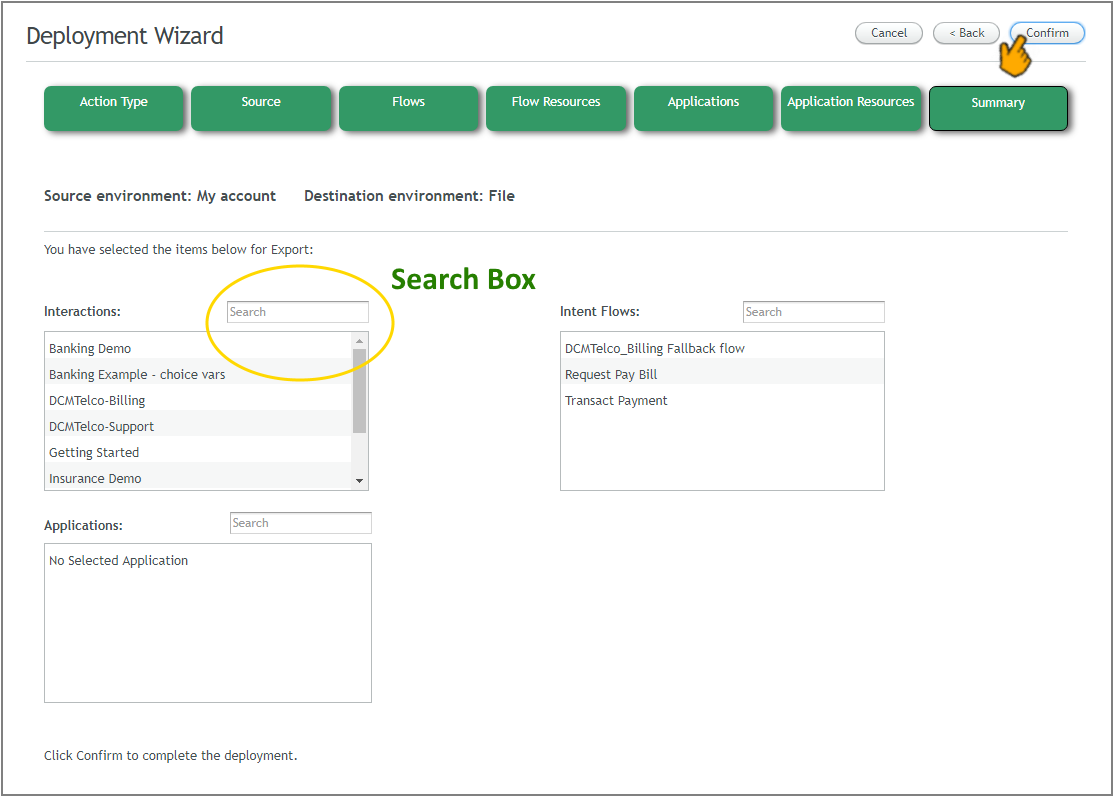
Select the Application Resources you wish to import and click Next. The Summary page is displayed:
The Summary page displays scrollable lists of all Flows and Applications that will be imported. To search a list, simply enter a few letters from the name of the item you wish to find into the Search box.
After reviewing the Summary lists, click Confirm at the upper right corner of the page to import the selected resources.
When the import operation is complete, a confirmation message is displayed:

The selected resources are now in the account.
Export to File
Flow Admins (or higher) can export all elements in an account or specific ones, according to your selection. The resulting .zip file is then used to deploy the elements to another environment or another account, or serve as a backup.
Important
NLP data for the Intelligent Assistant is not transferred using the import or export mechanisms. To transfer NLP data, use the Environment Deployment Wizard.
With the Deployment Wizard active, click File Export:
The Source page of the Wizard is displayed.
Select the Source Environment to be used for the exported elements. For our example, click Dev. Then click Next:
Click Next at the upper right corner of the page. The Flows page is displayed, listing all published Flows in your account.

Use the checkboxes at the left side of the page to select the Flows you wish to export. (Approved versions will be exported. If the selection is a Draft, the most recent Draft version is automatically exported.) When finished click Next. The Flow Resources page is displayed, listing all of the resources that are associated with the Flows you have selected:

Select the Flow Resources you wish to export and click Next. The Applications page is displayed:
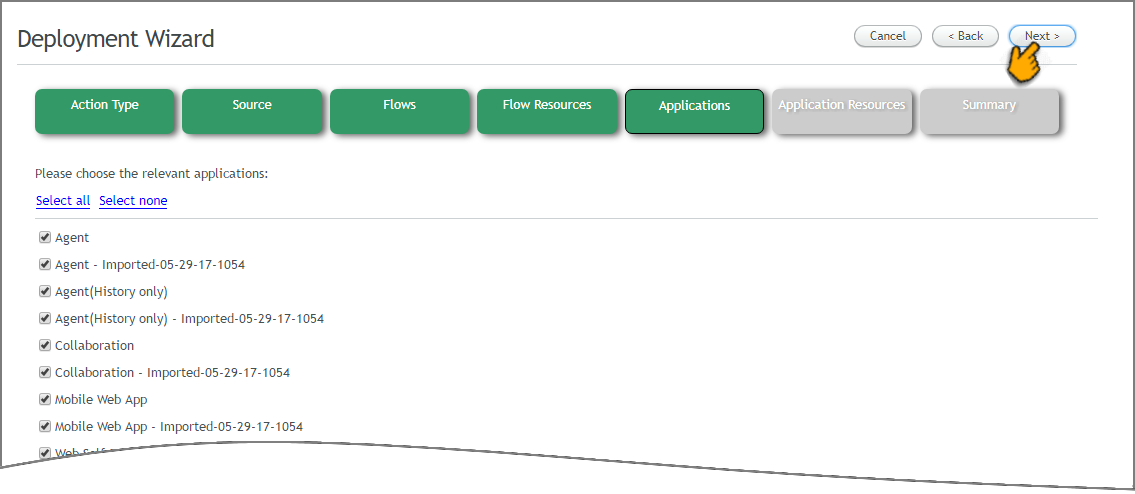
Select the Applications you wish to export and click Next. The Application Resources page is displayed:
Select the Application Resources you wish to export and click Next. The Summary page is displayed:
The Summary page displays scrollable lists of all Flows and Applications that will be exported. To search a list, simply enter a few letters from the name of the item you wish to find into the Search box.
After reviewing the Summary lists, click Confirm at the upper right corner of the page to export the selected resources.
When the export operation is complete, a download dialog is displayed:
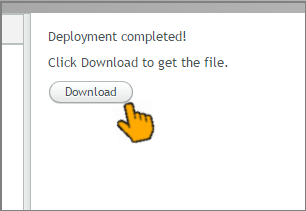
Click Download. The exported file will be saved to your Downloads folder. You can copy this file for backup purposes, or send it to someone in another account for their use.