Creating a U-Self Serve Virtual Agent
To create a Virtual Agent in U-Self Serve:
From the U-Self Serve menu section in the Admin Console, select AI Model. The AI Model page is displayed.
At the top of the page, click Create Virtual Agent. The Create Virtual Agent page is displayed:
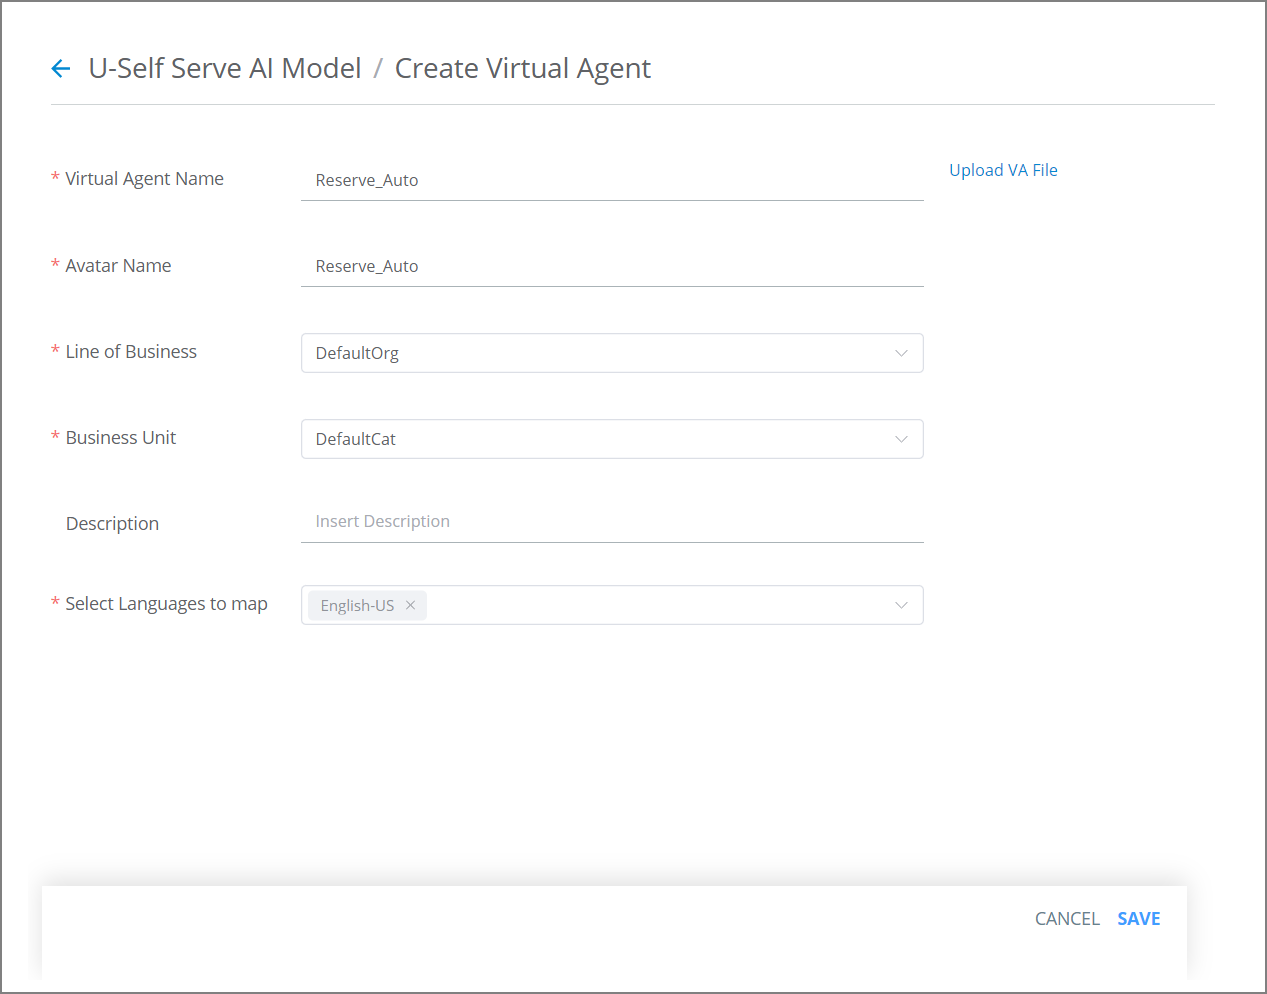
In the Virtual Agent Name field, enter a unique name for the new VA.
You can also use Upload a VA File to a create new Virtual Agent.
In the Avatar Name field, enter the name of the Avatar that will be used for the new VA.
From the Line of Business drop down list, select the Line of Business (LOB) for this VA, Example: Healthcare, Banking, Insurance, etc.
From the Business Unit drop down list, select the associated LOB Business Unit for this VA. Each LOB can have its own unique list of Business Units.
In the Description , optionally enter some helpful descriptive text about the Virtual Agent.
From the Languages drop down list, select the languages that can be used with the VA. Multiple Languages can be mapped to a Virtual Agent.
At the lower right corner of the page, click Save. A confirmation message appears and the new Virtual Agent is added to the list.
Uploading a VA File
You can upload a previously defined VA, along with its Intents, Entities and Training Phrases, using the Upload VA file option. For example, you might want to upload a VA from another LOB or from a previous version of U-Self Serve.
Note
You can use a file that is exported from NLU Version page (containing earlier Version History) as your VA upload file.
Ensure that your previously defined VA file is ready. The VA file must be in its original ZIP format.
To the right of the VA Name, click Upload VA File.
From your local device, browse for and select the desired VA file. The file upload process begins.
When the file upload process completes successfully, click Save. The new VA is added to your VA list.