Configuring SAML Authentication
Uniphore supports authenticating users of your account and applications using an SAML 2.0 framework.
Security Assertion Markup Language (SAML) is a protocol used by a service provider to authenticate users via a trusted identity provider, communicating via digitally signed XML files. SAML supports single sign-on (SSO) capabilities.
You can also map any X‑Platform Role to an SAML Group.
In order to use SAML 2.0, you must first pre-configure the relevant servers. For additional information, click here.
Settings for Legacy Configuration
These settings are relevant for configurations prior to Release 2023.3.
You access SAML parameters from the Authentication Settings page, either:
globally for your account, or
from a specific application.
From the Authentication Type dropdown, select SAML. The SAML Settings panel is displayed:
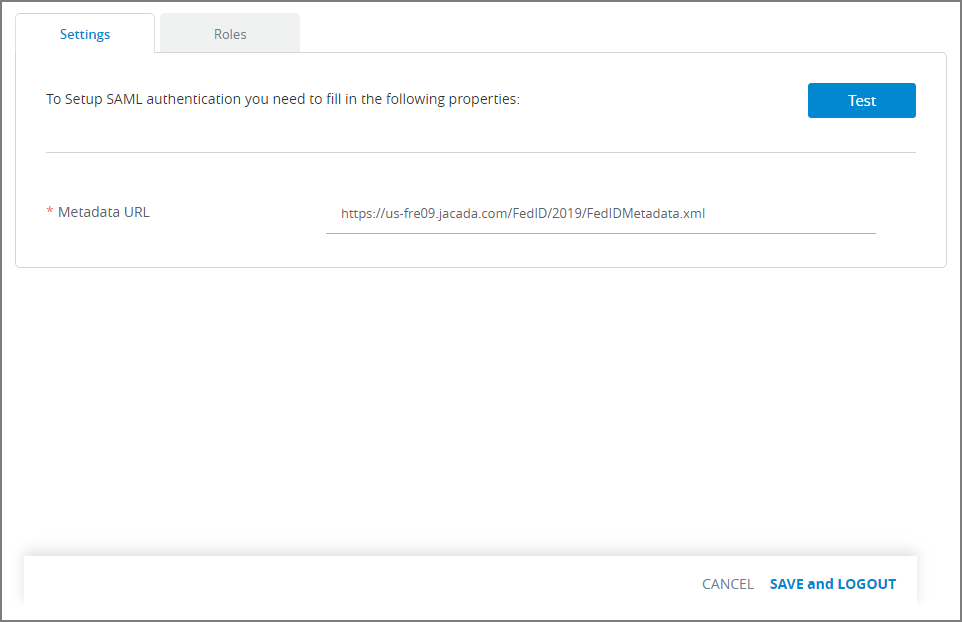
In the Metadata URL field, enter the URL path (supplied by the Identity Provider) that will be used for the SAML authentication process. For example:
https://us-fre09.jacada.com/FedID/2019/metadata. The name of a XML metadata file may optionally be added.Click Test at the upper right of the Settings panel. When your entries are valid, the message Connection Test Succeeded will be displayed.
Click the Roles tab. The SAML Roles panel is displayed:
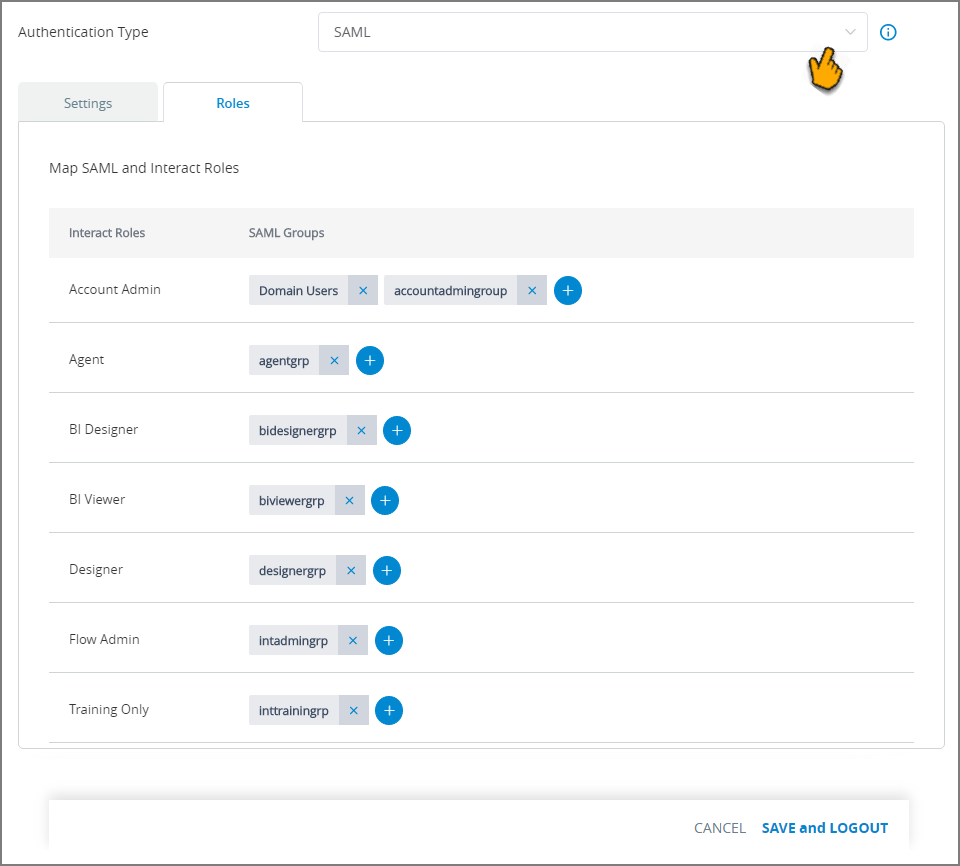
On this panel, you map one or more X‑Platform Roles to your pre-defined SAML Groups. For each Role displayed, click the Plus
 icon and enter the name of one or more SAML Groups that will be mapped to it.
As shown in the example above, both System and Custom Roles are supported.
To remove an existing Group, click on the X next to its name.
When you finish entering SAML settings:
If you are configuring SAML globally for the account, click Save and Logout. The settings will be saved, and you will be logged out of the account. You will need log in again in order for the new SAML authentication method to become effective.
If you are configuring SAML for a specific application, click Save. The new settings will be stored, and you can move to another panel to continue configuration as needed.
After you have configured SAML for the account or specific application, the relevant SAML login screen is displayed to a user when logging in (not the standard X‑Platform login screen).
Settings for Auth0 Configuration
These settings are relevant for configurations that utilize Auth0 authentication (Release 2023.3 and later).
When Auth0 is active, SAML parameters can only be configured globally from the Authentication Settings page. Configuring the authentication settings for individual applications is not supported.
Important
Before configuring SAML when Auth0 is used, the customer must add several pre-requisite SAML attributes to their Identity Provider platform. For a detailed example, click here.
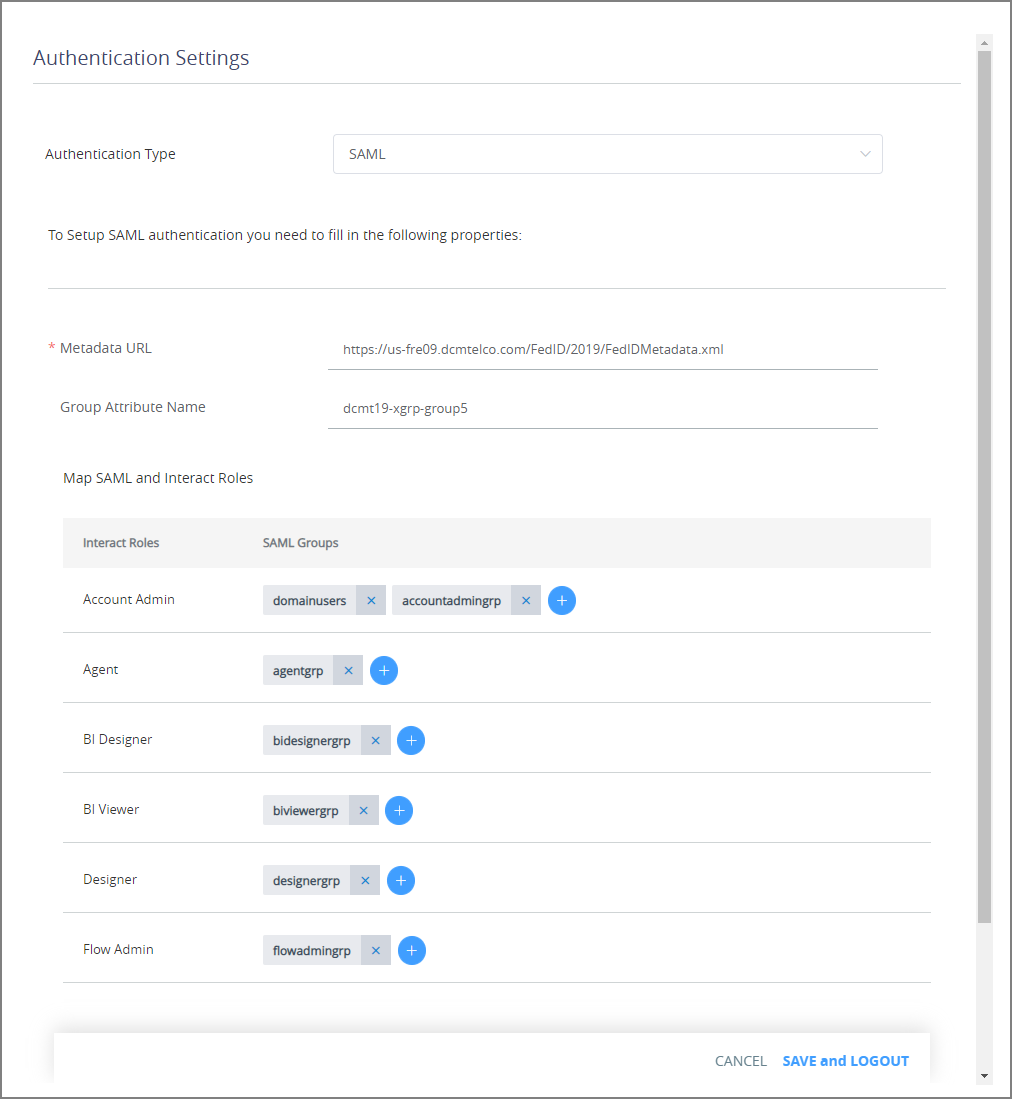
From the Authentication Type dropdown, select either SAML or Both. The SAML Configuration panel is displayed:
If you selected Both, you can optionally activate the Enable multi-factor authentication toggle. For more details about configuring MFA, click here.
In the Metadata URL field, enter the URL path (supplied by the Identity Provider) that will be used for the SAML authentication process. The name of a XML metadata file may optionally be added.
In the Group Attribute Name field, enter the unique name or URL that identifies the user group for authentication in the Identity Provider. For example:
http://schemas.xmlsoap.org/claims/Group.In the AI Agent Id Attribute Name field, enter the unique name or URL that identifies an Agent's ID for authentication in the Identity Provider. For example:
http://schemas.xmlsoap.org/claims/aiAgentId.Optionally, in the Station Code Attribute Name field, enter the unique name or URL that identifies an Agent's Station Code for authentication in the Identity Provider. For example:
http://schemas.xmlsoap.org/claims/stationCode.In the Map SAML and X‑Platform Roles section, map one or more X‑Platform Roles to your pre-defined SAML Groups. For each Role displayed, click the Plus
icon and enter the name of one or more SAML Groups that will be mapped to it.To remove an existing Group, click on the X next to its name.
When you finish entering SAML settings:
If you are configuring SAML globally for the account, click Save and Logout. The settings will be saved, and you will be logged out of the account. You will need log in again in order for the new SAML authentication method to become effective.
If you are configuring SAML for a specific application, click Save. The new settings will be stored, and you can move to another panel to continue configuration as needed.
After you have configured SAML for the account or specific application, the relevant SAML login screen is displayed to a user when logging in (not the standard X‑Platform login screen).
Server Pre-Configuration for SAML
Before configuring SAML 2.0, you must:
create and install the required security certificates for SAML 2.0 messages and SSL; and
configure the application server, web server or front-end load balancer to accept requests on the SSL port.
Note
Consult with your Uniphore Account Admin to obtain the correct SAML configuration parameters for your chosen Identify Provider.
Following are typical parameters used for server pre-configuration:
Name and Parameter | Description |
|---|---|
Entity ID
| The trust identifier that the SAML server will use to uniquely identify this X‑Platform account. The Account Admin should provide this to the person who provisions the SAML server. It is generated automatically by X-Console. |
X‑Platform Server End Points POST:
Artifact:
| The X‑Platform Server Assertion Consumer service endpoint to be used by the SAML server. The Account Admin should provide this to the person who provisions the SAML server. |
Signature Algorithm
| The secure hash algorithm method that the SAML server will use for its signature. |
Metadata URL Examples: Okta
Azure
| The URL path for Identity Provider metadata. This metadata contains information for integrating with the SAML server. This is supplied by your Identity Provider. |
Group Attribute Name Provider-dependent | Needed for access to Groups that will be used by X‑Platform for SAML authentication. This is supplied by the person who provisions the SAML server. |
AI Agent ID Attribute Name Required custom attribute | Used to pass the Agent ID required by X‑Platform for SAML authentication. This points to the This is a custom attribute that must be configured by the person who provisions the SAML server on the Identity Provider platform. For details, click here. |
Station Code Attribute Name Required custom attribute | Used to pass the Station Code required by X‑Platform for SAML authentication. This points to the This is a custom attribute that must be configured by the person who provisions the SAML server on the Identity Provider platform. For details, click here. |