Example SAML Configuration for Okta Platform
When the customer utilizes the external identity provider (IdP) Okta for SAML authentication, the customer's Okta administrator must use the following configuration for the relevant Okta account in order to authenticate users and grant them access to Uniphore applications accessed via Auth0.
Note
For information on how to map this configuration in X-Console SAML authentication settings, click here.
Create the Okta Integration
Login to Okta Admin Console and go to Applications > Applications.
Click Create App Integration.
Select SAML 2.0 as the Sign-in method.
Click Next.

In the General Settings panel, enter the App Name that was provided by Uniphore Support and click Next.
In the Configure SAML panel, copy or enter the Redirect URL from Auth0 that was provided by Uniphore Support into the Single sign-on URL text box.
Copy or enter the Service Provider Entity ID from Auth0 that was provided by Uniphore Support in the Audience URI text box.
In the Attribute Statements section, enter the following:
Name
Name format
Value
http://schemas.xmlsoap.org/claims/aiAgentId
Basic
user.clientId
http://schemas.xmlsoap.org/claims/stationCode
Basic
user.stationCode
In the Group Attribute Statements section, enter the following:
Name
Name format
Value
http://schemas.xmlsoap.org/claims/Group
Basic
Select Matches regex and enter (.*?).
Click Next.
In the Feedback panel, for the Question 'Are you a customer or partner?', select the option 'I'm an Okta customer adding an internal app'.
Click Finish.
After creating the SAML app integration, the SAML Signing Certificates section will be displayed on the Sign On tab.
Copy the Metadata URL
Click Sign On tab.
Copy the Metadata URL from Metadata details section:
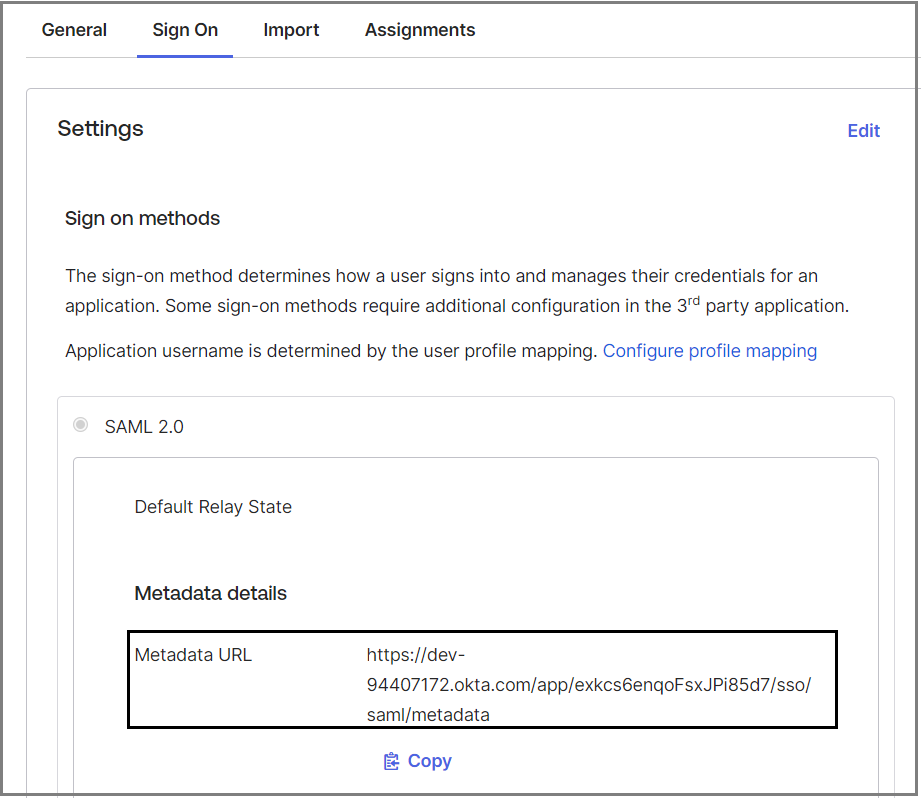
This value must be used on the X-Console SAML Authentication Settings page.
Assign Groups in the SAML Application
Following the creation of the SAML app integration, Uniphore Groups must be assigned in the SAML application.
Click Assignments tab.
Click Assign button and select Assign to Groups option.
Click Assign button in all Uniphore groups and Click Done.
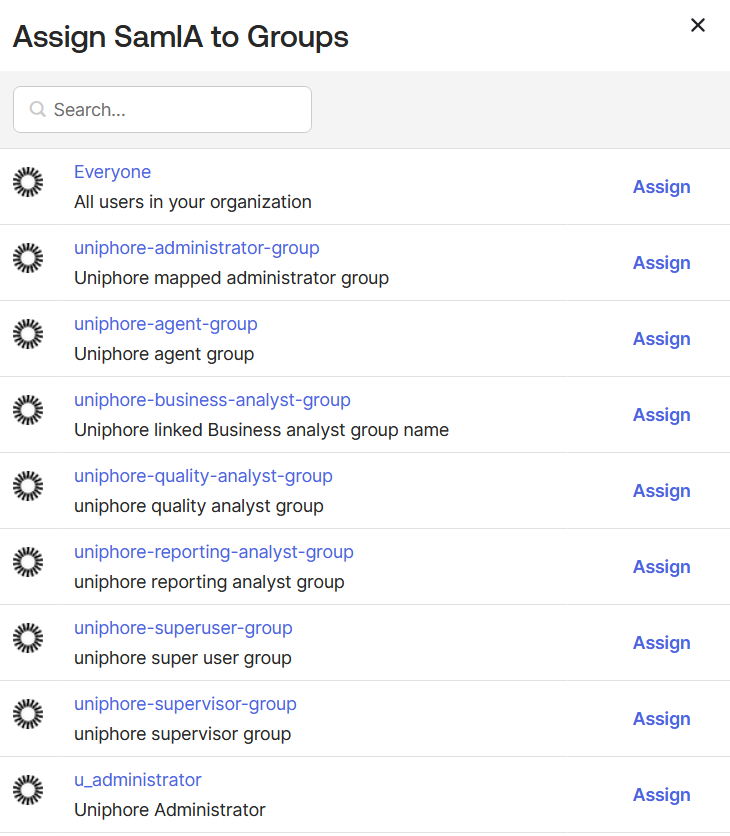
After assigning the Uniphore Groups, the Group Attribute Name value must be used on the X-Console SAML Authentication Settings page.
Create Required Custom Attributes
Several custom attributes must be added in the customer's Okta SAML app in order to pass the keys required for Uniphore authentication.
Go to Directory >Profile Editor.
Click Okta in the Filters list.
For Okta User (default), click Profile. If Profile is unavailable, click User (default).
Click Add Attribute.
For each of the following, add a required custom attribute to the Okta app:
clientId (Pointer for Uniphore AI Agent ID)
stationCode (Optional, pointer for Uniphore Station Code)
Complete the following fields:
Data type:String
Display name: Enter the custom attribute name (e.g., 'clientId').
Variable name: Enter the custom attribute name again.
Description: Enter 'Uniphore required attribute'.
Attribute Length: Enter according to the attribute:
For clientId, select Less than and enter 50.
(Optional) For stationCode, select Less than and enter 20.
For Attribute required, select the Yes checkbox.
Click Save. Perform the above steps for each custom attribute.
You can now map the Okta settings in the X-Console SAML Authentication Settings page. They will be required when Uniphore Auth0 authentication is used.