Adding RPA Event Triggers
You can add event triggers that will automatically invoke selected Flows whenever a specific RPA UI event occurs. Examples of a UI event include clicking a button, completing a text field, or closing an application window.
Triggers are a powerful way to integrate RPA Sequences into your workflows and reduce the number of dull or time-consuming tasks that must be performed routinely by Agents.
X‑Platform maintains RPA event triggers together with a specific Attended RPA application. This enables you to create unique sets of triggers for different RPA applications.
About the Triggers Page
 |
Item | Feature | Description | |
|---|---|---|---|
1 | Add Trigger | Click Add Trigger to define RPA event triggers for the selected RPA Attended application. For details, click here. | |
2 | Triggers Listing | Displays all triggers currently defined for the selected RPA Attended application, together with key parameters for each. Clicking on a Name will open an editor to enable you to make changes to that trigger. | |
3 | Activation Status | By default, a new trigger will be Active (green) when it is created. You can choose to inactivate a selected trigger at any time by clicking the Active toggle. An Inactive trigger is red. When a trigger is Inactive, X‑Platform will not perform any action that is defined for that trigger in the current application. | |
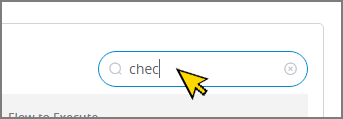
4 | Search Box | You can locate a specific trigger by entering a part of its Name or other parameter value here. All triggers that match the search value will be displayed.
| |
5 | Delete | To delete a specific trigger from the list, click the Trashcan icon | |
6 | Save | All trigger additions, changes and deletions are saved immediately. Clicking on Save will close the Triggers list. |

Working with Triggers
You assign RPA event triggers from the desired RPA Attended Application page. A RPA event trigger occurs when a specified action is taken on the selected UI element in your RPA Repository. During runtime, a built-in RPA Listener senses the triggered event and invokes the Flow that you have assigned.
From the Applications page, click the Name link of the relevant RPA Attended Application. The Details panel for the Application is displayed.
Note
Currently, only RPA Attended application channel types support event triggers.
Click the Triggers tab to display the Triggers panel.
From the top left of the panel, click Add Trigger to define a RPA event trigger for the selected application. The Add New Trigger dialog will be displayed:
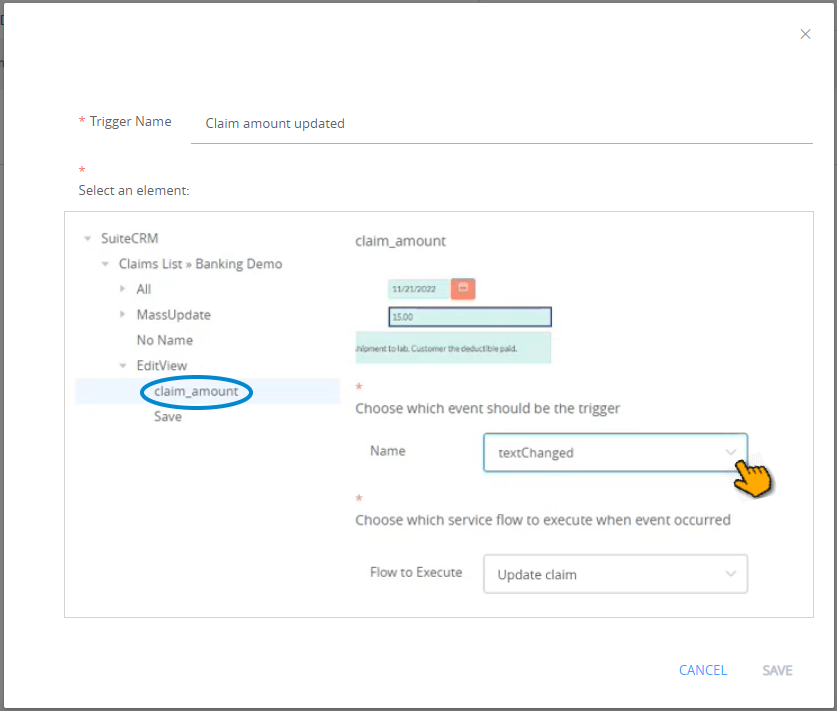
In the Trigger Name field, enter a unique name for the new trigger.
From the tree of RPA Repository elements that appears at the left side of the dialog, browse and click a UI element that will trigger a pre-defined Flow when the parent Flow is run. The selected element will be displayed on the right side of the dialog.
Hovering over an element in the tree will display its associated Repository thumbnail or a text hint, to assist you during selection.
From the Name dropdown list, select the UI action that will trigger this event. Only the actions that are available for that element will be displayed.
From the Flow to Execute dropdown list, select the Flow that will be run when the trigger event occurs. Only Service Flows that are relevant for use with event triggers will be listed.
At the lower right corner of the page, click Save. All trigger additions, changes and deletions are saved immediately and the dialog is closed. When all entries are valid, a confirmation message is displayed. To exit editing at anytime without saving changes, click Cancel.
After you have defined triggers for a RPA Attended application, event triggering will begin automatically for any Service Flows that are run by the application.
You can review example elements and flow for a simple RPA event trigger here.