Using Connectors
A connector is used to make a visual and logical connection between two steps or elements in a Flow. Connectors appear on the Flow Map as flexible blue arrows.
Connectors also indicate the direction of activity and information from one element to the next.
The number of connectors that can be drawn from or to a step or element depends on its type. The X-Designer will not allow you to draw a connector that cannot be logically connected at that location in the Flow.
Automatic Connectors
Whenever you add a new Flow step by dragging it from the toolbox and dropping it over an available step, a new connector will be drawn automatically between the two steps.
In addition, some connectors will appear automatically when you add a certain Flow steps or elements. For example, a Yes/No Selection element (available in Page and Form steps) will always be connected to two predefined exit points:
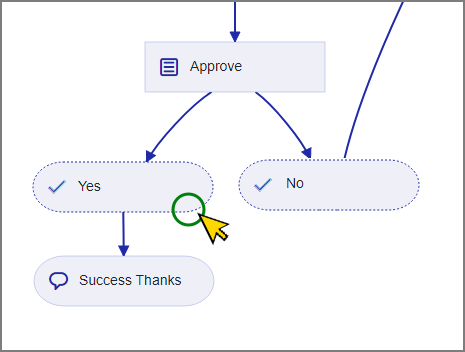 |
To make its automatic nature more clear, the X-Designer displays each predefined exit point using a dashed-line, as shown above. You cannot delete a predefined exit point or its connector.
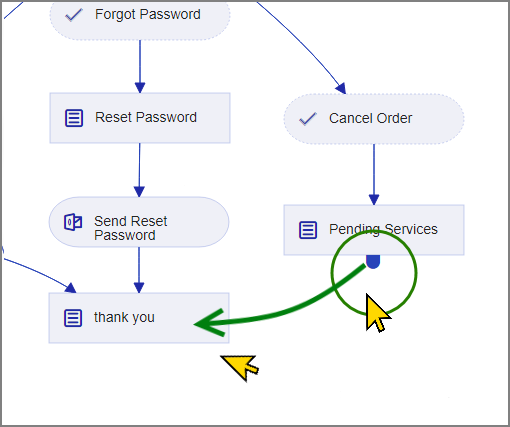
Add a Connector
Hover the mouse pointer over an existing Flow element and position the pointer over the small node that appears below the element.
Click the left mouse button and drag the cursor from the current element to the next element, and then release the mouse button. A connector is drawn between the two elements.
Delete a Connector
Hover the mouse pointer over the connector until a red X icon appears at the connector's midpoint.
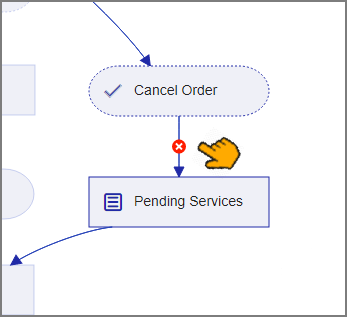
Tip
When you hover with the mouse, the two Flow elements which are associated with the connector will be highlighted for easier identification.
Click on the red X. The connector is removed.