Installation and Configuration
Installation and Configuration Steps
This topic contains detailed configuration guidelines to enable call recording for MS Teams:
Step | Reference | Description |
|---|---|---|
1 | Select the appropriate deployment assets based on the client installation requirements. | |
2 | Define the Cloud Service VM size and local storage info. | |
3 | Create and configure the resources required in a Microsoft Azure Subscription. | |
4 | Configure Microsoft Teams for the Uniphore Compliance Bot. | |
5 | Configure a resilient system (optional). | |
6 | Assign the recording policy to Active Directory objects. | |
7 | Configure the Integration Adapter on the U‑Capture Collector. | |
8 | Configure the MS Teams/Azure connection on the Collector. |
Note
Steps 1 to 6 may have already been performed by a customer.
This topic provides a number of setup and configuration steps using Microsoft admin tools and processes. These are subject to regular changes from Microsoft and although the configuration steps covered here will be maintained to ensure the correct process is followed, there may be some differences present.
Select Deployment Assets
The U‑Capture / MS Teams installation requires the following deployment assets – available from the Uniphore SFTP site.
File Type | Description |
|---|---|
| Template configuration file for the Compliance Bot. Select the |
| The Azure Cloud Service package files for the Compliance Bot. Each package represents different sizes of Cloud Service deployment (see below) select the file you need based on the client installation requirements. The filenames indicate the Cloud Service VM Size and the bot version: |
| The |
| The |
| VM Size in Azure | CPUs | Memory | Channels | Type |
|---|---|---|---|---|---|
Standard_D2_v2 | Standard D2 v2 VM | 2 | 7 GB | Up to 200 | General Purpose |
Standard_D3_v2 | Standard D3 v2 VM | 4 | 14 GB | Up to 750 | General Purpose |
Standard_D5_v2 | Standard D5 v2 VM | 16 | 56 GB | Up to 1500 | General Purpose |
Define the Cloud Service VM Details
Edit the ServiceDefinition.csdef file and configure the following settings:
Setting | Value/Description |
|---|---|
| Cloud service VM size – set to |
| Set to |
| Local storage size, in MB:
|
Provision the Microsoft Azure Subscription
The Uniphore Compliance Bot is intended to operate in Microsoft Azure – to start, go to the Azure Portal and perform each of the following steps in order.
Step | Reference |
|---|---|
1 | |
2 | |
3 | |
4 | |
5 | |
6 | |
7 | |
8 | |
9 | |
10 | |
11 | |
12 | |
13 | |
14 | |
15 |
Register Resource Providers
The Uniphore Compliance Bot requires the following Resource Providers to be registered in your subscription (Azure Cloud Services Extended Support):
Microsoft.ComputeMicrosoft.BotService
To ensure that these are correctly registered, or to register them within the portal, go to the Subscriptions blade. This can be found by searching for Subscriptions in the Search resources, services and docs search bar at the top and selecting the Subscriptions service.
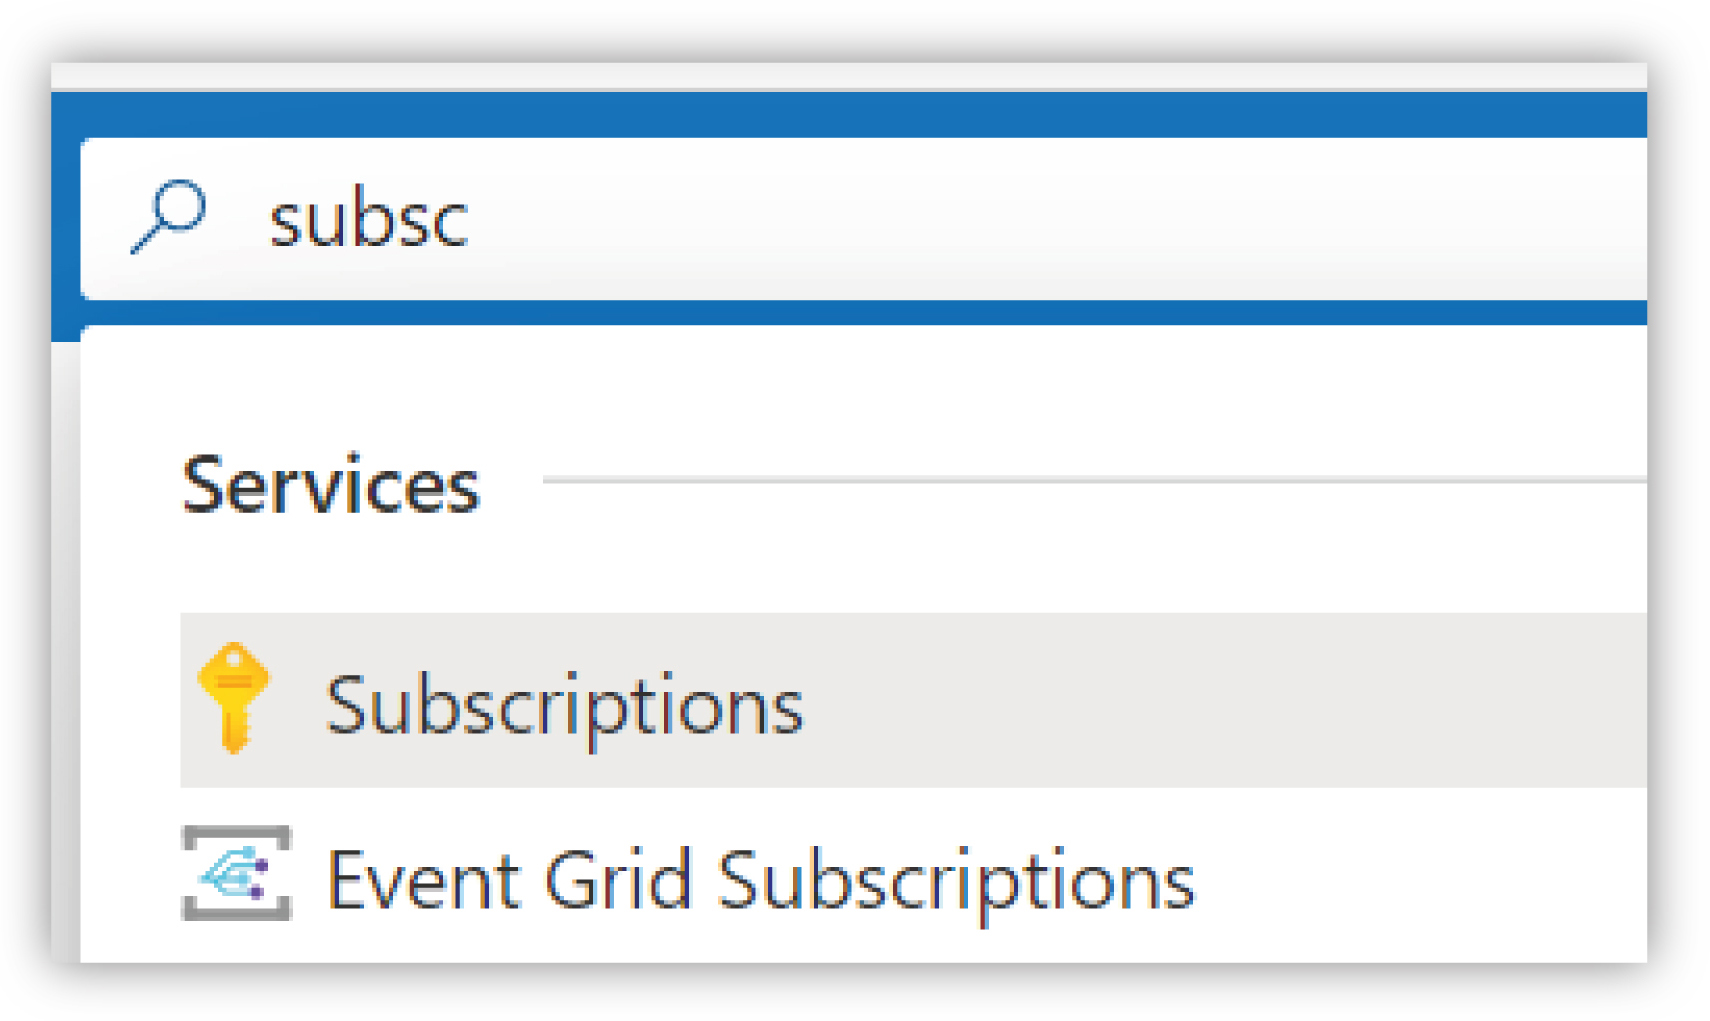 |
Choose the desired subscription from the list and then find the Resource Providers section under the Settings heading.
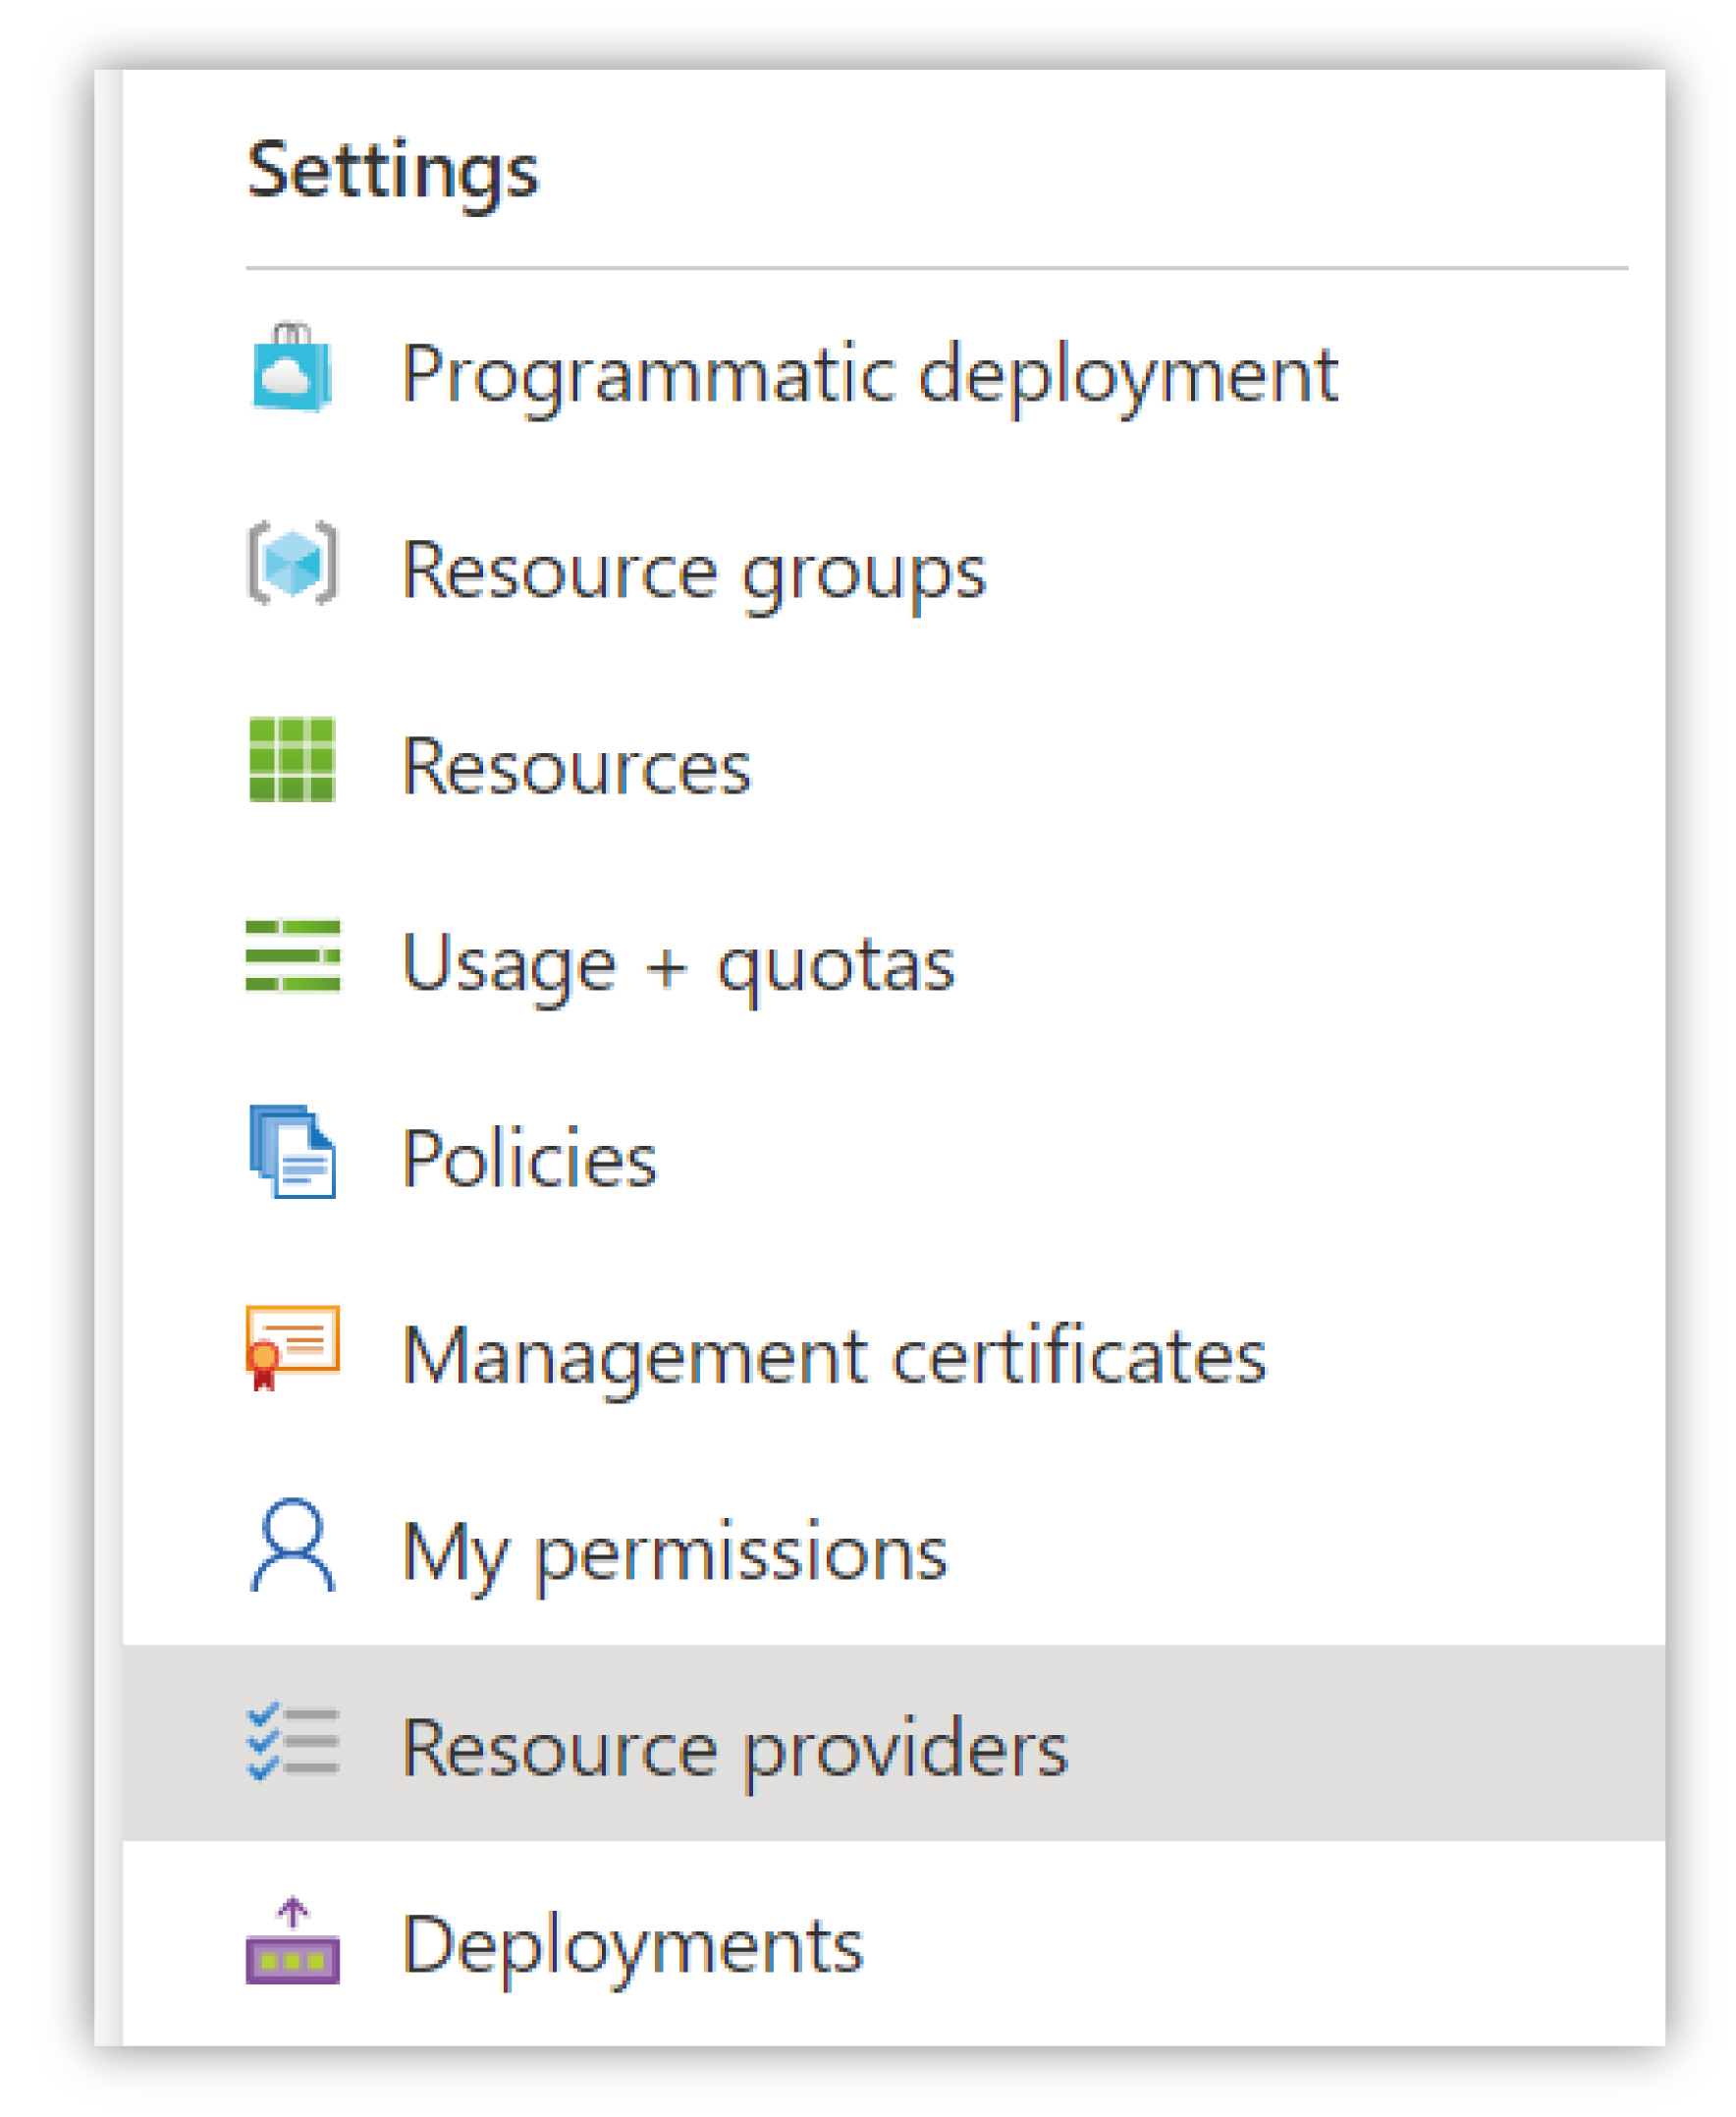 |
Use the Filter by name... option at the top of the list and ensure the resource providers mentioned above are registered. If they’re not registered, select them and click the Register button to add them to the subscription.
If they don’t exist in the list, then the subscription type isn't capable of hosting the Uniphore Compliance Bot.
Create a Resource Group for the Bot
Use the Search bar to locate the Resource groups service from the portal, and create a new Resource Group with an appropriate name.
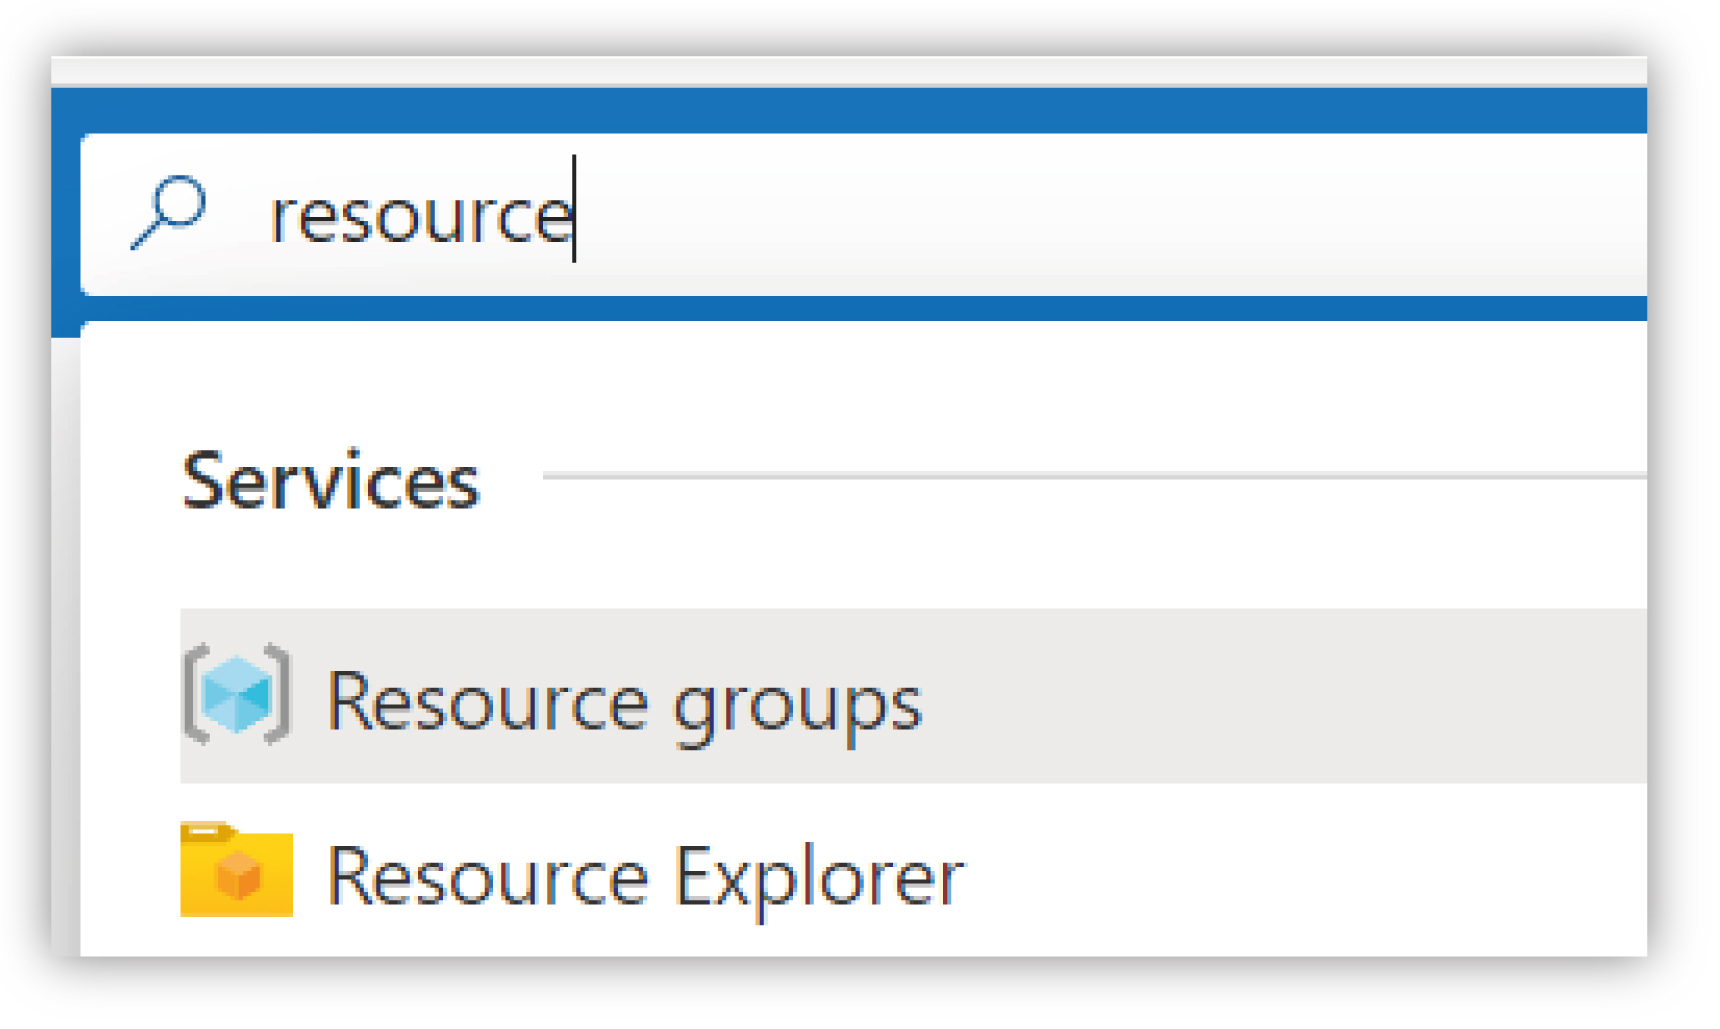 |
Ensure it's located in the same region as the Microsoft 365 tenant and that you have the correct Subscription selected.
Create a Key Vault
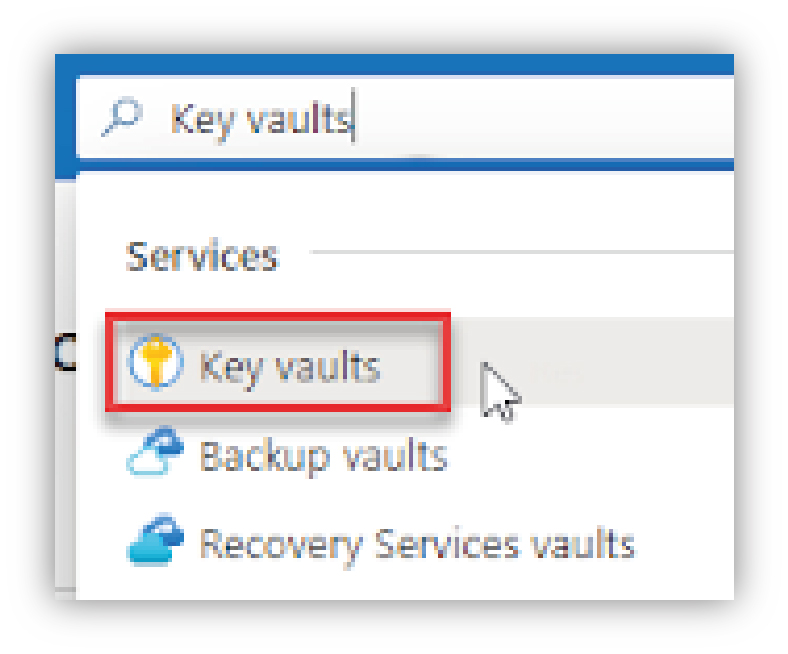 |
Create a Key Vault for the Resource Group (Azure Key Vault is a cloud service that provides a secure store for keys, secrets, and certificates.) – find the Key Vault service using the Search bar and create a new Key Vault with the following properties (note that all other settings can be left with their default values):
Property | Value/Description |
|---|---|
Subscription | The Azure Subscription where the Key Vault will be created. |
Resource group | The Resource Group created previously. |
Region | As with the Resource Group, ensure this is located in the same region as the Microsoft Teams tenant. |
Pricing tier | Select Standard. |
Key vault name | A unique name (within the subscription) for the Key Vault. |
Enable Access to | Ensure Azure Virtual Machines for deployment is checked. |
Upload/Import Certificate to the Key Vault
Once the Key Vault resource has been created, navigate to that resource and go to the Certificates section.
Click on the Generate/Import button to start the certificate upload wizard.
On the Create a certificate screen, set the following:
Method of Certification Creation – select Import.
Certificate Name – enter a unique name for the certificate. The name must only contain alphanumeric characters and dashes.
Upload Certificate File – select the pfx certificate file to upload.
Password – if you’re uploading a password protected certificate file, provide the password here. Otherwise, leave it blank.
When you’re ready, click the Create button. Once the certificate is uploaded successfully it will be listed under the Certificates section with a status of Enabled.
Copy the Thumbprint value for the newly uploaded certificate and save for later.
Once created, update the following configuration file values:
Property | File | Path | Value |
|---|---|---|---|
ServiceCertThumbprint | ServiceConfiguration. ClientExtendedSupport. cscfg | Role/ ConfigurationSettings/ ServiceCertThumbprint | Thumbprint |
Name | ServiceConfiguration. ClientExtendedSupport. cscfg | Role/Certificates/ Certificate | Certificate Name |
thumbprint | ServiceConfiguration. ClientExtendedSupport. cscfg | Role/Certificates/ Certificate | Thumbprint |
Create an Application Insights Resource
Application Insights is an Azure cloud service that handles logging and analytics for Azure services (and more). Using the Search bar to locate the Application Insight service in the portal, create a new Application Insights resource with the following properties (all other settings can be left with their default values).
Property
Value/Description
Subscription
The Azure Subscription associated with this resource – select Microsoft Teams.
Resource Group
The Resource Group created previously.
Name
A unique name (within the subscription) for the Application Insights resource.
Region
Use the same region as the Microsoft Teams tenant.
Resource Mode
Select Workspace based.
Workspace > Subscription
Select Microsoft Teams.
Log Analytics Workspace
Select DefaultWorkspace…

Once complete, review the created Application Insights resource, and make a note of the associated Instrumentation Key.
Navigate to API Access and click Create API Key.
Make a note of the Application ID for the Application Insights resource.
Enter a description, select Read Telemetry, and click Generate key.
Make a note of the API key.
Create the Azure Bot
In the Azure Portal, find Azure Bot using the search bar or use Create a resource on the Home page – click Create to create a bot with the following properties:
Property | Value/Description |
|---|---|
Bot Handle | The name of the bot – this will be needed this later. |
Subscription | The Azure Subscription where the bot will be created. |
Resource group | The Resource Group created previously. |
Pricing tier | Set to Free. Note that at the time of writing, the bot does not send messages. |
Type of app | Set to Multi Tenant. |
Creation type | Set to Create new Microsoft App ID. |
Once created, update the following configuration file values (find the auto-created bot in the App Registration section in Azure for the required details):
Property | Referred to as | File | Path |
|---|---|---|---|
Display name | Bot Name | appsettings.remote.json | Host/Service/ BotName |
Microsoft App ID | App ID | appsettings.remote.json | Host/Service/BotId |
Application Insights Instrumentation Key | Application Insights Instrumentation Key or App Insights Key | ServiceConfiguration. ClientExtendedSupport. cscfg | APPINSIGHTS_ INSTRUMENTATIONKEY |
Configure the Bot
Further configuration of this bot is detailed in the Microsoft “Registering a Calling Bot” guide. However, there are some differences, so all of the steps are listed below.
Note
For this stage the CNAME record must be known, although it doesn’t need to be created at this point.
In the Azure bot page created previously, click on Channels in the Settings menu.
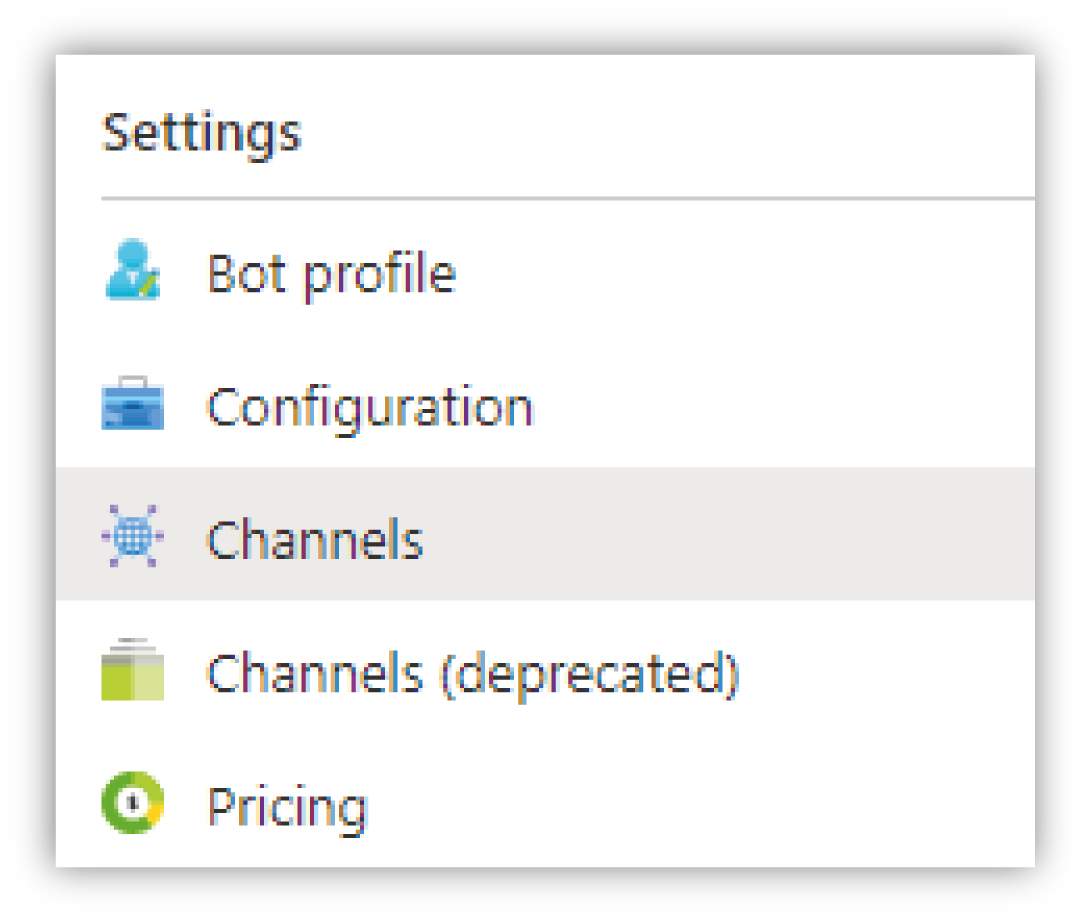 |
From there you can select Microsoft Teams from the list of available channels. Once loaded, go to the Calling tab and make sure the Enable calling option is checked and the Webhook (for calling) text-box contains the following value:
https://{cname}.{your-domain}/api/calling
Property | Value/Description |
|---|---|
Enable calling | Checked. |
Webhook (for calling) | https://{cname}.{your-domain}/api/calling NoteIn the linked Microsoft sample documentation, the endpoint is configured with https://{your-domain}/api/calls, whereas the correct endpoint should end with |
Create a Client Secret
To create a new client secret:
In your Azure bot instance, click Configuration in the Settings menu.
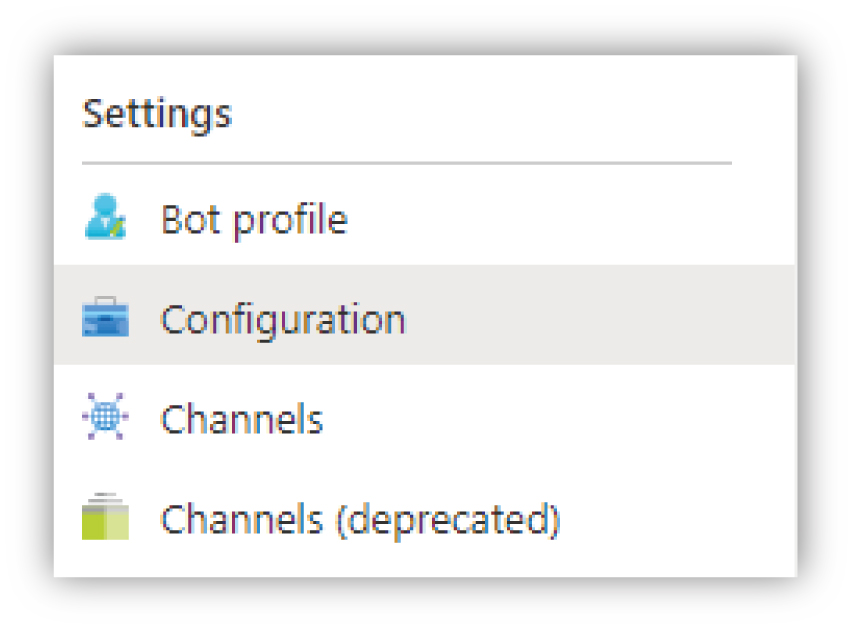
Locate the Microsoft App ID (Manage) textbox and click the Manage link. This will take you to the Certificates & secrets section.
Click the New client secret button and enter the following information:
Property
Value/ Description
Description
The friendly name of the client secret, for example Uniphore Compliance Recording Bot
Expires
Set to the maximum available timeframe (24 months, at the time of writing).
When you’re ready click Add, but do not navigate away from the blade.
Note
The created secret value is shown only at this stage and will not be visible again.
Once created, update the following configuration file values:
Property
Referred to as
File
Path
Client secret
Bot Secret
appsettings.remote.json
Host/Service/BotSecret
Set API Permissions
This step provides the Compliance Bot with permission to call the Microsoft Graph service enabling the call recording features.
Under the API permissions section, click the Add a permission button and select Microsoft Graph from the list of APIs.
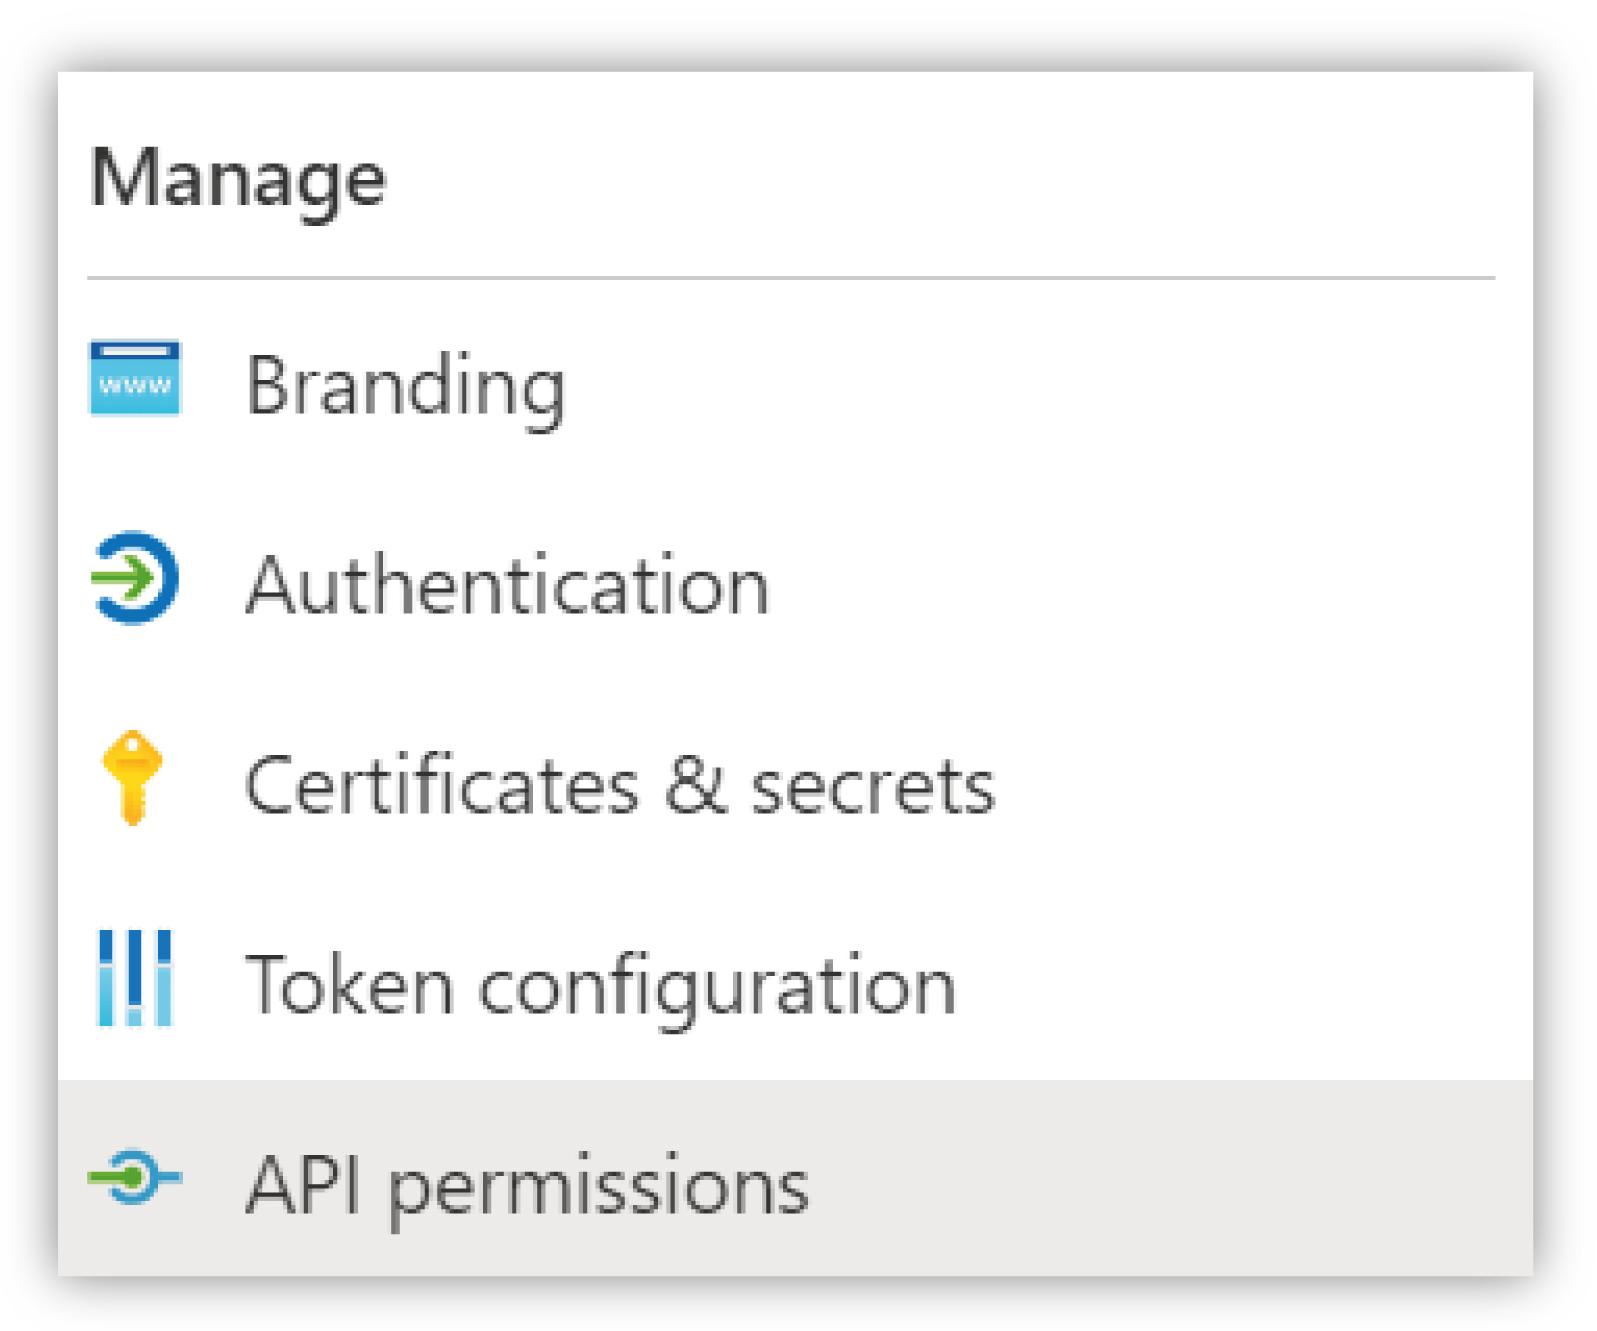 |
Select Application permissions and select each of the permissions shown below (this can be done as a single operation).
Once selected, click the Add permissions button to add the selected permissions to the applications list. After the permissions have been added, click the Grant admin consent button and confirm the permissions. This will be slightly different for each instance as it includes the name of the organisation in the title.
Section | Permission |
|---|---|
Calls | Calls.AccessMedia.All Calls.Initiate.All Calls.InitiateGroupCall.All Calls.JoinGroupCall.All Calls.JoinGroupCallAsGuest.All |
OnlineMeetings | OnlineMeetings.Read.All OnlineMeetings.ReadWrite.All |
User | User.Read.All |
Calendars | Calendars.Read |
 |
Create a Storage Account
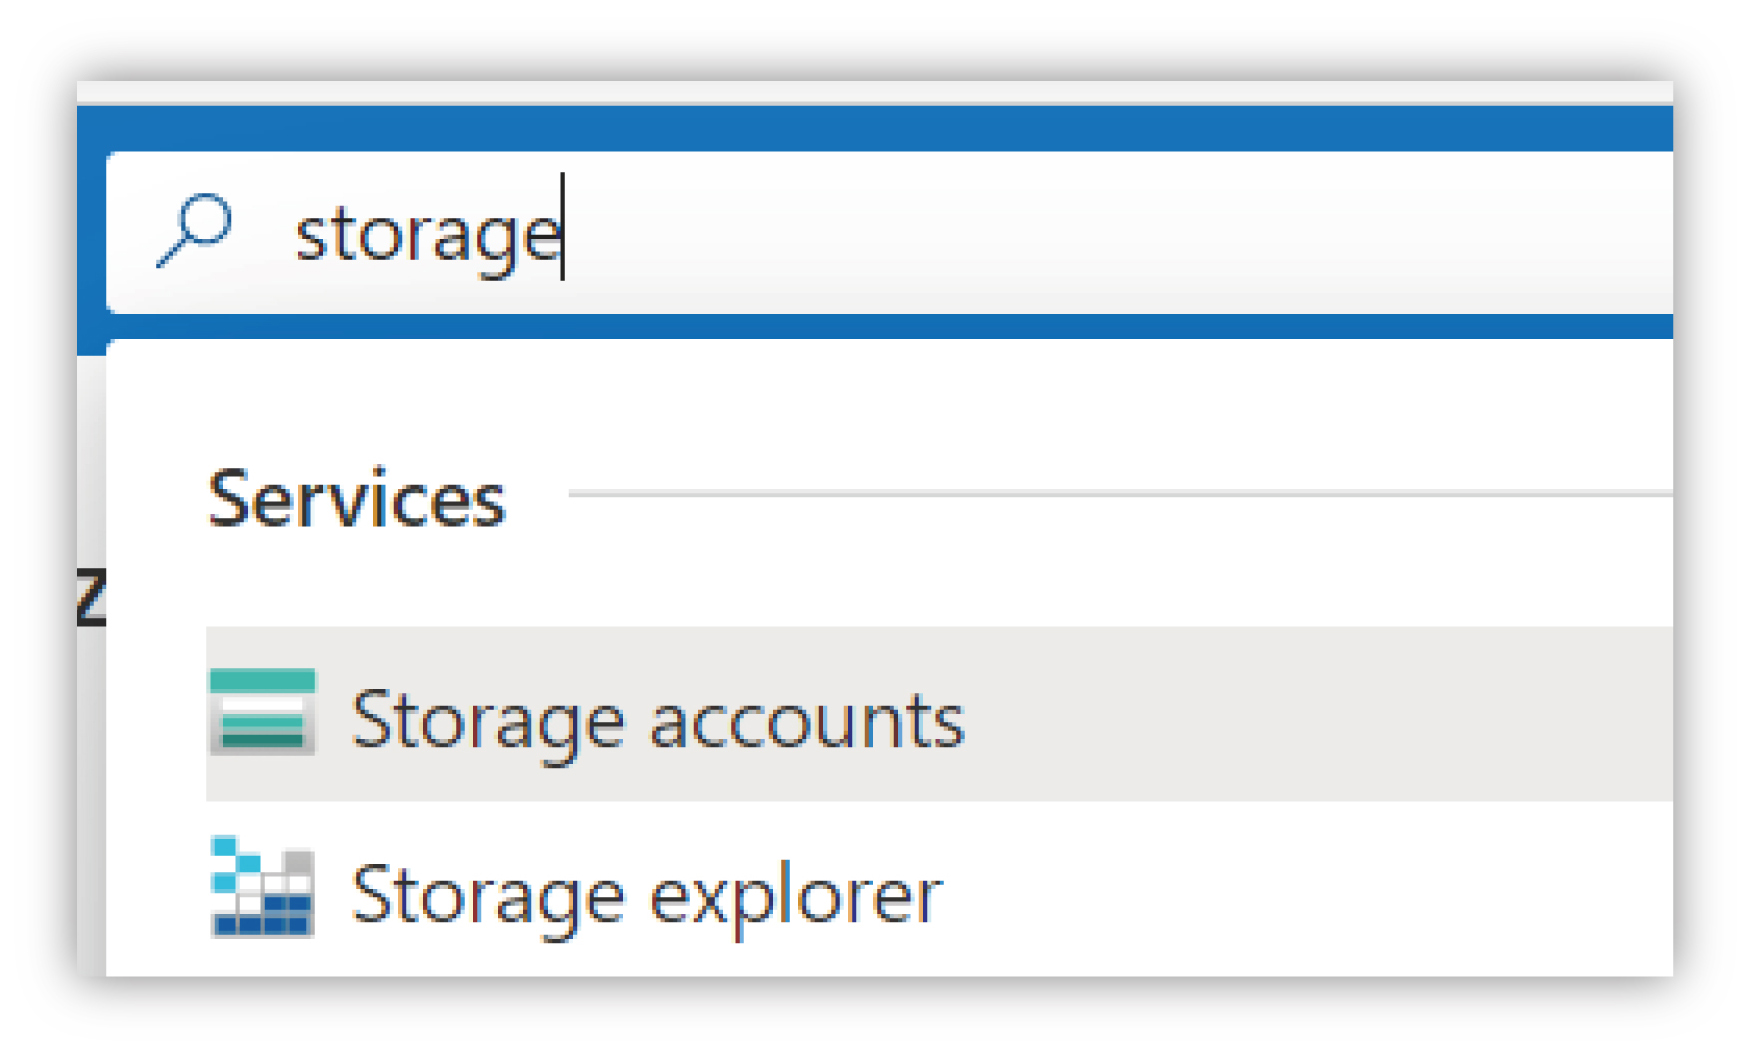
To create the storage account within your Resource Group, use the search bar to find Storage Accounts – once the blade has opened, create a new storage account with the following properties (all other settings can be left with their default values):
Property | Value/Description |
|---|---|
Subscription | Select the subscription used to create the Resource Group. |
Resource group | Select the resource group created previously. |
Storage account name | The DNS friendly name of the storage account. The Storage account name must be lowercase, and must not contain any spaces/special characters. In this instance, it must also be between 3 and 24 characters. |
Location | Use the same location as the Microsoft Teams tenant. |
Performance | Set to Standard – the default. |
Redundancy | Set to Locally-redundant storage (LRS) – currently the bot does not failover to a remote location. |
Once created, go to the Access keys section and under key1 copy the Connection string property and the name of the storage account ready for use in configuring the Collector.
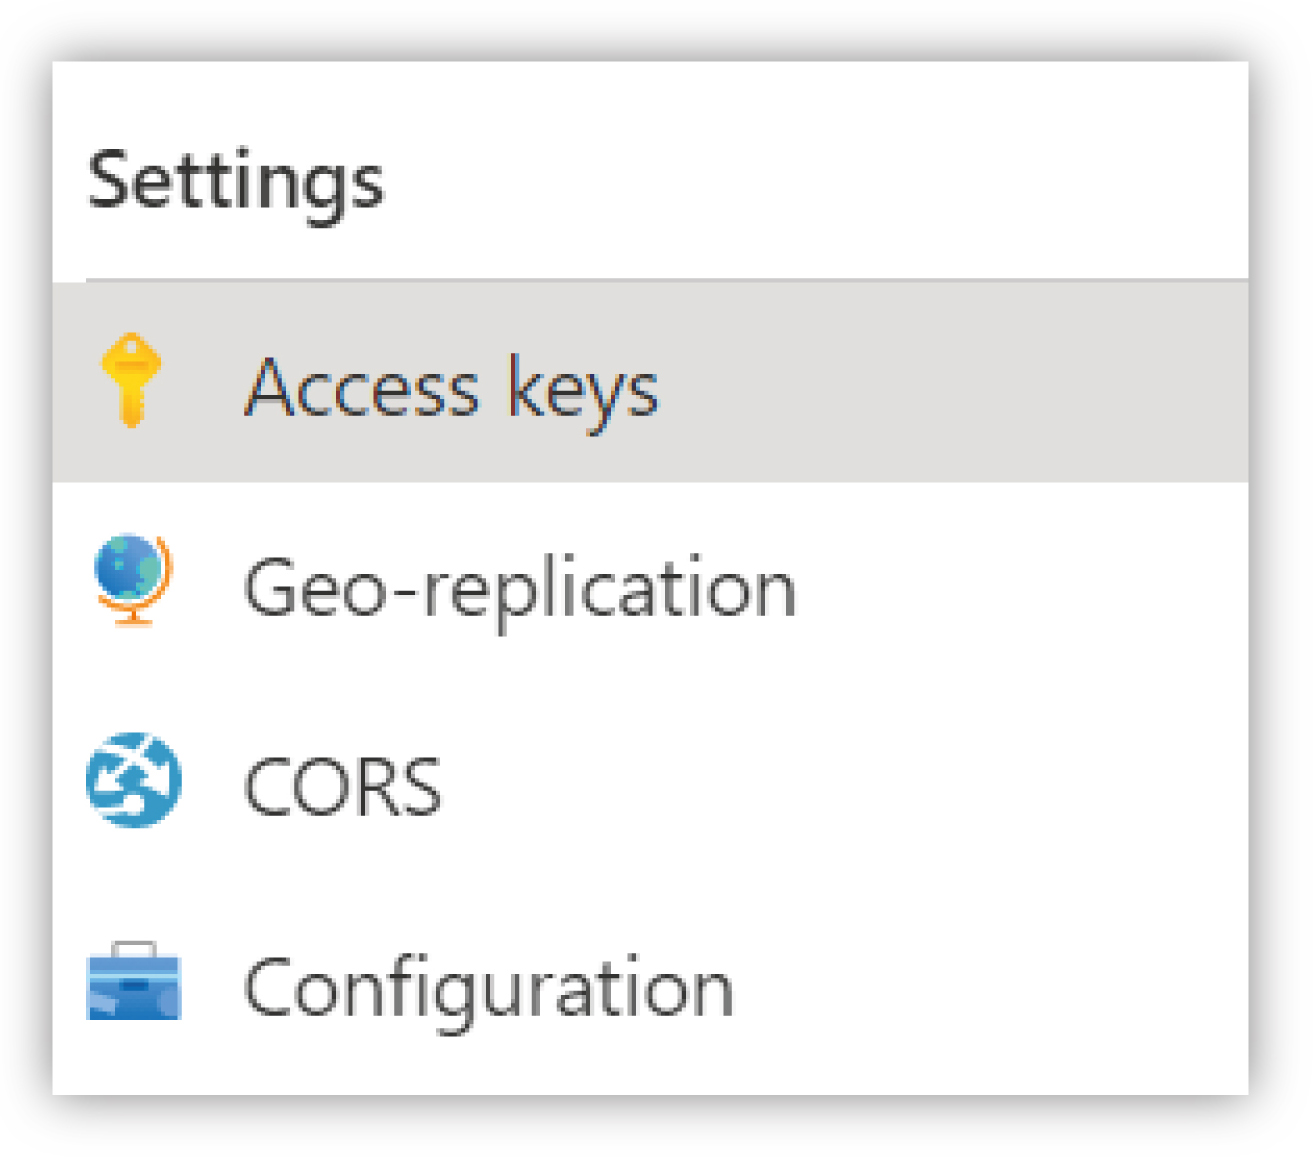 |
Once created, update the following configuration file values:
Property | Referred to as | File | Path |
|---|---|---|---|
ConnectionString | Connection String |
|
|
ConnectionString | Connection String |
|
|
Create a Virtual Network
An Azure Virtual Network (VNet) resource is the fundamental building block for a private network in Azure. To create a virtual network within your Resource Group, select + Create a resource > Networking > Virtual network, and set the following properties (all other settings can be left with their default values).
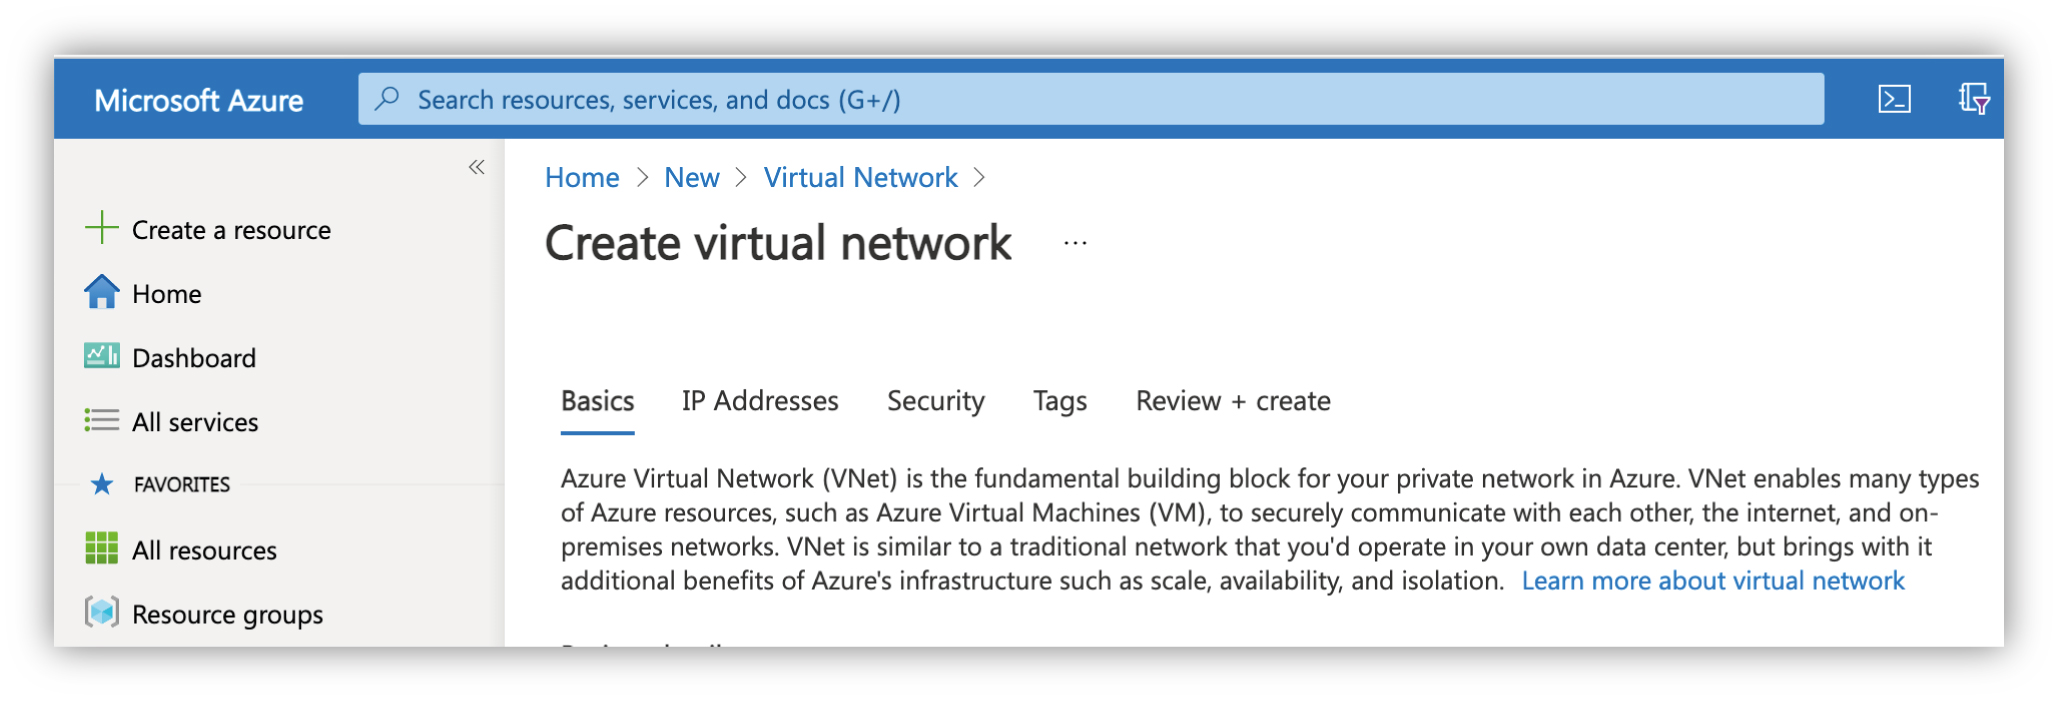 |
Property | Value/Description |
|---|---|
Subscription | The Azure Subscription where the network will be created. |
Resource group | The Resource Group created previously. |
Name | A unique name (within the subscription) for the network. |
Region | As with the Resource Group, ensure this is located in the same region as the Microsoft Teams tenant. |
Subnet name | Set to |
Once created, update the following configuration file values:
Property | File | Path | Value |
|---|---|---|---|
name | ServiceConfiguration. ClientExtendedSupport.cscfg | NetworkConfiguration/ VirtualNetworkSite | Name of the Virtual Network. |
name | ServiceConfiguration. ClientExtendedSupport.cscfg | NetworkConfiguration/ AddressAssignments/ InstanceAddress/ Subnets/Subnet | Name of the Subnet name ( |
Create a Public IP Address
Create a public IP address under the same resource group as the other resources – set the following properties (all other settings can be left with their default values):
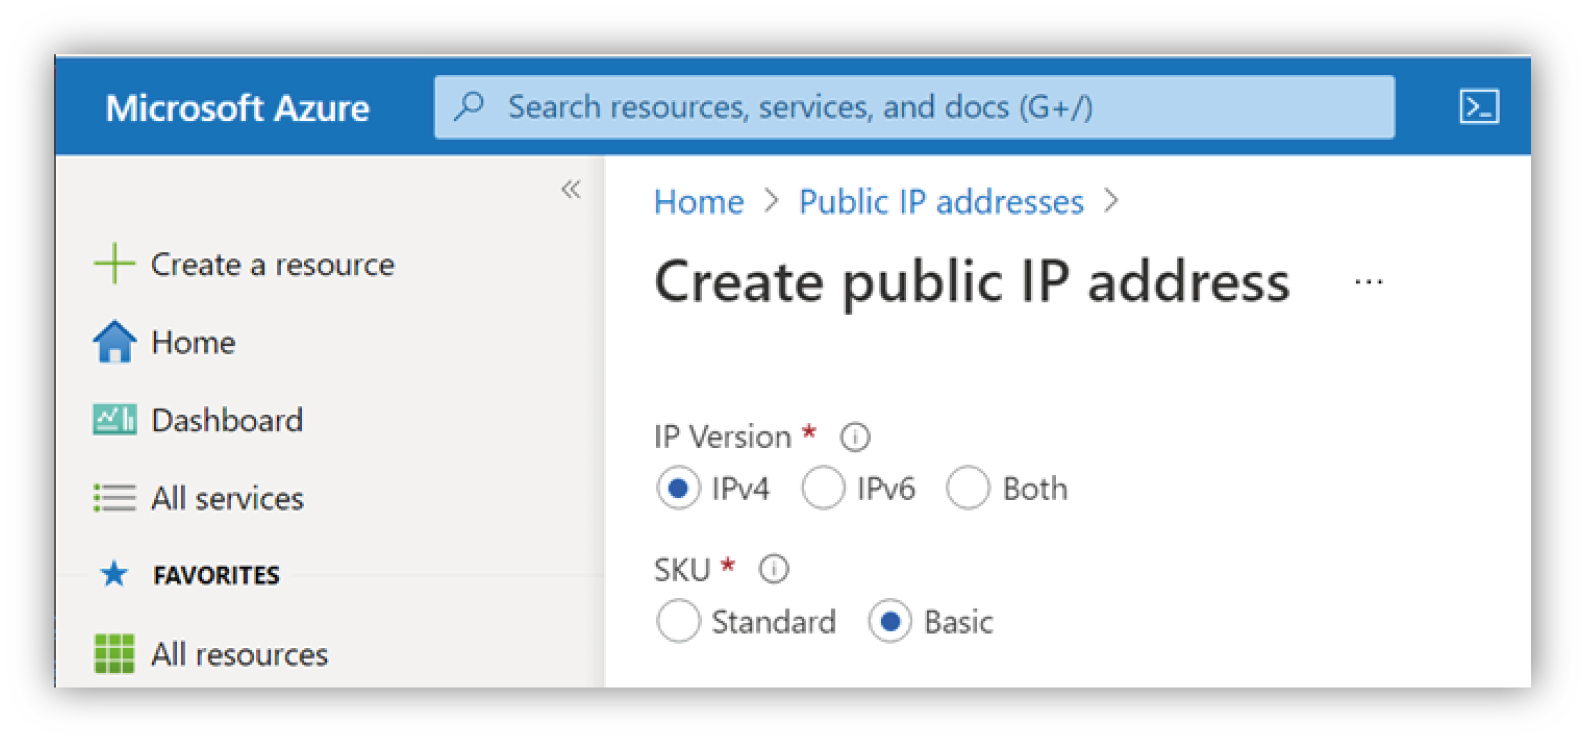 |
Property | Value |
|---|---|
IP Version | Select IPv4 |
SKU | Select Basic |
Name | A unique name (within the subscription) for the IP address. |
Routing Preference | Set to Microsoft network |
IP address assignment | Set to Dynamic |
DNS name label | DNS name of the bot (a public name for the bot to prefix the domain). |
Subscription | Select the subscription used to create the Resource Group. |
Resource Group | Select the Resource Group created previously. |
Location | As with the Resource Group, ensure this is located in the same region as the Microsoft Teams tenant. |
Once created you will notice that an Alias record has been added to your DNS Zone for this IP address.
Update the Remaining Configuration Properties
Go to the Azure Active Directory section in the Azure Portal associated with the Teams Tenant (you can also use https://aad.portal.azure.com/). Find the Tenant Id under Tenant Information and update the following appsettings.remote.json configuration file values:
Property | Path/Description |
|---|---|
EnableAzureBlobLogs* | Bot/EnableAzureBlobLogs If set to |
EnableHttpLogging* | Bot/EnableHttpLogging If set to |
MinimumLogLevel* | Bot/MinimumLogLevel Determines the detail included in the logging. In order of detail (low to high) optional levels include: NoteLogging has an impact on performance and should be left on |
RecordingStatusBannerDisabled | Bot/RecordingStatusBannerDisabled If set to NoteThis setting may not apply outside of the organisation that the bot covers, especially if there are conflicting settings for displaying the banner. If not specified, the default is |
Client CNAME | Host/ClientUrl This is the client's URL (https), the CNAME pointing to the Azure DNS. |
Azure DNS | Host/AzureUrl This is the URL of the Cloud Service (http), ending in cloudapp.azure.net. |
Tenant Id | Host/Service/TenantId |
Username** | WebSockets/Username This is used when authenticating from the Collector. Make a note of the username as it will be required to complete the installation. |
Password** | WebSockets/Password This is used when authenticating from the Collector. Make a note of the password as it will be required to complete the installation. This value will be encrypted on first-run. |
* The logs are always written to Application Insights, if EnableAzureBlobLogs is set to true then the logs are also written to Azure storage (blob storage).
** The Username and Password provided here must match the values in MicrosoftTeamsRAM.ini on the Collector – see Configure the Collector MS Teams RAM.
Upload the Bot Configuration File
Upload the appsettings.remote.json Compliance Bot configuration file that was updated in the previous steps. Go to the Azure Storage account created previously and select the Storage browser (preview) option from the menu. Right click the BLOB CONTAINERS node, select + Add container and enter the following options:
Property | Value/Description |
|---|---|
Name | Set to config – note that this is a case sensitive property. |
Public access level | Set to Private (no anonymous access) |
Select the newly created config container and click the Upload button from the toolbar. In the Upload dialogue box enter/select the appsettings.remote.json file and click Upload.
Create the Azure Extended Cloud Service
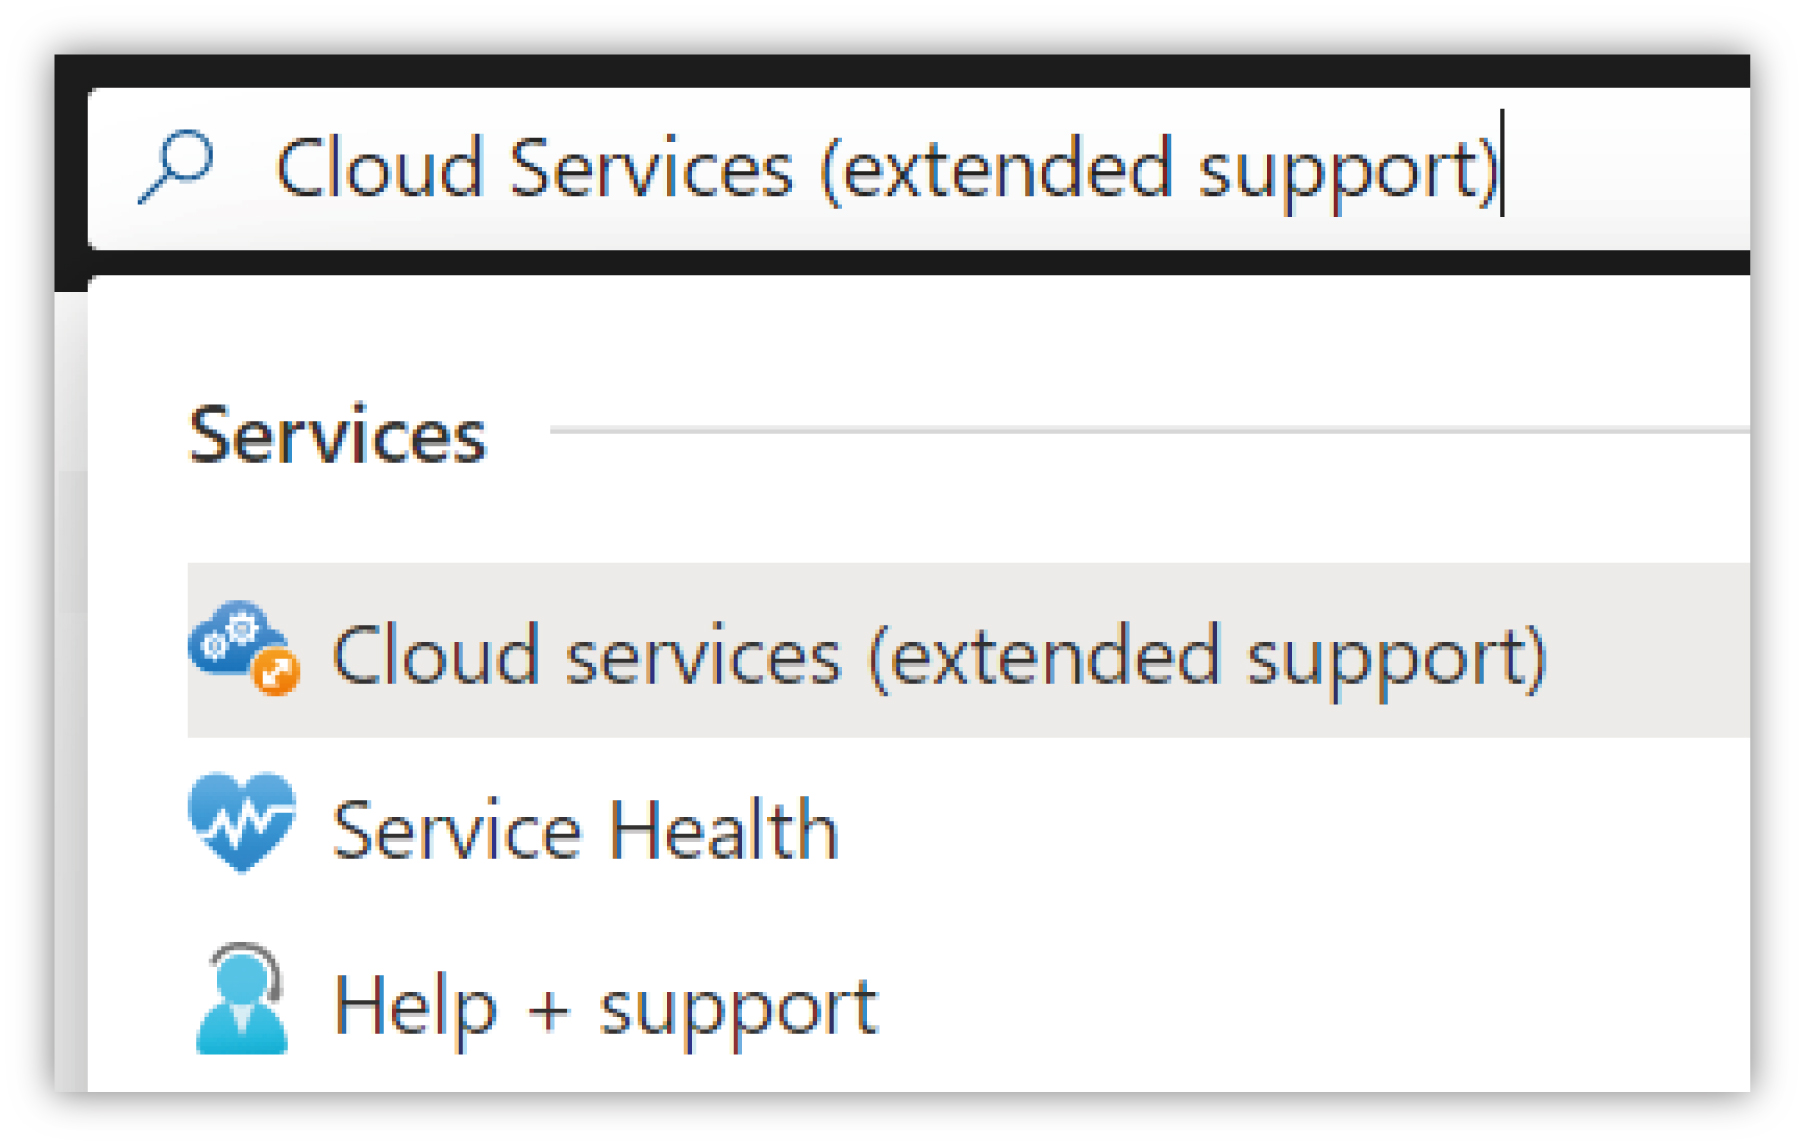
To create the Compliance Bot, a new Azure Cloud Service must be created. Use the search bar to find Cloud services (extended support) – once the blade has opened, click the + Create button and enter the following details:
Property | Value/Description |
|---|---|
Subscription | Select the subscription used to create the Resource Group. |
Resource group | Select the Resource Group created previously. |
Cloud service name | DNS name label used in the creation of the Public IP Address. |
Region | Use the same location as the Microsoft Teams tenant. |
Storage account | Use the storage account created previously. |
Upload a package (.cspkg) | Upload the bot installation .cspkg package of the correct VM size. |
Upload a configuration (.cscfg) | Upload the ServiceConfiguration.ClientExtendedSupport.cscfg Azure Cloud Service configuration file for the Compliance Bot. |
Upload a service definition (.csdef) | Upload the ServiceDefinition.csdef Azure Cloud Service resource definition file. |
Public IP Address | Select the Public IP address created previously. |
Key Vault | Select the Key Vault created previously. Note that the list of certificates will be updated and Status should change to Found. |
Click the Create and Validate button – if all the settings are correct the validation should be successful. Click the Create button to deploy the cloud service.
Once complete, in the Overview section, wait for the role instance(s) to start. When complete, the Status column will change to Running. The Uniphore Compliance Bot is now ready.
Note
The CNAME created should be the same as the one used during the bot configuration, where the value used was defined as:
https://{cname}.{your-domain}/api/calling
Configure Microsoft Teams
To provision the Uniphore Compliance Bot within MS Teams and configure policies:
Create a new Recording Application instance – this will create the application instance required to connect the Compliance Bot with the Microsoft Teams tenant.
Synchronize the Recording Application instance from Azure Active Directory to the Agent Provisioning Service.
These steps are all detailed in the Microsoft Teams Recording Policy documentation, but are also covered here for clarity.
Note
Similar to the Microsoft Azure Portal, Microsoft PowerShell commands and processes may change. Although the configuration steps covered here will be maintained to ensure the correct process is followed, there may be some differences present.
If you wish to implement a “Paired Bot” solution to provide an Active/Active or Active/Standby resiliency model, see "Configure a Paired Bot" for further guidance before executing any MS Teams PowerShell commands against the bot.
Authenticate with PowerShell
Create a New Recording Application instance
Assign permissions
Synchronize the Recording Application instance
Create a new Recording Policy
Assign the Recording Policy to the Recording Application
Optional - Update the Compliance Recording Application
Configure a Paired Bot
To implement a “Paired Bot” solution to provide Active/Active or Active/Standby resiliency:
These steps are all detailed in the Microsoft Teams Compliance Recording documentation , but are also covered here for clarity.
Note
Similar to the Microsoft Azure Portal, Microsoft PowerShell commands and processes may change. Although the configuration steps covered here will be maintained to ensure the correct process is followed, there may be some differences present.
Assumptions
Create the Recording Application Instance
Pair the Recording Application Instance
Verify the Paired Application
Recording Policy
Assign the recording policy to Active Directory objects as required:
To a specific Active Directory User.
To an Active Directory Group.
To Active Directory Users based on a query.
To all users in Active Directory.
These steps are covered in the Microsoft Teams Recording Policy documentation, but are also covered here for clarity. Note that, similar to the Microsoft Azure Portal, Microsoft PowerShell commands and processes may change. Although the config steps covered here will be maintained to ensure the correct process is followed, there may be some differences present.
Assign the Policy to a Single User
Assign the Policy to Users in a Department
Assign the Policy to All Existing Users
Assign as a Global Policy
Unassign Users From a Policy
Disable or Enable a Policy
Configure the Collector Integration Adapter
The Integration Adapter configuration is specified in IntegrationAdapter.ini on the Collector – this file is automatically generated with default values on first start of the Collector. An example is shown below:
[General]
CollectorId=0f89817f-e324-48ca-bcb6-3d61f292755b
TenantId=dcedc429-11a9-4408-84a7-c781363c62e1

[JetStream]
ServerURL=nats://u-capture.example.com:4222

[Licence]
RecordInternalCalls=1
RecordPoolChannels=1000
PP0=P5FCAA3BAASAJEJA

[INSTALLED PPS]
PP0=/usr/lib/libPP_Matcher.so

[Phones]
DetectNewItems=1
Settings
Depreciated NATS Streaming Settings
Configure the Collector MS Teams RAM
To configure the MS Teams RAM, edit the MicrosoftTeamsRAM.ini file on the Collector and update the following settings – a sample is also provided below.
Section | Setting | Notes |
|---|---|---|
|
| The IP address of the Collector. For example, |
| The port of the Collector. | |
|
| Fully qualified hostname of the bot Web Socket server. For example
Make sure there’s no trailing slash " |
| The port of the Web Socket server. | |
| The username for authentication against the bot. Make sure there’s no trailing space before or after username. | |
| The password for authentication against the bot. Make sure there’s no trailing space before or after password. | |
(Optional) |
| Fully qualified Host/IP address of the proxy server along with scheme and port if any. For example, |
| Username to use to authenticate against the proxy. Make sure there's no trailing spaces and/or special characters before or after the username. If the proxy doesn't require authentication then leave this setting blank. | |
| Password to use to authenticate against the proxy. Make sure there's no trailing spaces and/or special characters before or after the password. If the proxy doesn't require authentication then leave this field blank. |
* The Azure Username and Password provided here must match the values defined for the bot - see Update the Remaining Configuration Properties in Provision the Microsoft Azure Subscription.
Enter the Passwords as plain text. On first execution of the RAM, the passwords will be encrypted and two new settings will be added to the Azure section (EncryptedPassword and PasswordEntropy) with pre-populated values. Also, the Password fields will have their values set to an empty string once the passwords have been successfully encrypted and stored.
[General]
RecorderIp=127.0.0.1
RecorderPort=6477

[Azure]
Hostname=wss://botdev4.devbot.redboxdev.com
WebSocketsPort=2012
Username=admin
Password=recorder

[Proxy]
Url=http://www.proxyserver.com:3333
UserName=proxyusername
Password=proxypassword
Notes
Note
Ensure that the Microsoft Teams RAM is restarted every time there’s a configuration change to the .ini file or log configuration files.
Ensure that when entering values for hostname, username, and password that no special characters or trailing white space is entered.
Ensure that when entering port numbers no special characters or white space are entered.
If you have to increase the verbosity of the logging, ensure that it’s reverted back to WARN after any diagnostic work has completed – see Collector Logs.
Troubleshooting - Common Issues
Can’t Connect to the Bot – Ensure that all of the following have been checked:
Check bot hostname is correct and has the correct scheme and no trailing slashes, white space, or special characters (for example, new lines, etc).
Check port numbers are correct.
Confirm that any network firewalls etc have been opened up for the port and scheme being used to connect to the bot.
Increase the verbosity of the log level to
DEBUGand check for any errors or warnings.
Upgrade the Azure Bot
For an existing MS Teams integration upgrading to the latest version of U‑Capture, you should upgrade the Azure Bot to the latest version currently available. The bot version is provided in the Azure Cloud Service package (.cspkg) filename for the Compliance Bot:
ComplianceRecordingBot_{vm-size}_{bot-version}.cspkg
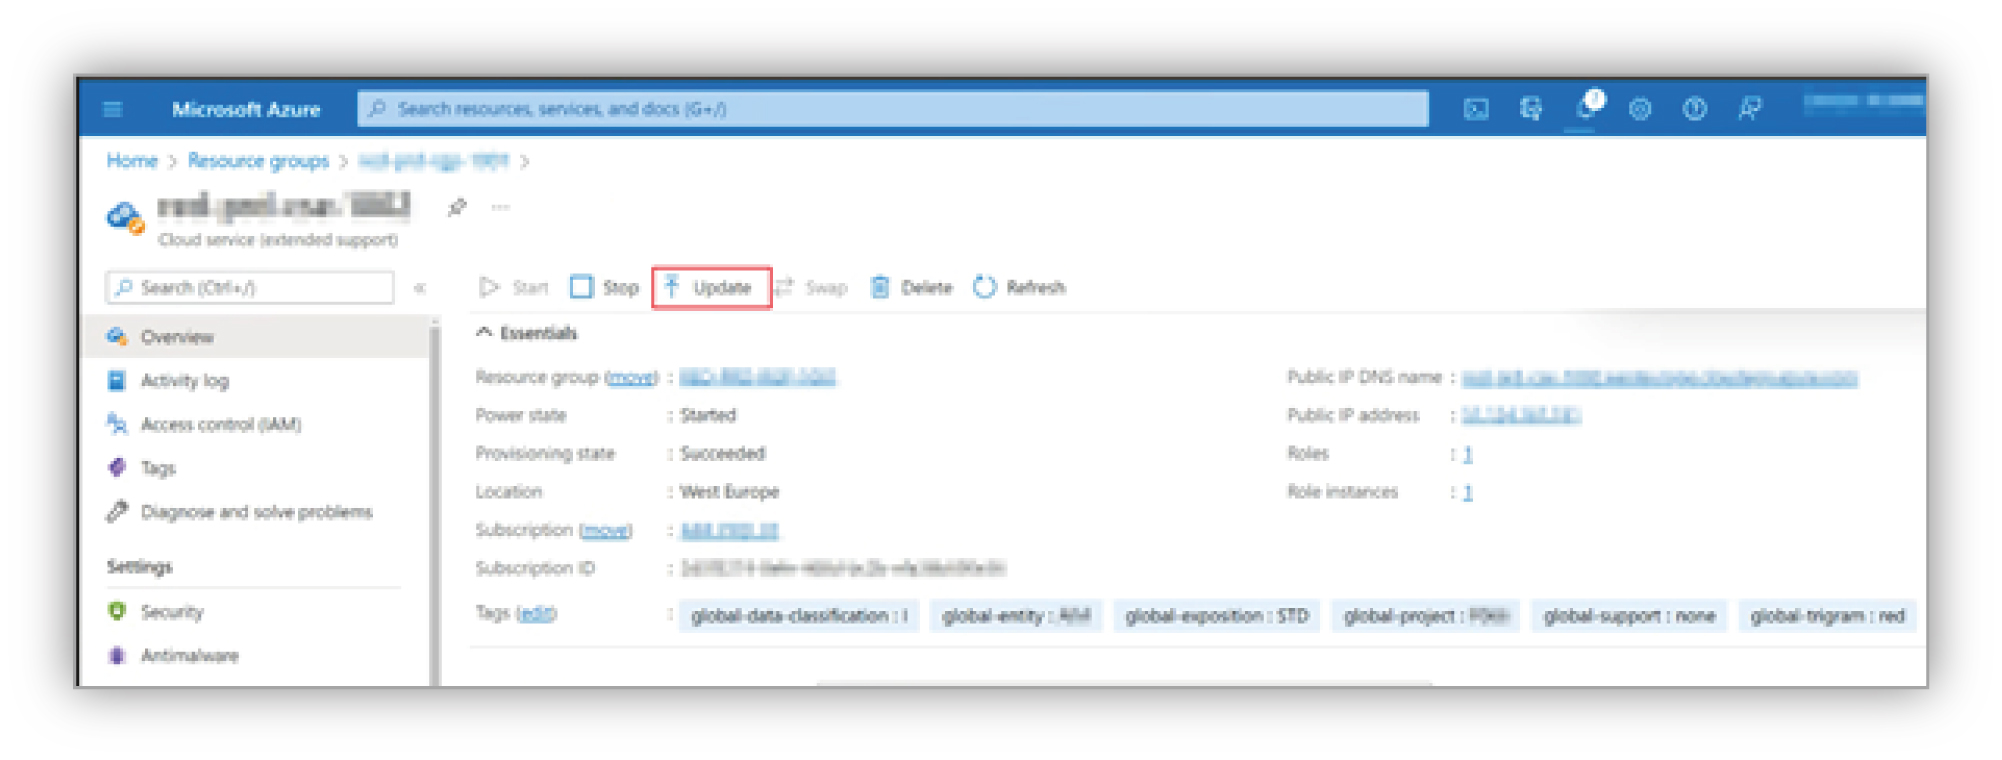
Login to the Azure Portal, go to the Cloud Service Extended Support section where the Compliance Bot was deployed, and click Update.
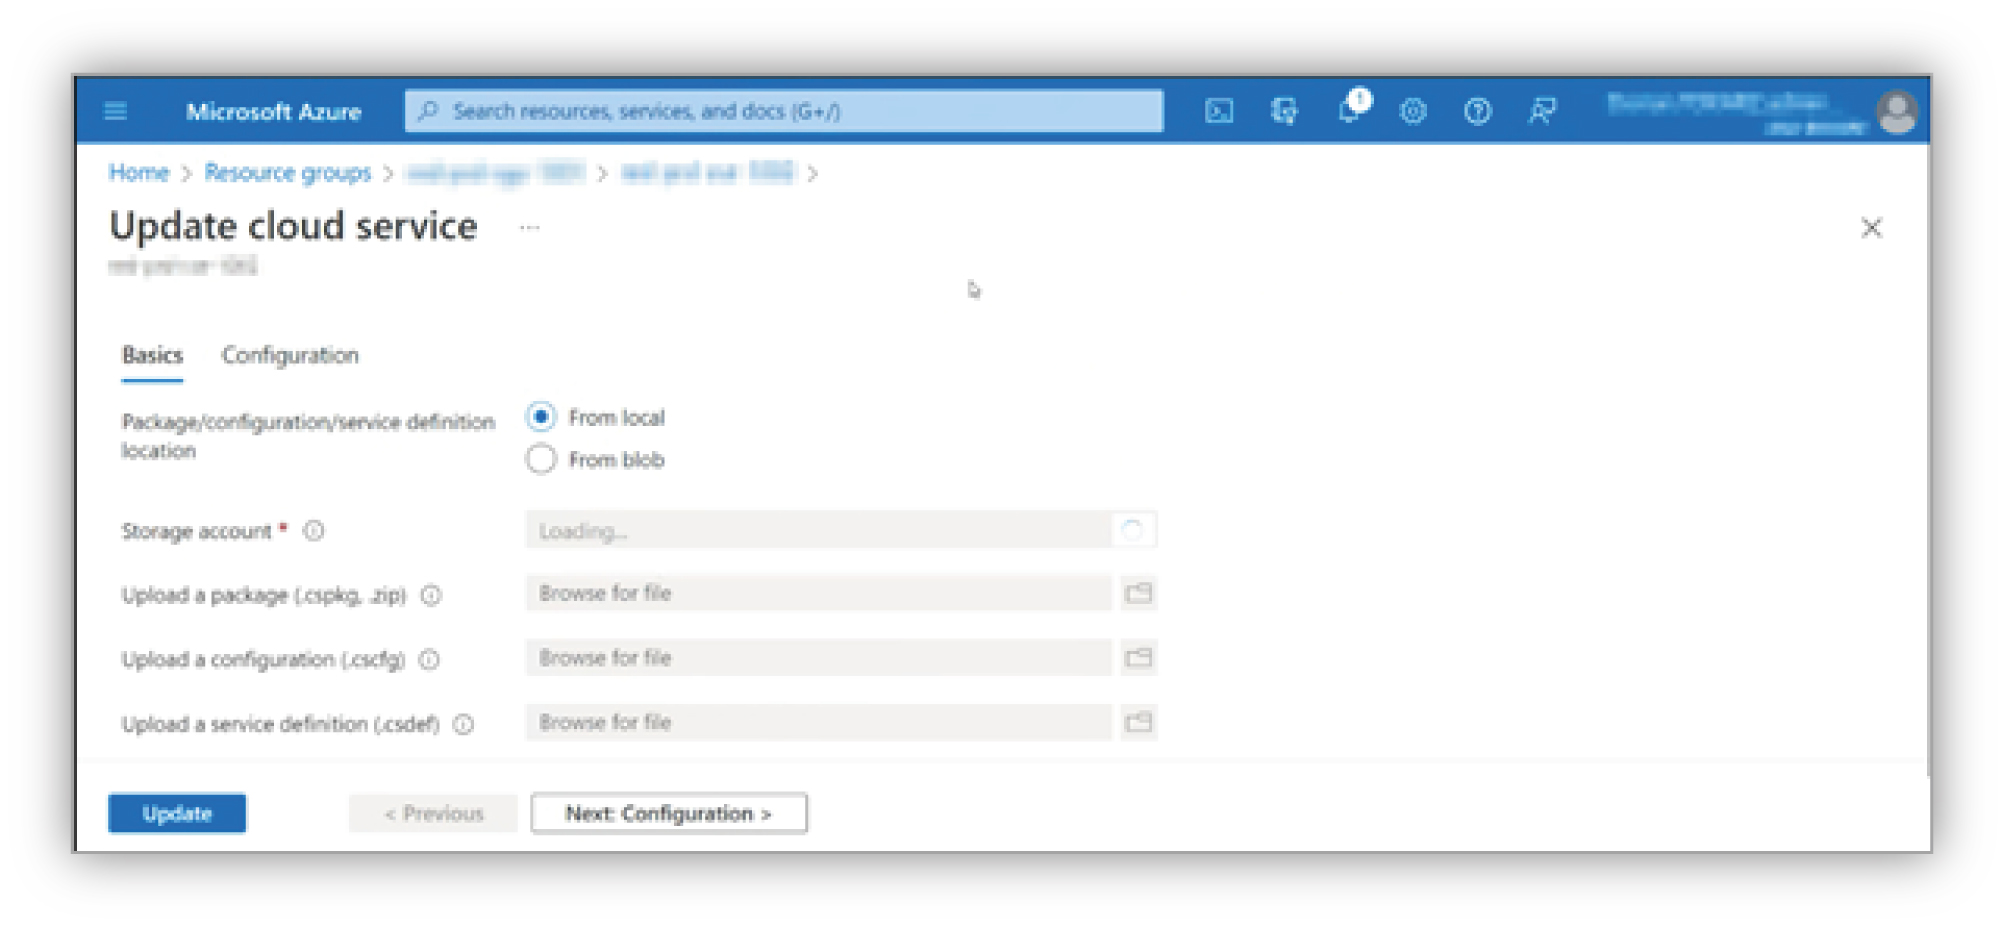
Select the Storage Account that was used for the Compliance Bot. Select the new cspkg file (for example, ComplianceRecordingBot.Standard_D2_v2.v1.12.cspkg) and select the existing ServiceConfiguration.ClientExtendedSupport.cscfg and ServiceDefinition.csdef files from the current install. Once all three files have been uploaded, click Update to automatically update the Compliance Bot to the latest version – this may take up to 10 minutes (see FAQs below).
FAQs
Will there be any downtime?
Yes, recording will not be available during the upgrade process. Uniphore recommends that this upgrade is performed outside of normal operational hours.
Will I lose any configuration in the Cloud Service Extended Support?
No. As long there are no changes to the previous settings, no configuration will be lost.
Update the Azure Bot Secret
If you need to update/change the existing client secret for the Azure Bot (Create a Client Secret in Provision the Microsoft Teams Azure Subscription), perform the following:
In the Azure Portal, navigate to the bot instance and click Configuration under the Settings menu.
Locate the Microsoft App ID (Manage) textbox and click the Manage link – this will take you to the Certificates & secrets.
Find the expired client secret and select Delete.
Now follow the usual process to create the new client secret and update the existing configuration file values (see Create a Client Secret in Provision the Microsoft Teams Azure Subscription).
Note
It’s advisable to keep the name of the client secret (
Description) the same as the deleted one.Finally, upload the updated configuration file (see Upload the Bot Configuration File in Provision the Microsoft Teams Azure Subscription).
MS Teams Recording Control
Logs
Collector Logs
Compliance Bot Logs
To download the log files for the Uniphore Compliance Bot using Azure:
Log in to Azure Portal.
Locate the Application Insights Resource.

On the App Insights overview page, click the Logs button.

Prepare your query and execute the search.
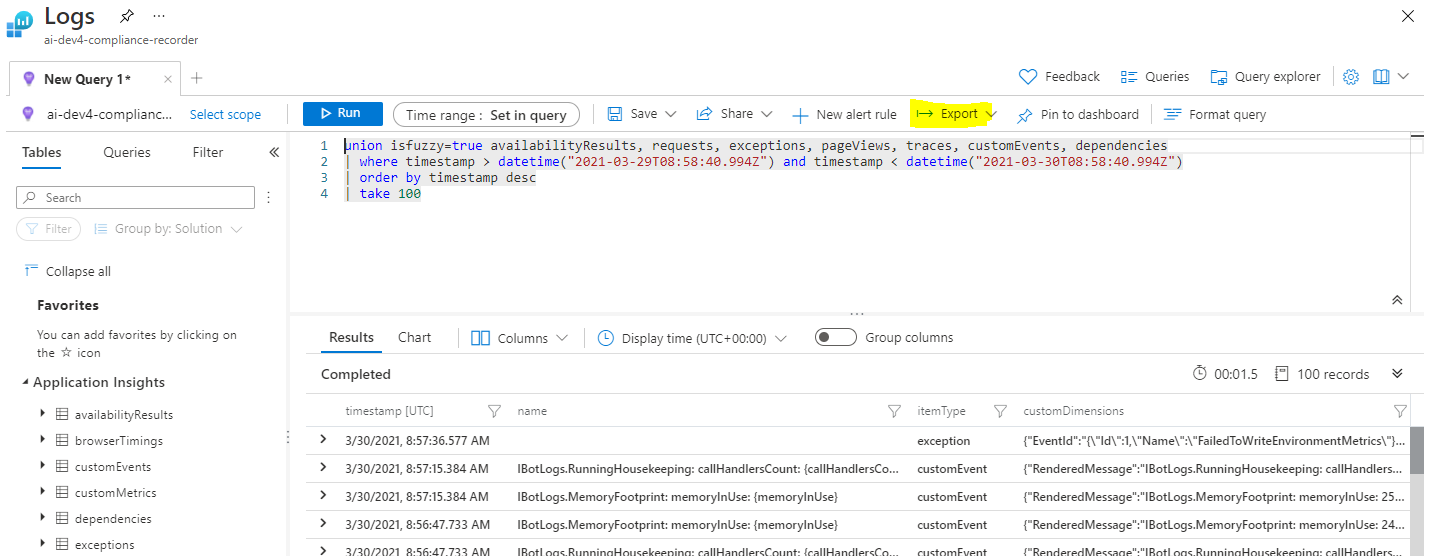
To export the result, click the Export button and choose the format you require.