Define Contact Summary and Disposition
Analyst can define a Contact Summary either in Paragraph or Bullet points format. The Contact Summary appears on the LivePerson Widget in the Agent Workspace. The template defined here is used for both On-Demand Summary and End of Call Summary.
Contact Summary - Paragraph format
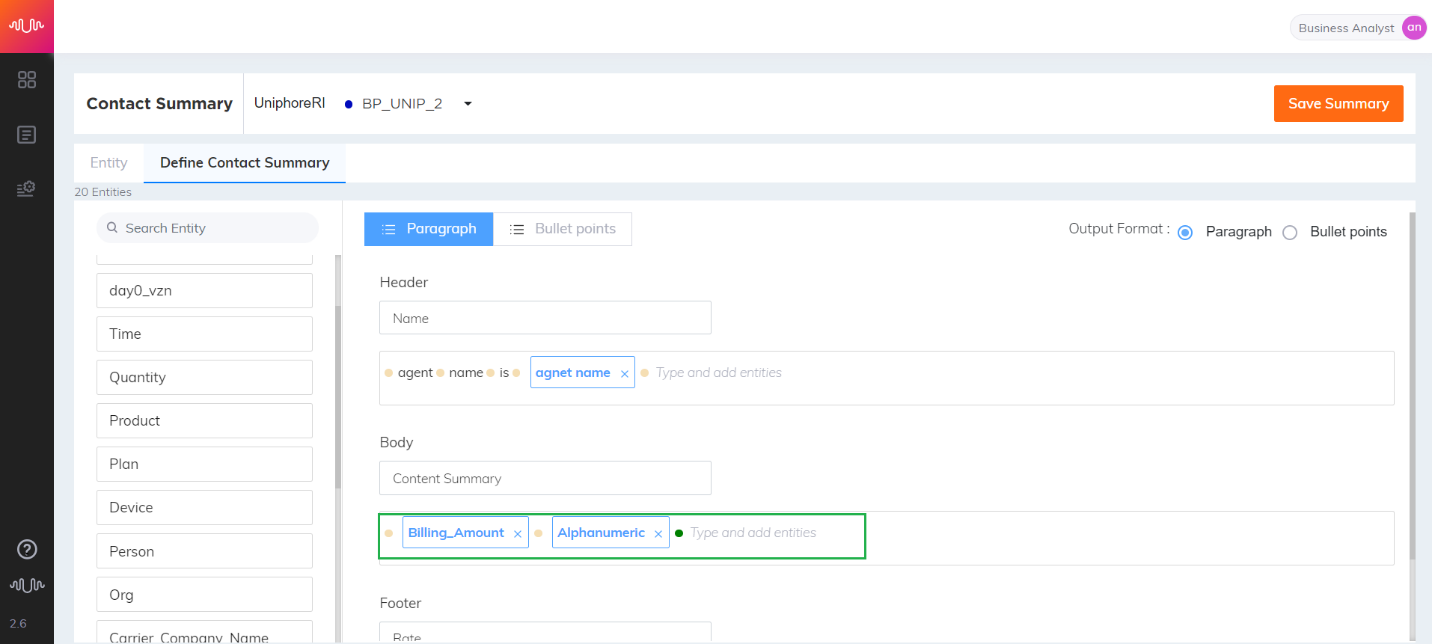
Select the output format as Paragraph from the radio buttons on the right hand side.

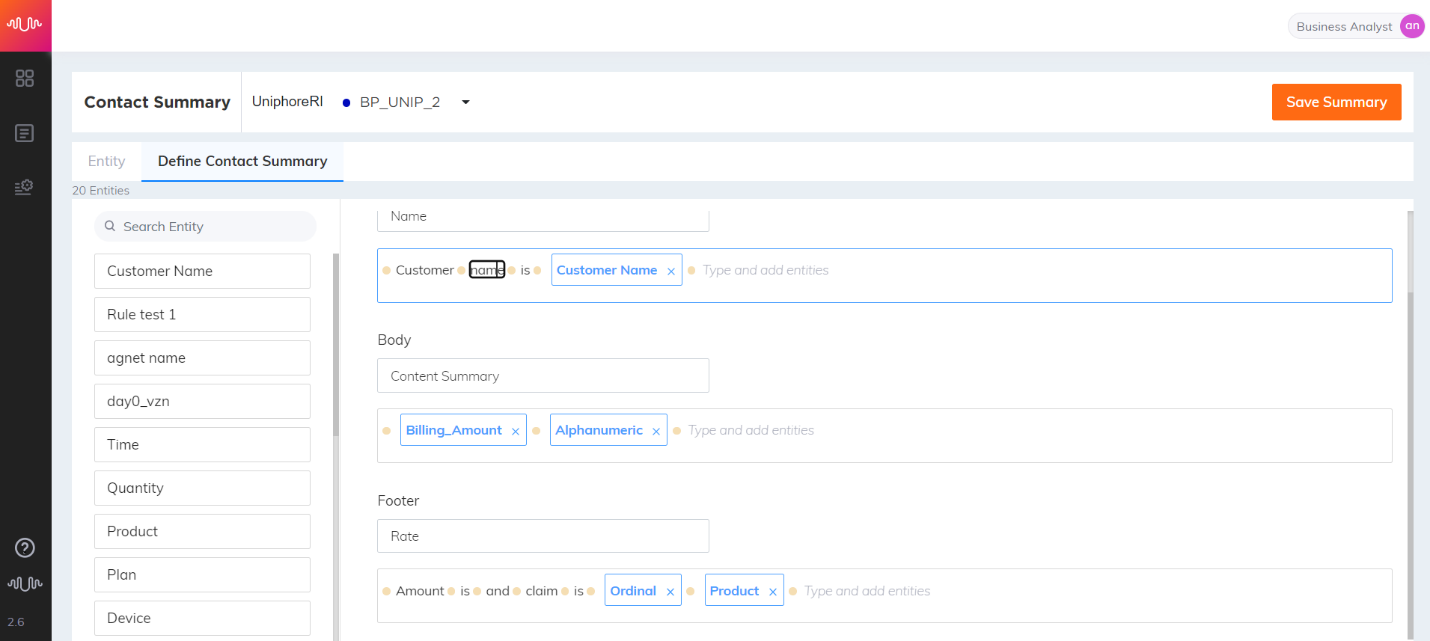
In the left pane, all the entities including AI entities which are imported from AI model, NLP and Rule entities are listed for the selected organization and business process. Analyst can type free form text and add entities from the left pane in Header, Body and Footer sections. These 3 sections are optional.
Note
Entities that are in trained status are only listed in the left pane.
Hit “enter” when you want to add an entity. Click on the orange dot at the end of your any phrase. It will turn green. Now select an entity from the left hand side.
Click Close (
 ) icon next to the entity to delete the entity.
Place the cursor in the text and press Delete/Backspace keys to delete the text. After deleting the text, press "enter" to save the changes.
Filler/Stop words (example: aah, hmm, yeah, ok, okay, etc.,) are updated through API. These words are automatically removed from the conversation turn during call processing and the corresponding entity values are extracted from the call based on the entity configuration. In the below example, filler word 'hmm' is removed from the Customer turn. The Agent turns "99786" and "09876" are merged and displayed as "9978609876" in the Summary.
Agent: Can I confirm your mobile number?
Customer: Yes you can.
Agent: 99786
Customer: hmm
Agent: 09876
Contact Summary - Bullet points format
Select the output format as Bullet points from the radio buttons on the right hand side.
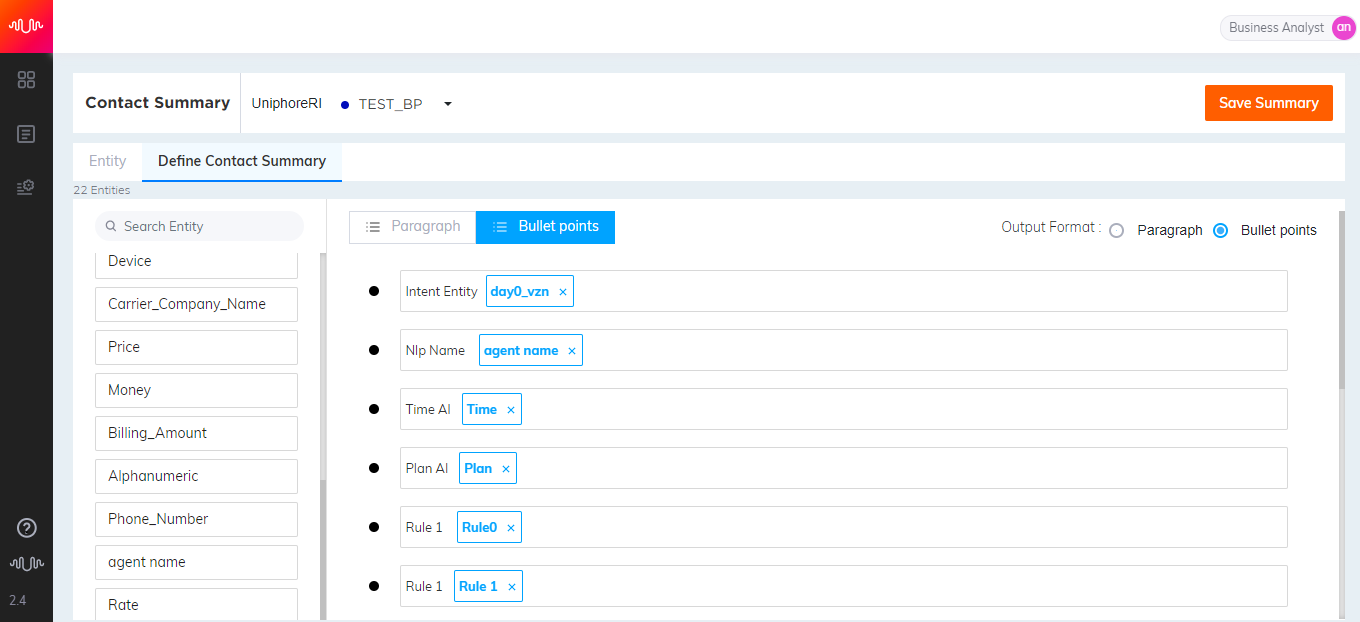
Analyst can randomly type and add entities from the left pane in each bullet point and move the bullet points in any order.
Note
Entities that are in trained status are only listed in the left pane.
Click on the orange dot. It will turn green. Now select an entity from the left hand side and click Plus (
 ) icon to save the entity and add a new line.
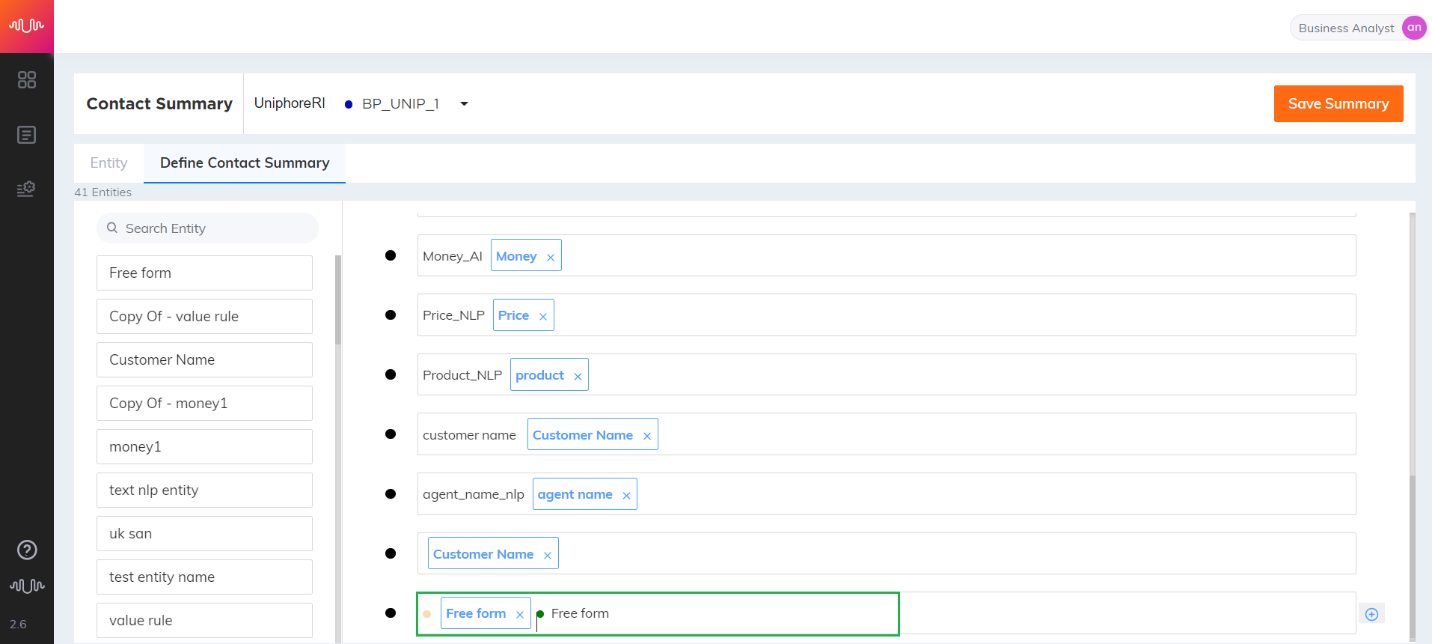

Click Close (
) icon next to the entity to delete the entity.Click Delete (
 ) button in the row to delete the respective bullet point.
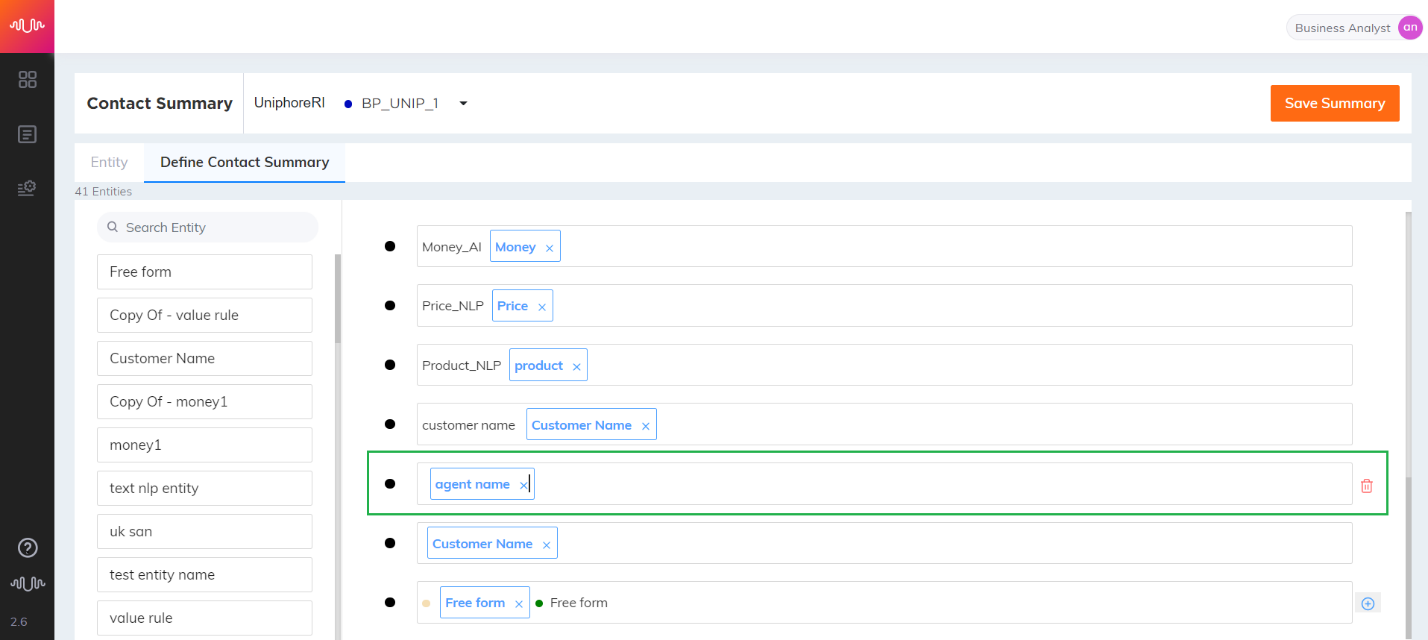
Analysts can configure one or more hierarchies for disposition categorization based on their analysis of calls. Contacts are categorized automatically from transcription in real time based on this defined hierarchy.
Define Conversation Disposition
Business analysts can configure one or more hierarchies for disposition categorization based on their analysis of calls. Contacts are categorized automatically from transcription in real time based on this defined hierarchy.

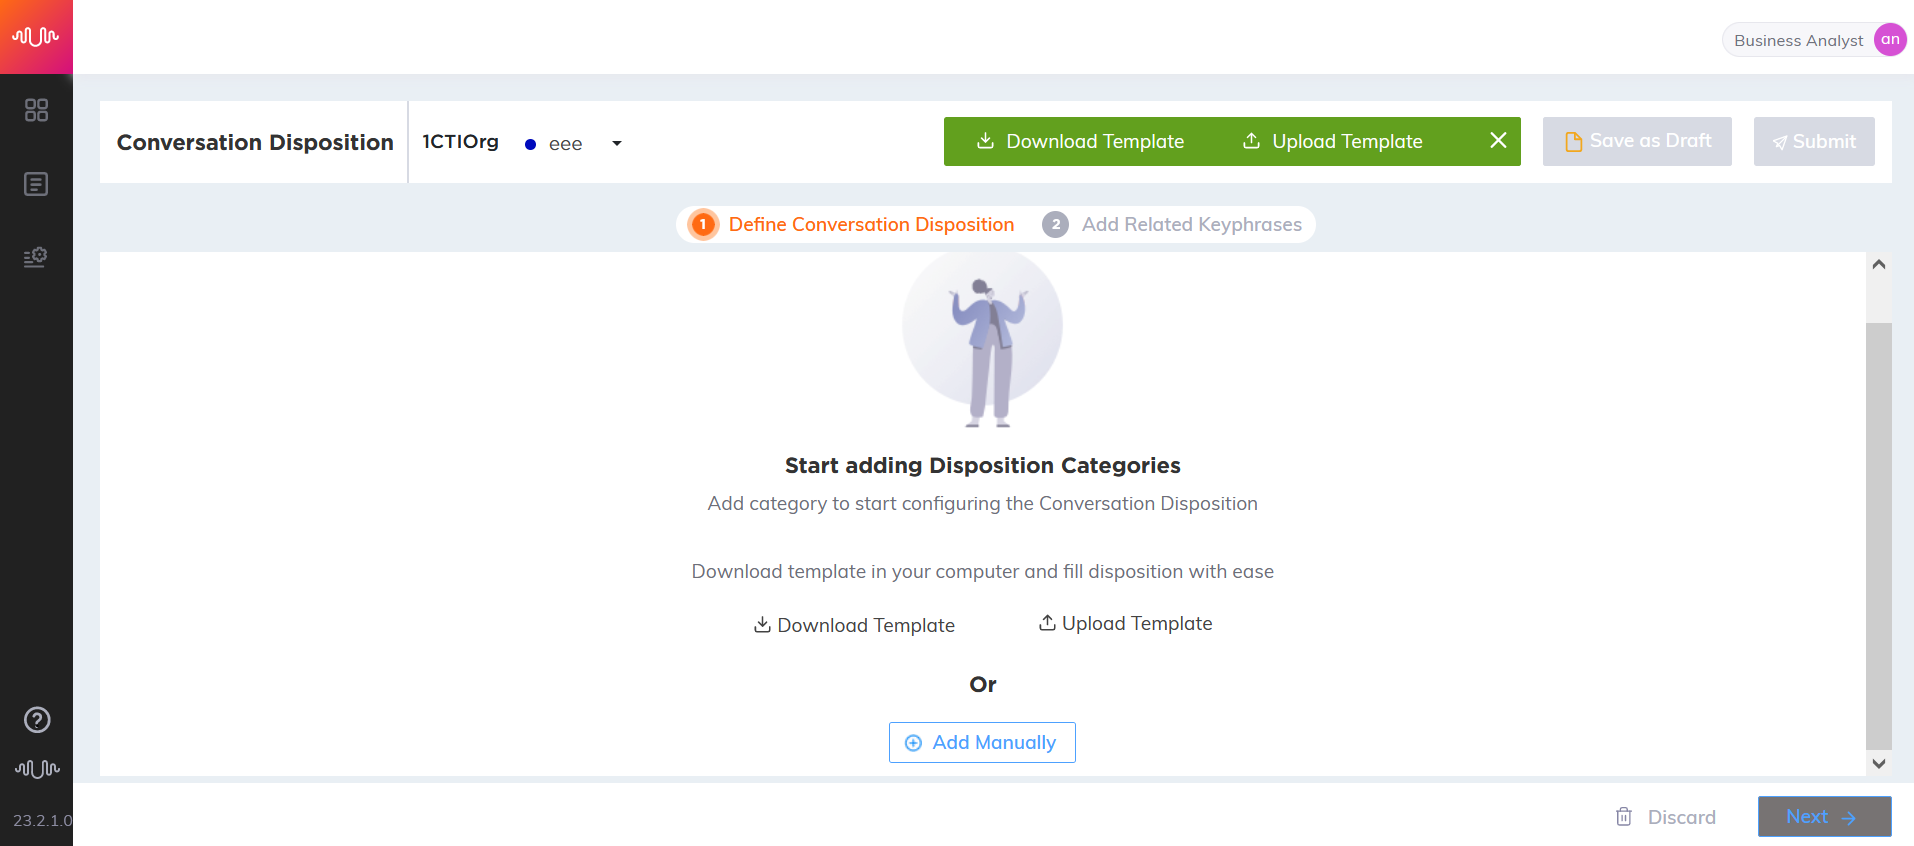
Analyst can create disposition categories using a predefined template or adding manually.
Conversation Disposition categories can be created manually from scratch or can be imported from another organization or business process. Click "Add Manually" to start adding categories in a hierarchy.
Click Download Template button to download the contact categorization file template (.csv), if required. In the template, fill the contact categorization levels based on the requirement and save it in the desired path. Select and upload the file to view the Hierarchy levels. Analyst can define contact categories up to 5 levels.
Click Upload Template button to upload the contact categorization file template (.csv), if required. A confirmation message will be displayed.

Click Yes Continue to override the existing disposition categories with the new changes or click Cancel to cancel the upload process.
Click on Hierarchy (
 ) icon in each level to create child nodes under it.
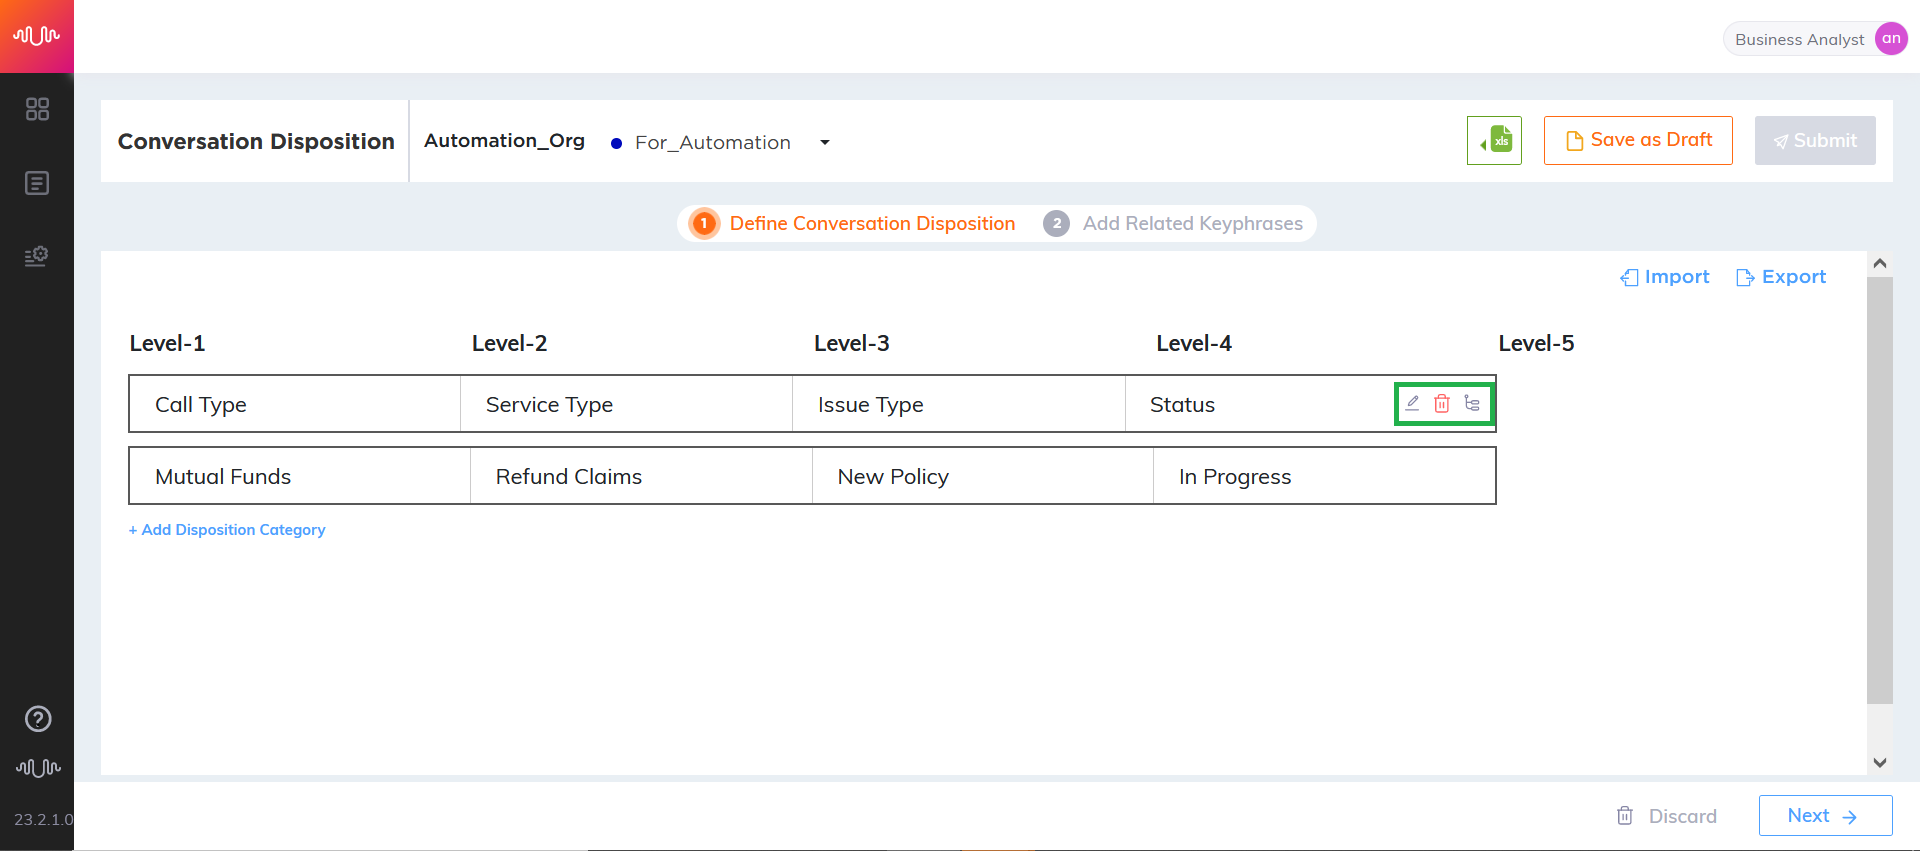
Click Edit (
 ) icon to edit the category name, if required.
Click Delete (
 ) icon to delete the specific category. While deleting the category, child nodes will also be deleted. A confirmation message will be displayed as shown below.
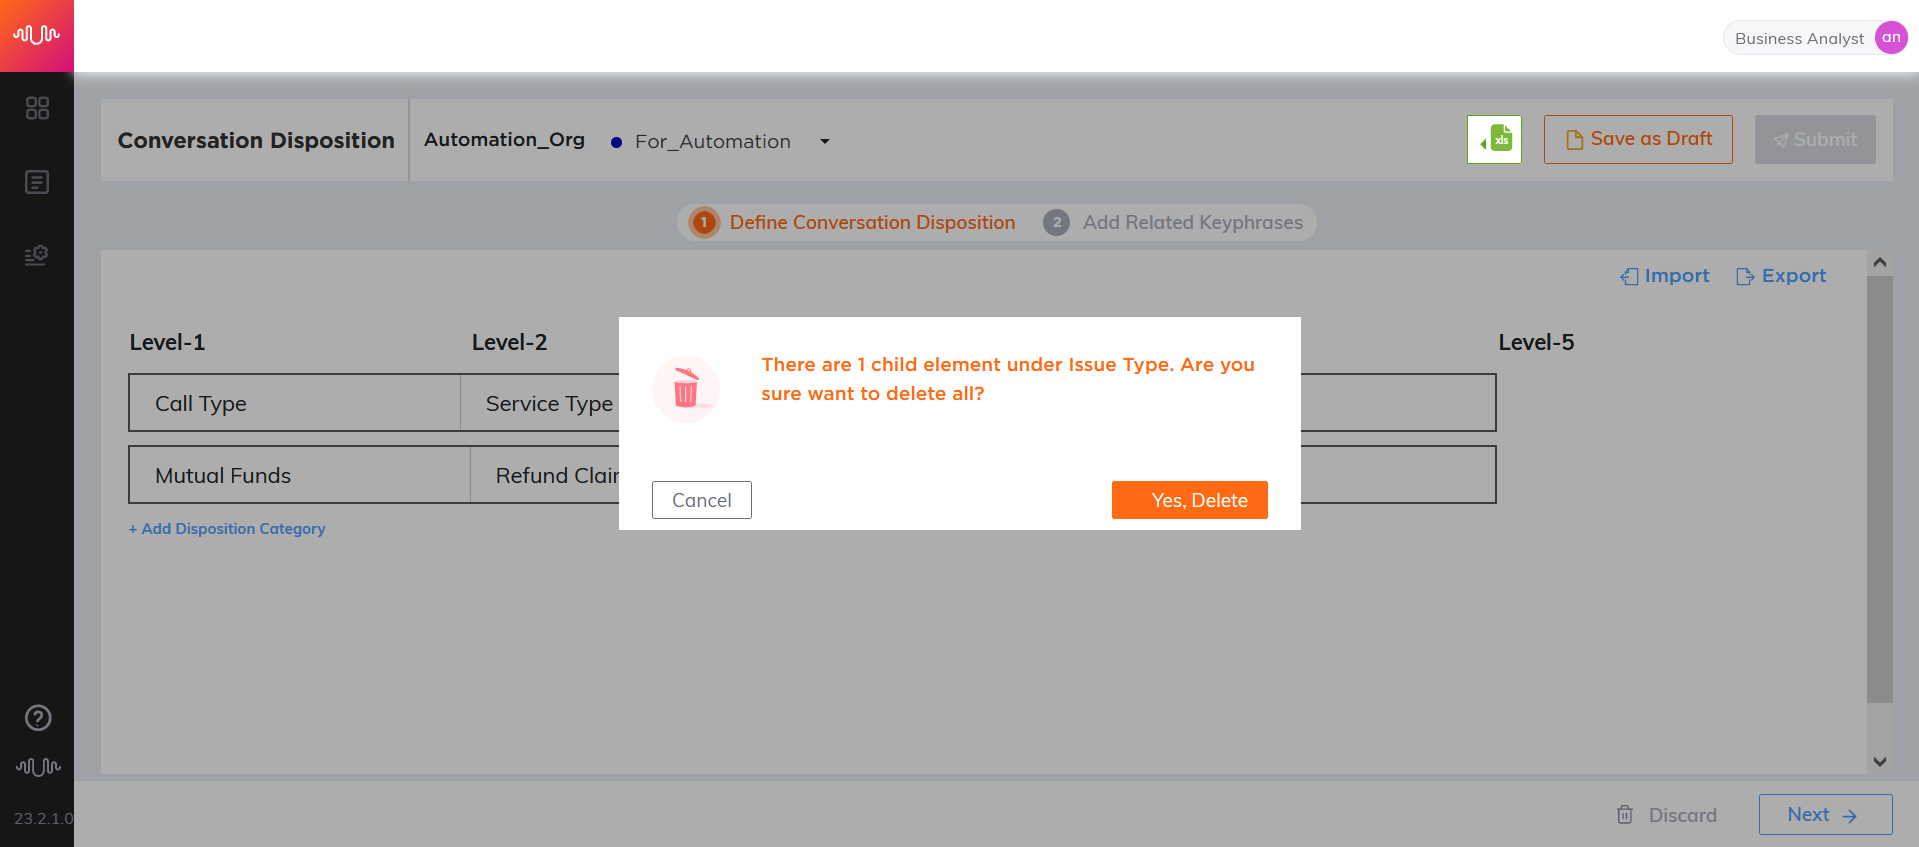
Click Yes to delete the selected category.
Add Keyphrases to Conversation Disposition
Analyst can manually add keyphrases to Disposition Categories.
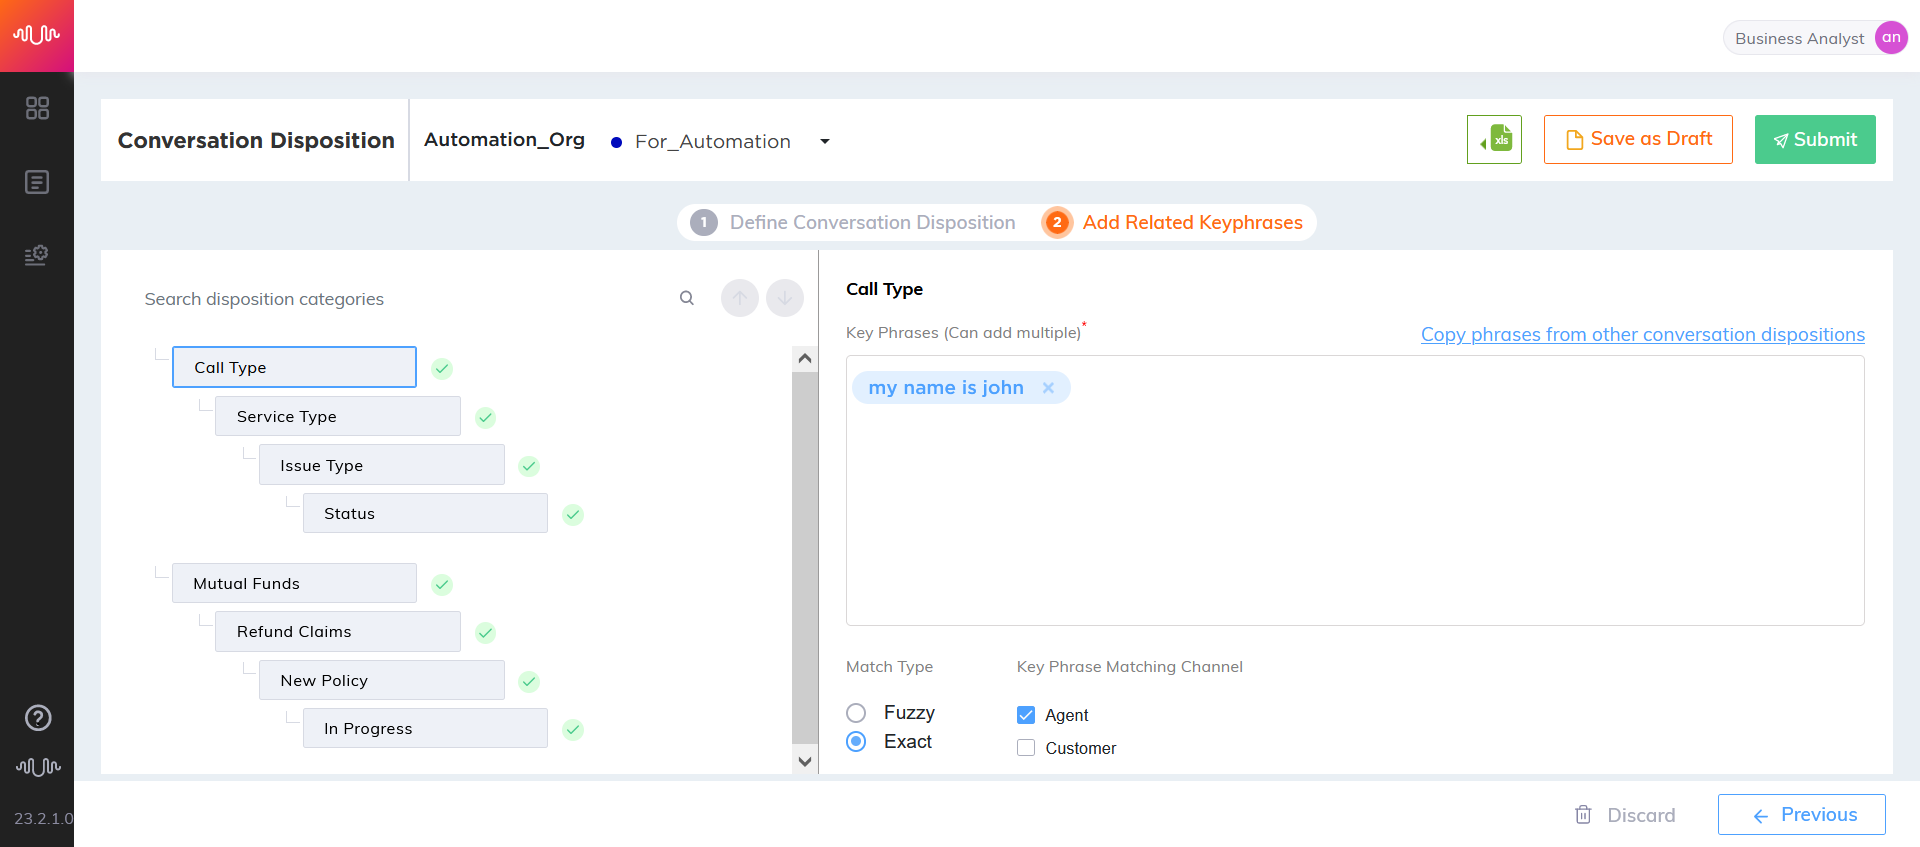
Select a Category from the left pane.
Enter the keyphrases manually in respective to the selected category and hit "enter".
Double click on the keyphrases to make any changes and hit "enter".
Select any one of the Matching options.
Fuzzy – Variants related to the configured keyphrase are considered for the corresponding category.
Exact – Accurate configured keyphrases are considered for the corresponding category.
Select a speaker channel (Agent or Customer) in the Keyphrase Matching Channel field.
Agent – Configured keyphrase will be detected in Agent Channel.
Customer – Configured keyphrase will be detected in Customer Channel.
Click Save as Draft to save the configuration of Contact Categories/Disposition as a Draft. Analyst can continue working on configuration of category at a later point of time.
Click Submit button to submit the Categories after completing the configuration. It will navigate to Business Process Dashboard.

Click Train button in Conversation Disposition section to train the Disposition.
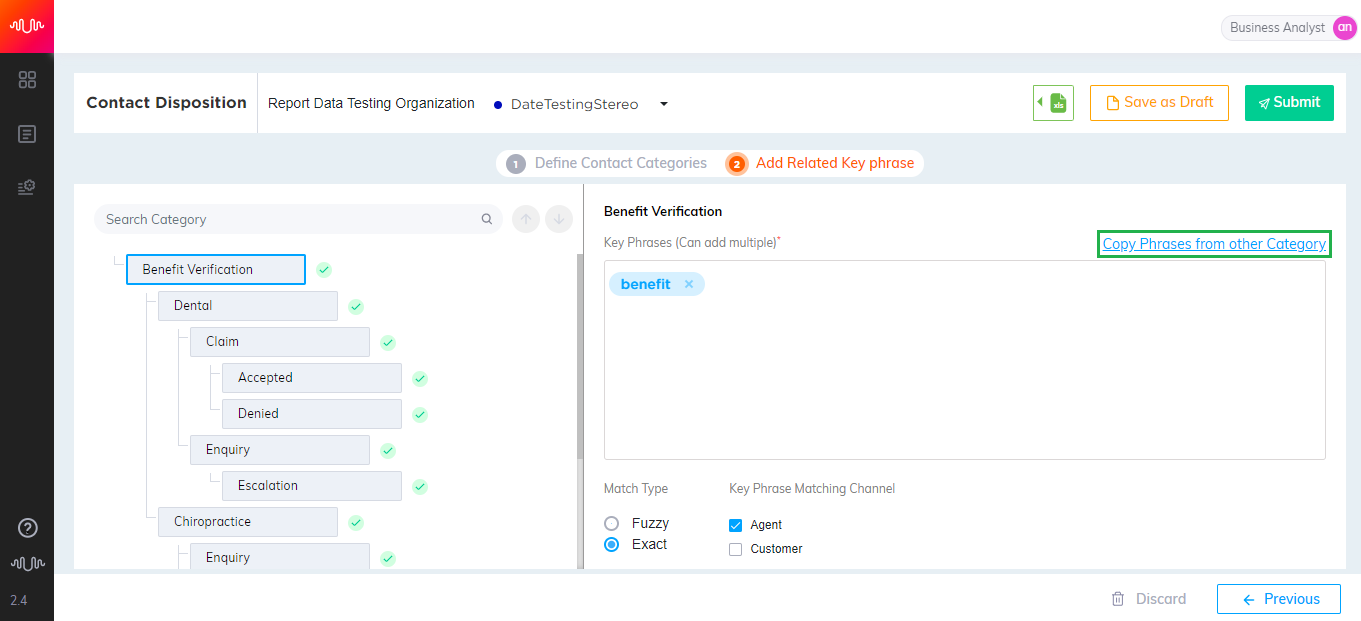
Copy Keyphrases from an other Category
Analyst can copy bulk key phrases from another Category within the same Business Process.
Click Copy Phrases from other Category link.
In the Search field, enter a minimum of 3 characters to search for a keyphrase.
Select the keyphrase from the list. The selected keyphrase will be listed at the bottom of the pop-up window.
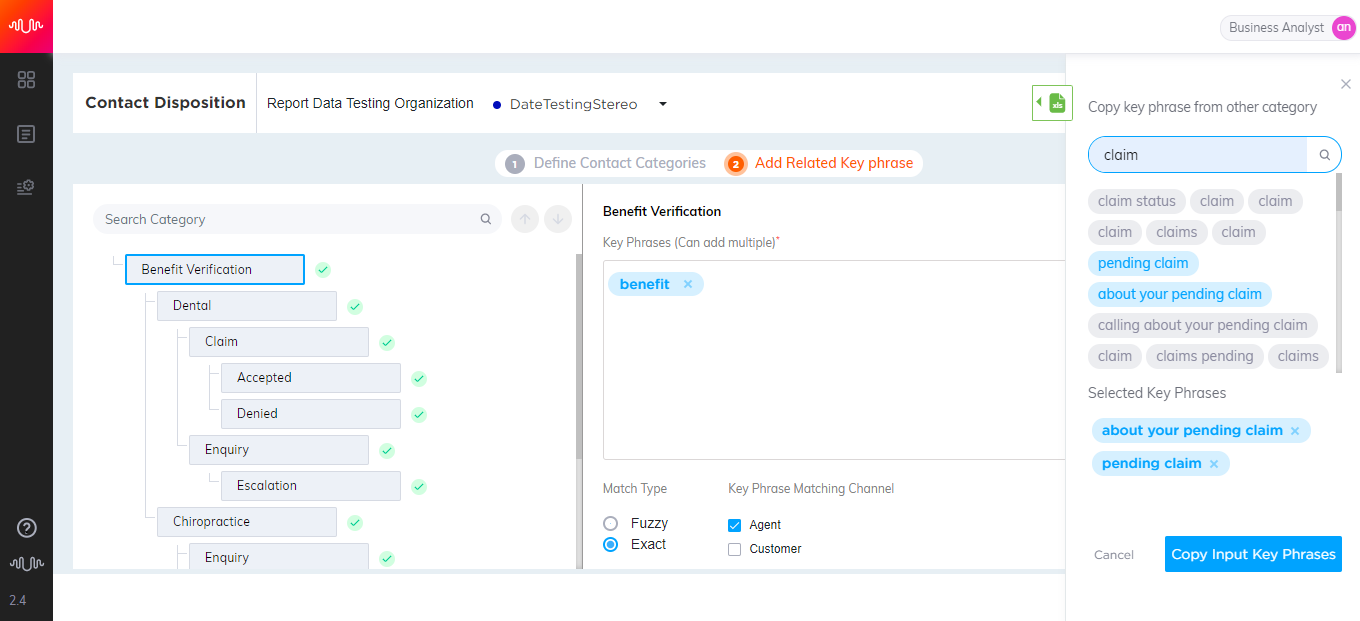
Click Copy Input Keyphrases button to copy the keyphrases from other categories and display them in the Keyphrase section.
Search Category
Analyst can search and select a category for configuration.
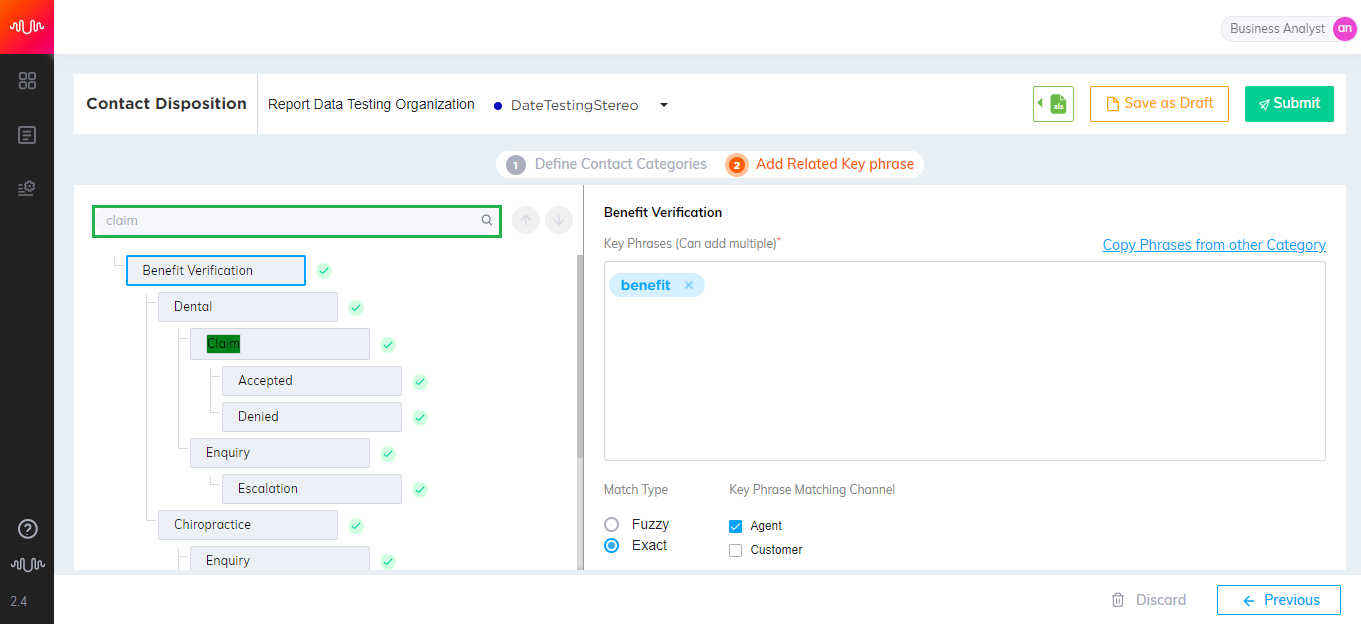 |
In Search field, enter minimum 3 characters to search for a category.
Select the category from the list of Hierarchies for configuration.
A tick mark will be displayed next to the category to indicate the category as configured.
Generate Summary and Disposition
Whenever an agent identifies the start of an intent, he/she can generate a summary and disposition, which starts appearing on the LivePerson Agent Workspace. The Regenerate option overwrites the existing summary and provides a new summary for the current intent. When the agent decides that the current intent has ended in the call and the customer is speaking about a new intent, agent can click the Add Intent button that starts generating a new summary and disposition and gets displayed on the Agent Workspace. At the end of the call, the agent has the option to review each of these individual summaries and disposition categories before submitting the call.
Refer to the section “Agent Application (ACW)” for generating summaries and dispositions.