Create a Routing Profile
Routing profile helps contact center in assigning an end user’s call to agents based on certain criteria such as channels, queues, priority, and delays. It can be assigned to an agent through Add new user. By setting up a Routing profile, you can reduce the end users' wait time and connect them to the right agent, thus improving the efficiency of the contact center.
To create a Routing Profile:
Login to Amazon Connect instance as an Admin.
Go to User Management from the left menu and click Routing profiles.
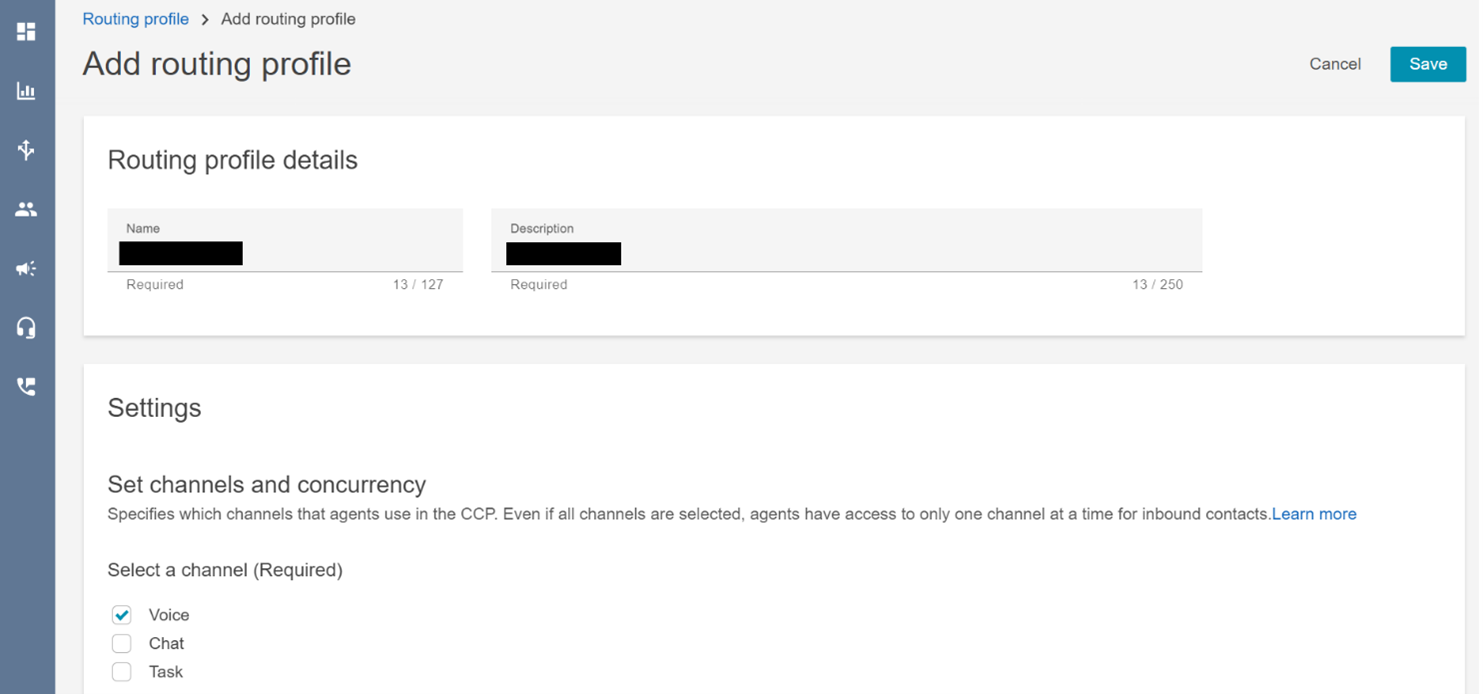
Click Add routing profile to create a new routing profile.
Add the Routing profile details. Enter a Name and Description for the Routing Profile.
In Settings, select one or more channels which the agent uses. The available channels are Voice, Chat and Task.
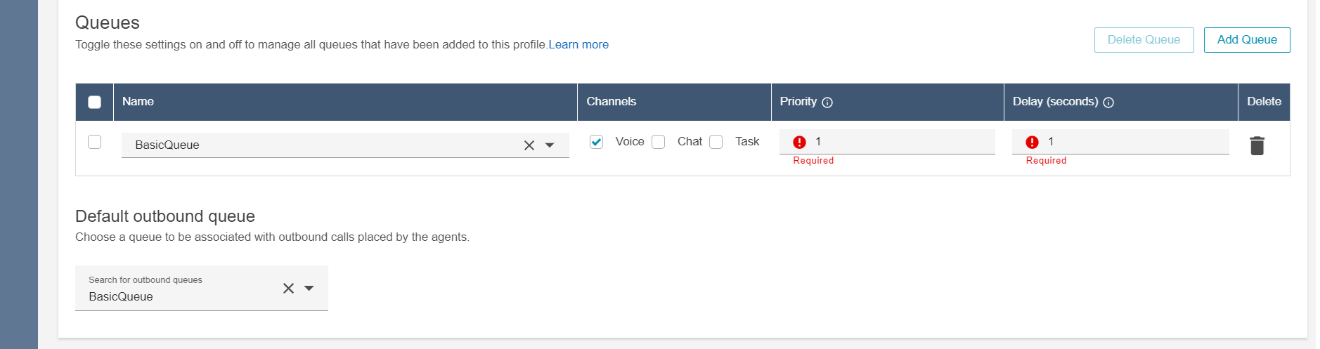
In Queues, select a queue from the drop down. The Queues created earlier are listed here. Select Channels, add Priority and Delay for the selected queue.
In Priority, specify the order in which contacts need to be handled for that queue. For example, if there are many contacts in queue with priorities 1, 2, 3 and more, the contact with priority 1 is handled first followed by subsequent priority numbers.
In Delay, enter the minimum time limit (in seconds) where a contact is required to be in the queue before they are routed to an available agent.
In Default outbound queue, select a queue for the outbound calls.
Click Save.