Adding SMS Campaigns
To create a new campaign, you select the relevant Flow to send, specifying along with it the following campaign parameters:
Campaign Name: The name by which the campaign is known. The name can include any text.
Campaign ID: An identifier that is used to invoke the service that sends the SMS to the customer. Any string can be used.
Message to Text: The message content, which may include up to 140 characters. The Flow URL should be represented by the following placeholder: <link>.
At the upper right corner of the Campaign Management page, click Add. The Add Campaign page opens.
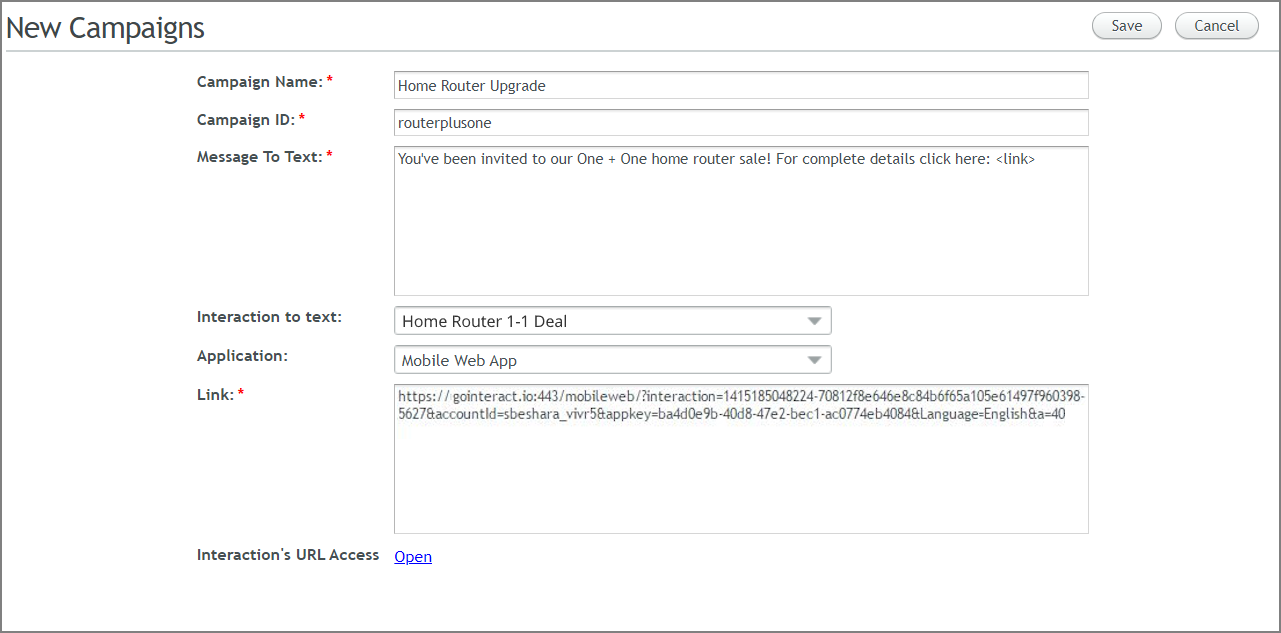
Enter the unique Campaign Name and Campaign ID for the campaign in the appropriate fields. Any string characters may be used.
In the Message To Text field, enter the content of the SMS message. The required campaign URL is inserted in place of the <link> placeholder whenever the message is sent. (e.g.,Please click here: <link>).
From the Interaction to text dropdown list, select the relevant Flow. Only approved Flows are listed. You can enter the first few characters from the Flow name to locate the Flow using autocomplete.
From the Application dropdown list, select the application in which to run the Flow. The list includes all applications to which the Flow was published.
Once you select an application, a URL is automatically displayed in the Link field.
In addition, the Flow's URL Access link appears at the bottom of the page. Clicking this link opens the Access Protection tab of the relevant Flow where the current access status of the selected Flow can be viewed. When Flow access is set to Protected, an access token will be automatically added to the current campaign's URL when it is saved. For more information about access protection, click here.
If relevant, add any additional required parameters required for the Link field. The link may be up to 160 characters long.
At the upper right corner of the page, click Save. A confirmation message is displayed, and the new campaign is listed in a new row on the Campaign Management page.