Adding Applications for U-Assist
The following three applications (U-Assist InCall, U-Assist AfterCall, Knowledge AI) are required to run U-Assist.
Important
After deploying the applications, you cannot make any updates or changes to them.
Click the specific customer or tenant name from the customer list.

Follow the steps given below to deploy each application:
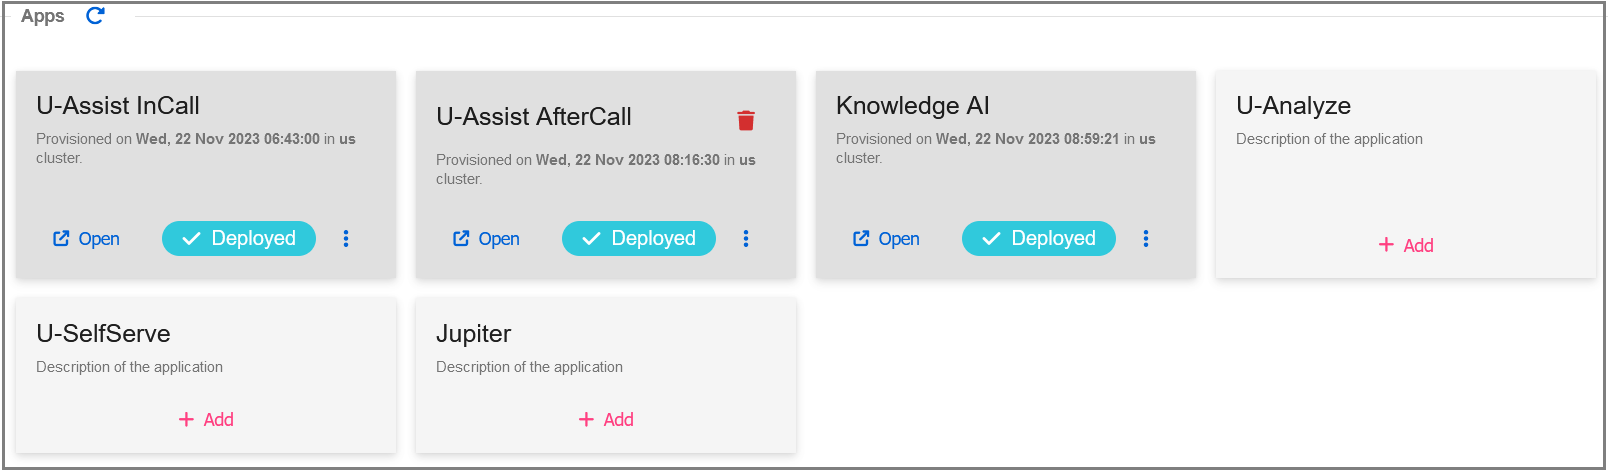
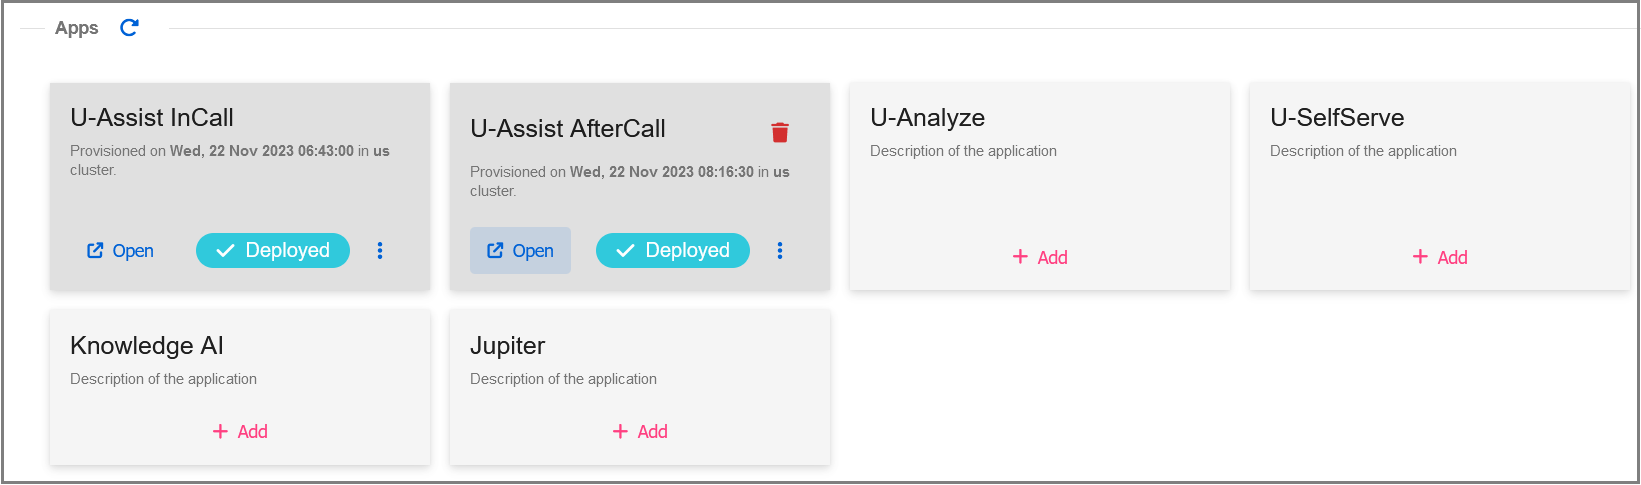
Add U-Assist InCall Application
Click Add in U-Assist InCall Apps to setup instance for X-Console Application. The Provision New App pop-up window will be displayed.
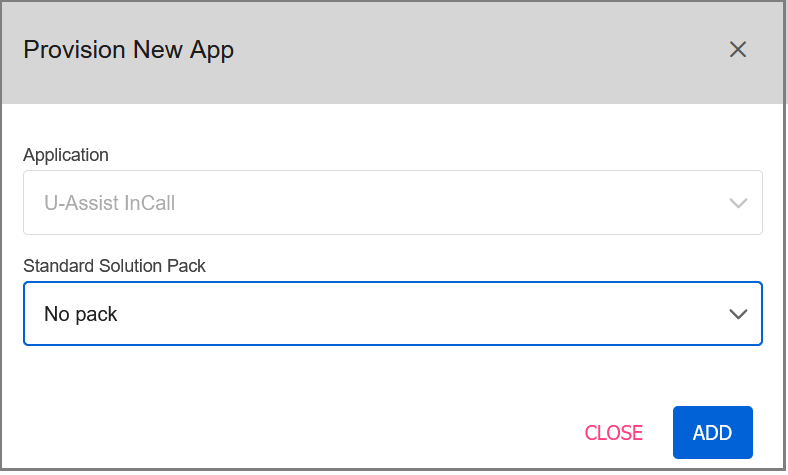
In the Application field, the U-Assist InCall is shown by default.
Note
It is not required to select any value in the Standard Solution Pack field.
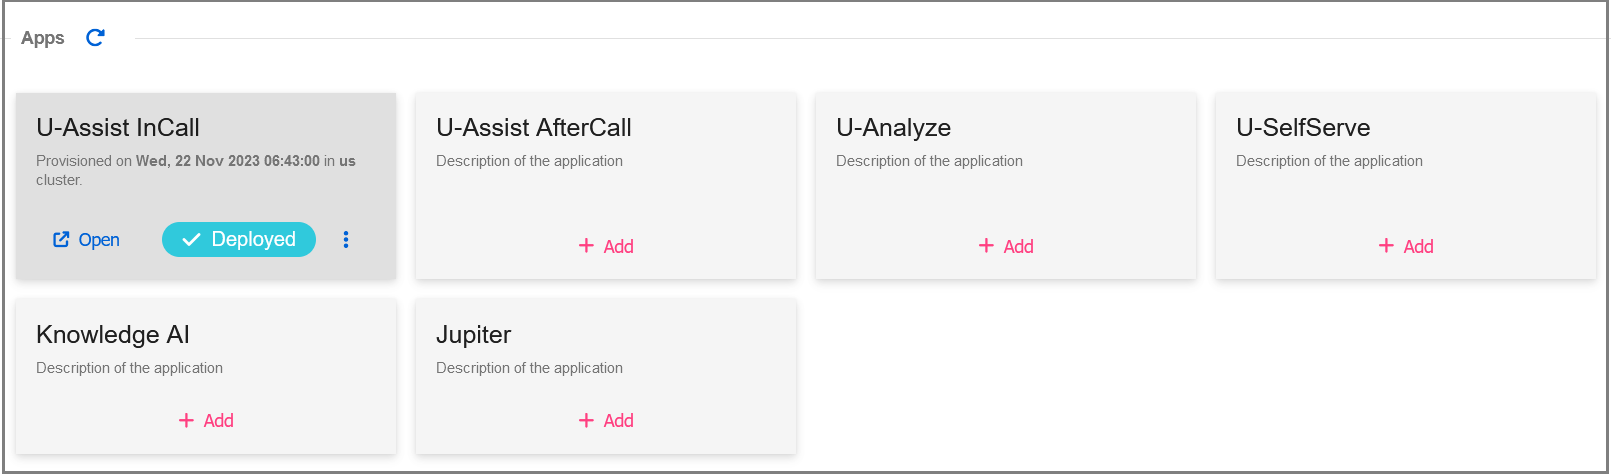
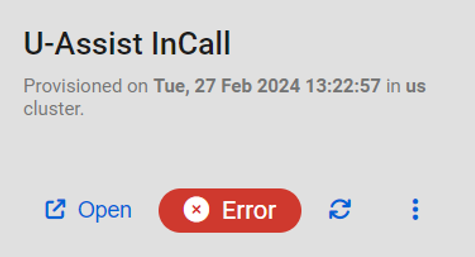
Click Add to create a unique instance with the Slug name for accessing X-Console application. The status is 'Deployed' after successfully adding the Application. The Open link provides the URL for the U-Assist InCall Application.
Note
If the system takes more than a minute to deploy the InCall Application on X-Console, an Error status will be displayed instead of Deployed. The default session timeout is 60 seconds. Please wait 10 minutes after deployment before attempting to login.
Add U-Assist AfterCall Application
Click Add in U-Assist AfterCall Apps to setup instance for U-Assist AfterCall Application. The Provision New App pop-up window will be displayed.
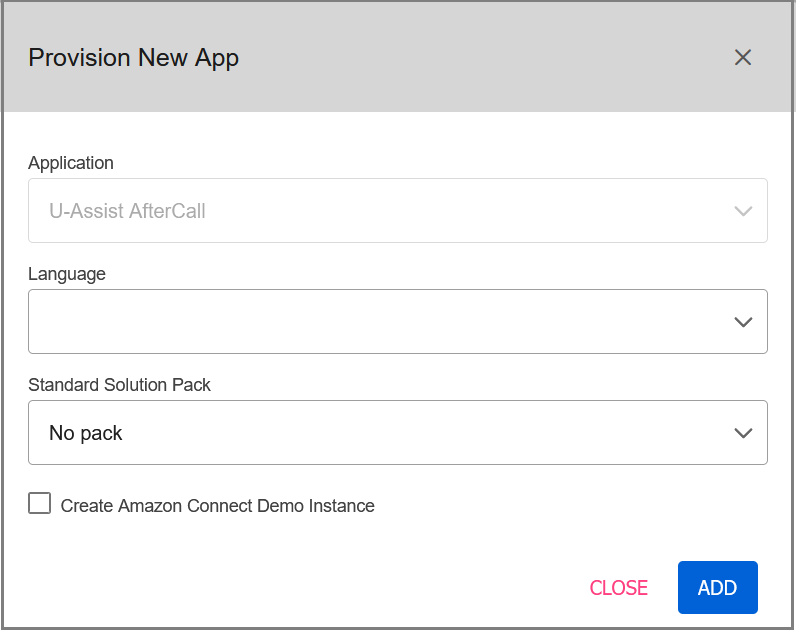
In the Application field, the U-Assist AfterCall is shown by default.
In the Language drop-down list, select the language. All the languages supported by U-Assist will be listed in the drop-down.
Important
Only one language can be selected at a time. If the language you want is not shown in the drop-down, it is not supported.
Note
It is not required to select any value in the Standard Solution Pack field.
Select the checkbox ‘Create Amazon Connect Demo Instance’ to automatically create Amazon Connect demo instance details.
Best Practice: This is the easiest approach to create an instance during application deployment for U-Assist live calls, and it needs to be connected to an Agent user at the time of user creation.
If you wish to use a new AWS instance, the values of the contact attributes "orgName", "catName' "ctiLanguage" “skill” need to be configured in the AWS while creating a Contact Flow.
Click Add to create a unique instance with the Slug name for accessing U-Assist AfterCall application, as well as to automatically obtain the Amazon Connect demo instance and the credentials for the demo Agent.
When creating the Agent user for AI Agent Application, the auto-generated Agent user ID should be entered in the User CRM ID field. Refer the step 5 in Adding Users section.
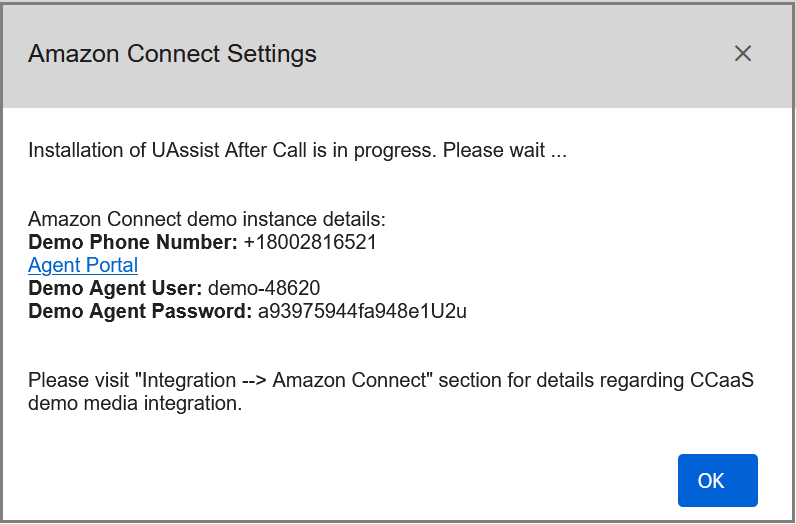
Click OK to exit the pop-up window. The status is "Deployed" after successfully adding the Application. The Open link provides the URL for the U-Assist AfterCall Application.
The auto created Amazon Connect demo instance is displayed in the Integrations section.
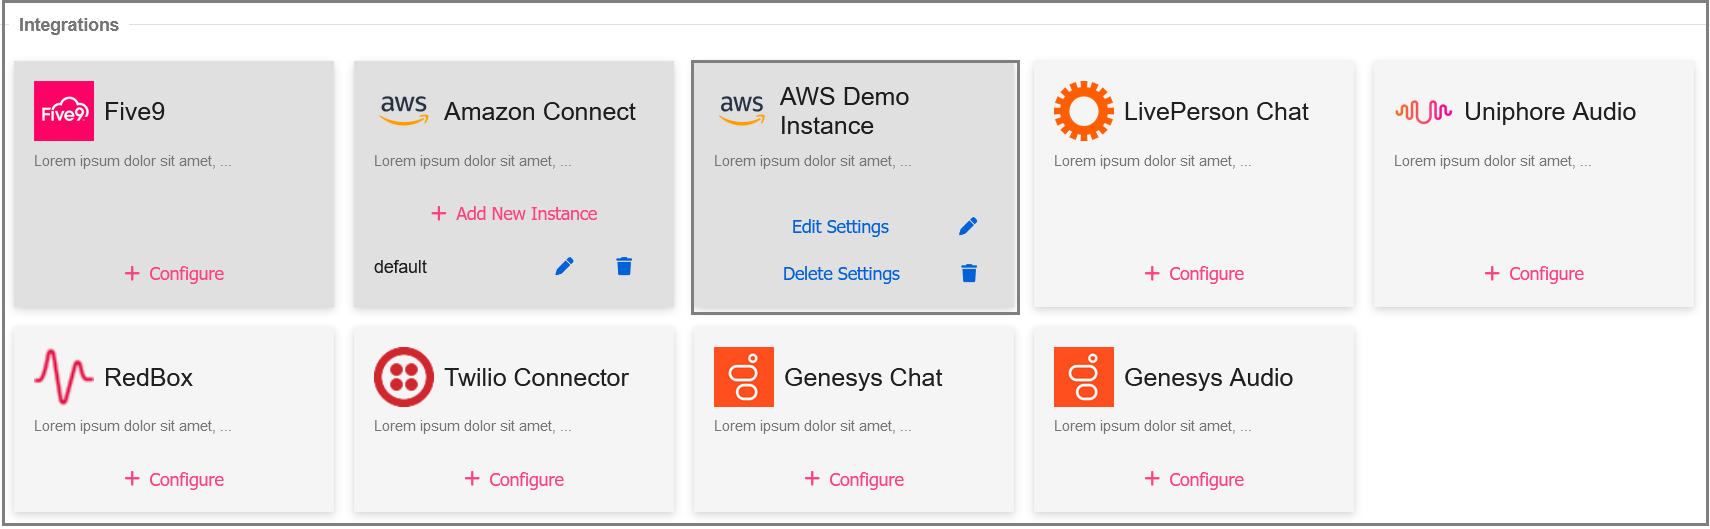
In AWS Demo Instance, click Edit Settings (
 ) icon to view the Amazon Connect Settings for demo Agent user.
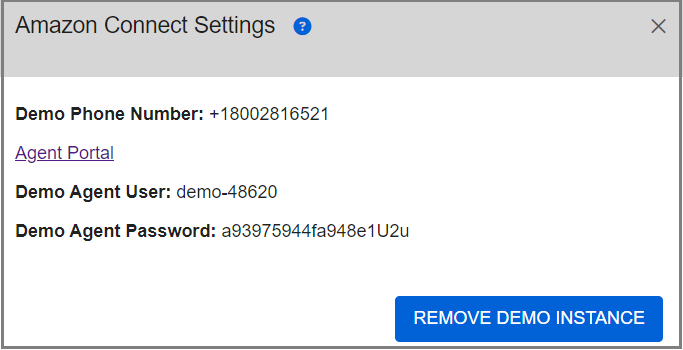
Add Knowledge AI Application
Click Add in Knowledge AI Apps to setup instance for Knowledge AI Application. The Provision New App pop-up window will be displayed.
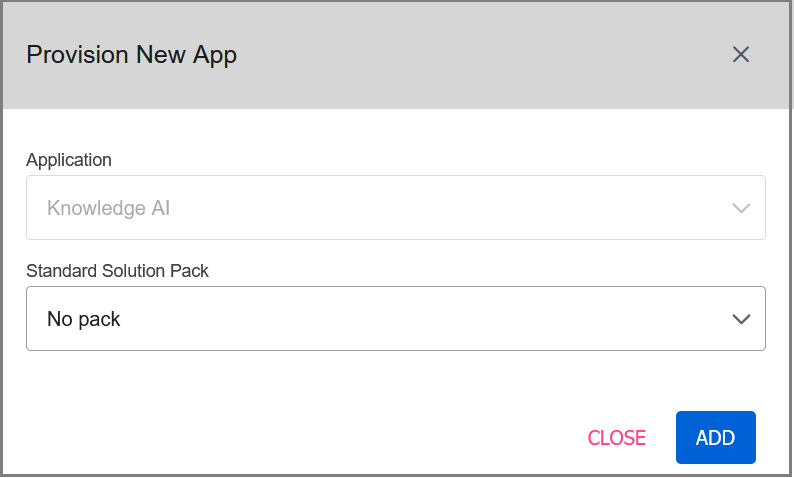
In the Application field, the Knowledge AI is shown by default.
Note
It is not required to select any value in the Standard Solution Pack field.
Click Add to create a unique instance with the Slug name for accessing Knowledge AI application. The status is "Deployed" after successfully adding the Application. The Open link provides the URL for the Knowledge AI Application.
Note
If you face any issues in deploying Knowledge AI, please contact your Uniphore Support team.