Adding a Custom Integration Point: Workflow
Like SOAP and REST Integration Points, you create new Custom Integration Points in the X-Console, using the New Custom Integration Point wizard.
In addition to defining request and response parameters and testing your service, the wizard includes an editor that enables you to write custom code for the IP.
Before you begin work on a Custom Integration Point, we recommend that you review the following additional instructions.
For instructions and guidelines about custom code structure, permitted modules and error handling, see Writing Code for a Custom Service.
Review the article Custom Services: Examples before writing your own Custom Service.
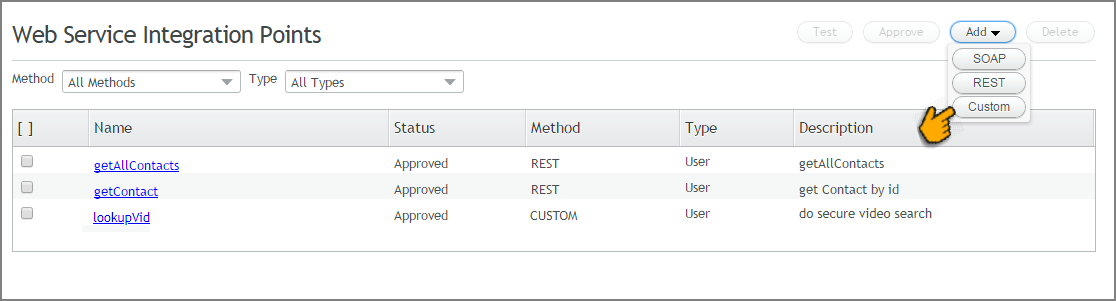
At the top of the Web Service Integration Points page, click Add, and then select Custom.
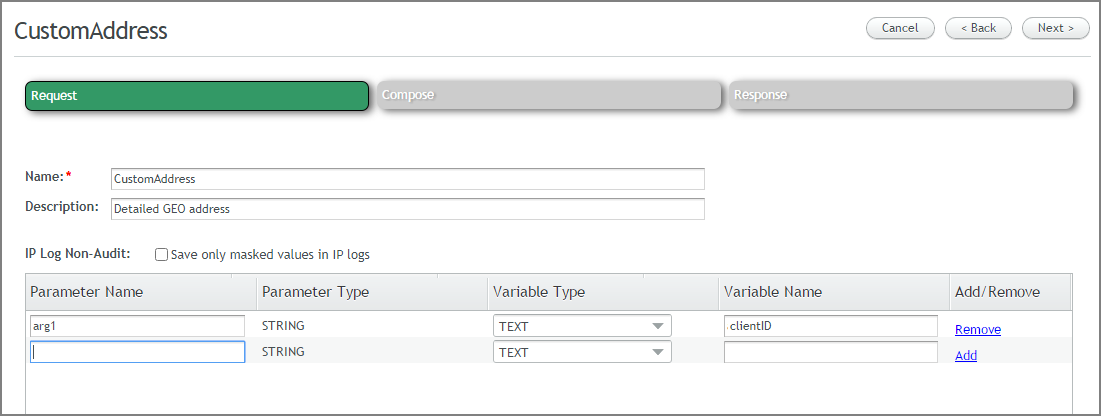
The New Custom Integration Point wizard opens:
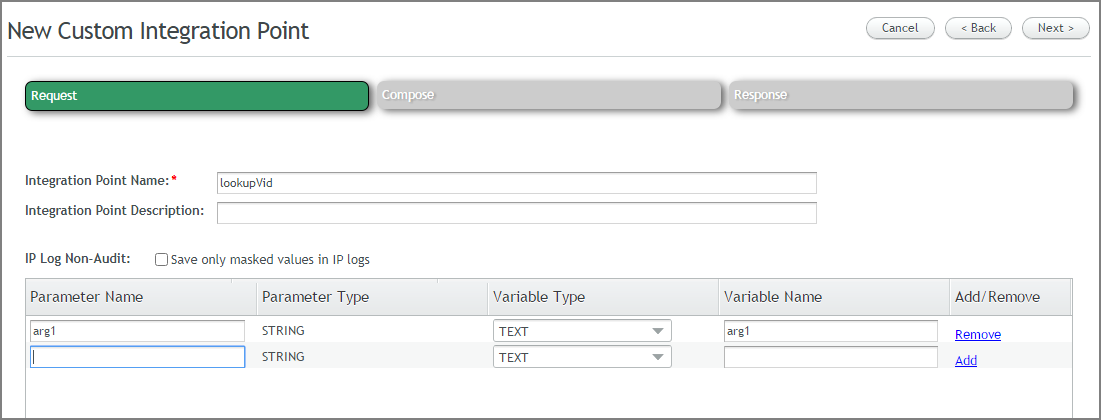
At the top of the page, enter a relevant Integration Point Name and Description in the appropriate fields.
Optionally activate the IP Log Non-Audit checkbox to instruct X‑Platform to mask specified sensitive data when writing to IP Logs. Masking is performed on data that matches Regular Expression patterns that are defined for the account.
Define the input parameters.
Provide the relevant name for each parameter. In the Variable Type column, select the data type that will be used for this parameter in Interact. Optionally, in the Variable Name column, you can assign a more meaningful name that will be displayed to users in the X-Designer.
At the upper right corner of the page, click Next. The Compose panel is displayed:
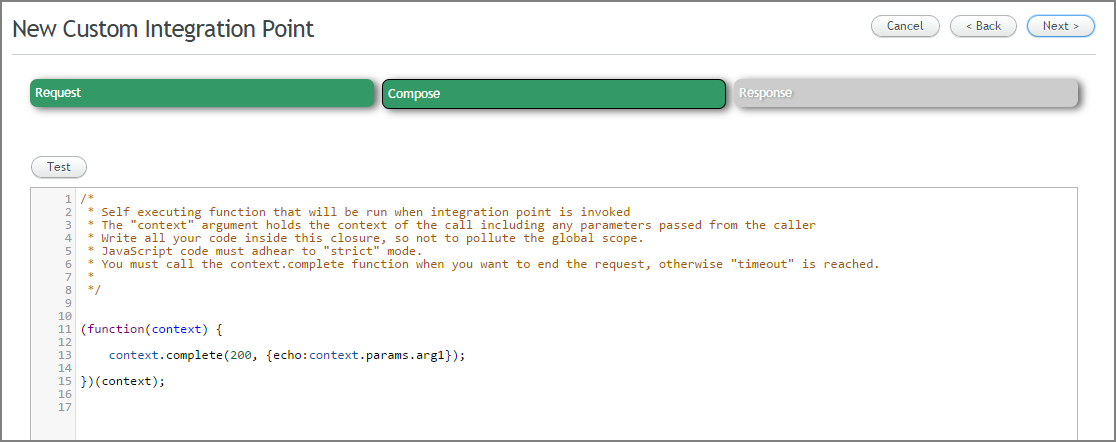
Write the code for your Custom Integration Point Service in the code editor of the Compose panel, or paste code here that has been composed and/or validated in another tool. For more details and guidelines, click here.
At the upper right corner of the page, click Next. The Response panel is displayed:
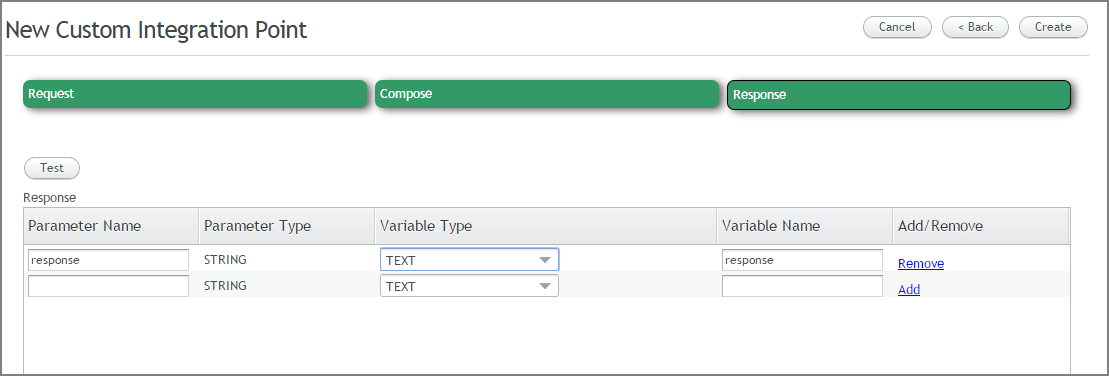
Map the Response parameter(s) to variables that will be available in the X-Designer. For details about Response mapping for a Custom Integration Point, click here.
Verify operation of the new Custom Integration Point service by clicking Test. For details about testing, click here.
At the upper right corner of the page, click Create. A confirmation message is displayed, and the new Custom Integration Point is added to the Web Service Integration Points page.
Editing a Custom Integration Point
You can edit an existing Custom Integration Point at any time.
From the Web Service Integration Points page, click the name of the Custom Integration Point you want to change. Your selection will be displayed for viewing and additional actions.
At the upper right corner of the page, click Edit. The wizard is opened for the selected Custom Integration Point:
Change all required parameters as needed, moving between the Request, Compose and Response panels by clicking Next.
When you have completed your changes, at the upper right corner of the page, click Update. A confirmation message is displayed, and the updated Custom Integration Point will be displayed on the Web Service Integration Points page.