Creating Custom Types
Using the X-Console, you can create the following Custom Types for use in any of your Flows:
Custom Types. Custom Types provide complete flexibility for defining and integrating mixed fields types in Flows. They are especially useful when using Integration Points from external data sources. For example, a Custom Type representing a customer object might consist of a fieldset such as First Name, Last Name, Phone, Date of Birth, etc.
Enums. Enumerated variables are used to create personalized object fields. Use Enum variables to add pre-defined Session Variables to any Flow. For example, an Enum variable might be used to qualify Customer Levels such as Gold, Silver, Bronze, etc.
Adding a New Custom Type
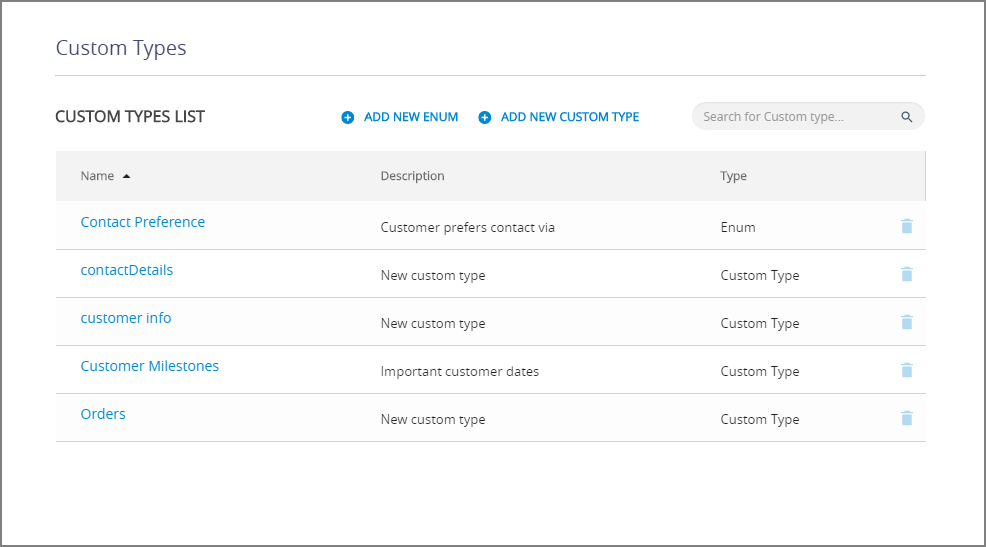
From the Resources section of the X-Console, click Custom Types. The Custom Types page is displayed:
At the top of the page, click Add New Custom Type. A new Custom Type page is displayed:
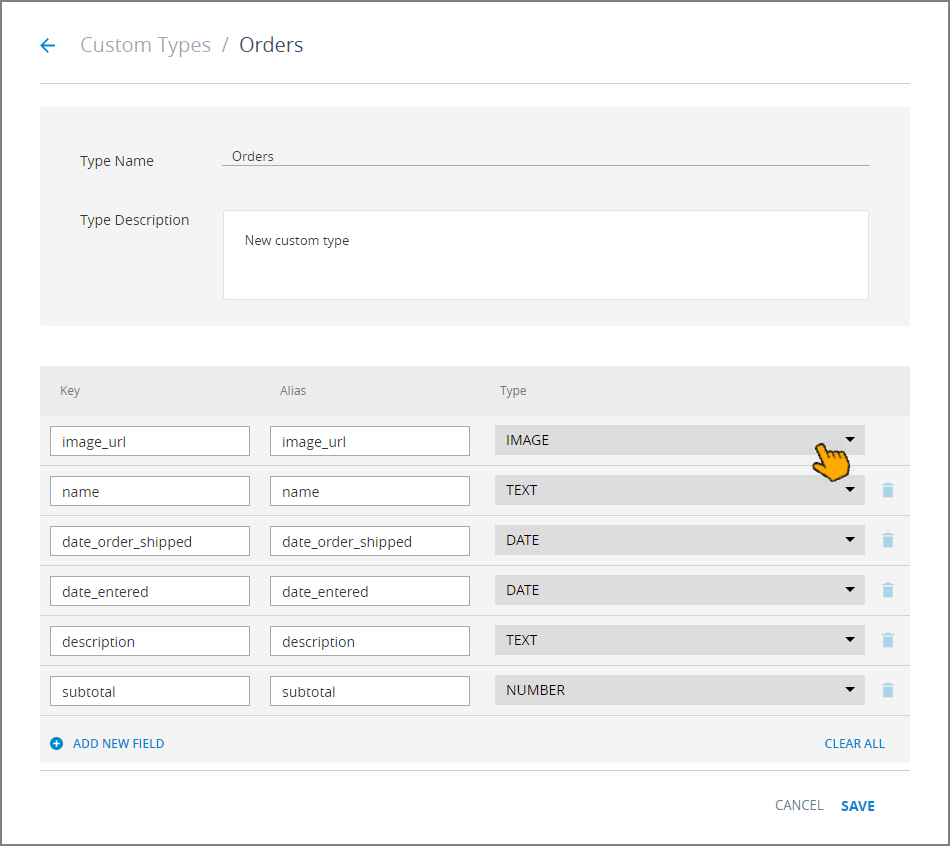
In the Type Name text box, enter a unique name for the Custom Type. This is a required parameter.
If desired, in the Type Description field, enter notes or comments related to the object.
Add the first field to the new Custom Type object by defining the following settings:
Key: The identifier for the field. A Key value cannot contain spaces.
Alias: A friendly name for the key. This setting is displayed in the X-Designer.
Type: Use the dropdown menu to select one of the supported data types for the field. The default type is Text.
Along with primitive data types, Image, Enum and Collection types are also supported. You'll find existing Enum types listed at the bottom of the dropdown menu.
When you select Collection, you also need to set its data type:
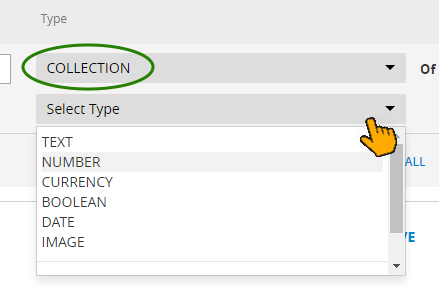
Each Collection can be assigned only one data type.
Since it can comprise multiple variable types, you can build a Custom Type with a mixed variety of Types. For example, a Custom Type representing a customer object can contain a fieldset such as First Name, Last Name, Phone, Date of Birth, etc.
Note: If you are referencing an external data source, such as a REST or SOAP web service, enter the key exactly as it appears in the data source.
To add more fields, click Add New Field, and repeat the sequence in Step 5.
To delete fields, click the Trashcan icon
 at the right side of the relevant row. You can also use the Clear All button to quickly delete all currently assigned fields.
When you have completed adding fields, click Save in the upper right corner. A confirmation message is displayed, and the new object is listed on the Custom Types page. You can exit the operation at anytime without saving changes by clicking Cancel.
Adding a New Enum Type
At the top of the Custom Types page, click Add New Enum. The New Custom Type page is displayed:
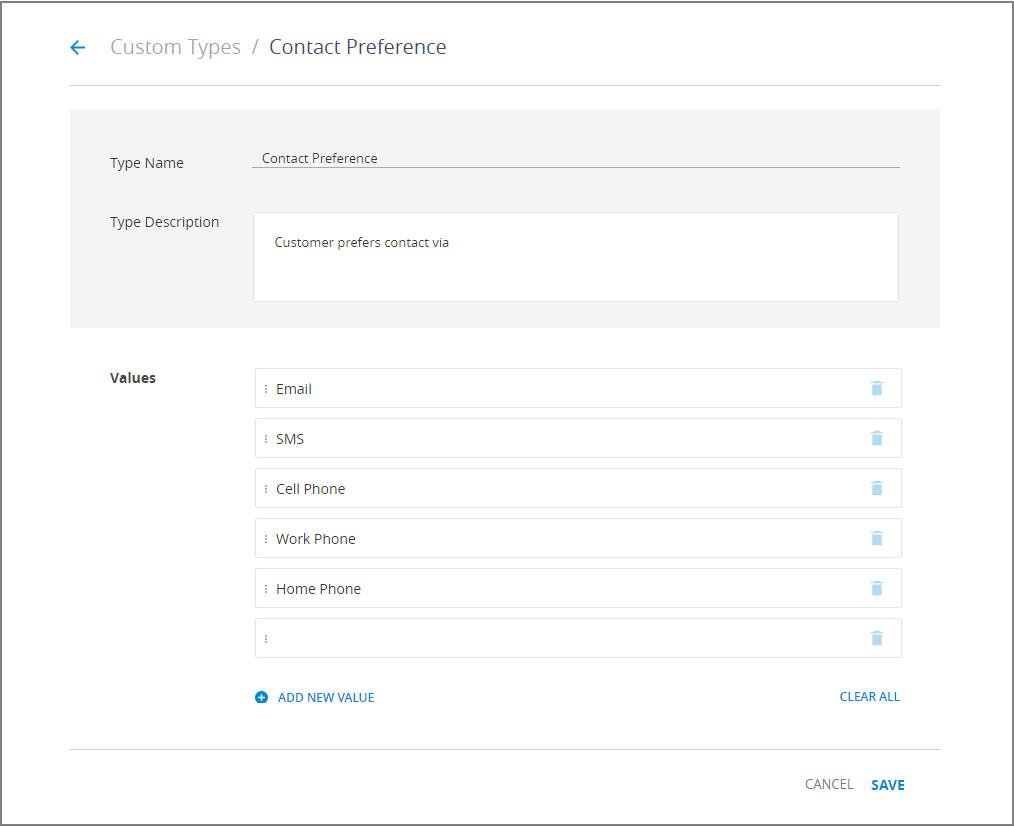
In the Type Name text box, enter a unique name for the Enum. This is a required parameter.
If desired, in the Type Description field, enter notes or comments related to the Enum.
In the Values list, click Add New Value to add a value to the new Enum.
Repeat Step 4 for each new value you want to add to the Enum.
To delete values, click the Trashcan icon
at the right side of the relevant row. You can also use the Clear All button to quickly delete all currently assigned values.When you have completed adding values, click Save in the upper right corner. A confirmation message is displayed, and the new object is listed on the Custom Types page. You can exit the operation at anytime without saving changes by clicking Cancel.