Configuring Custom Authentication
X‑Platform supports authenticating users of your account and applications using a custom AuthLink configuration.
Note
For information on setting up your server environment for AuthLink authentication, see Configuring AuthLink Authentication.
Accessing Custom Settings
You set a custom AuthLink connection from the Authentication Settings page, either:
globally for your account, or
from a specific application.
Configuring Custom AuthLink Settings
From the Authentication Type dropdown, select Custom. The Custom Settings panel is displayed:
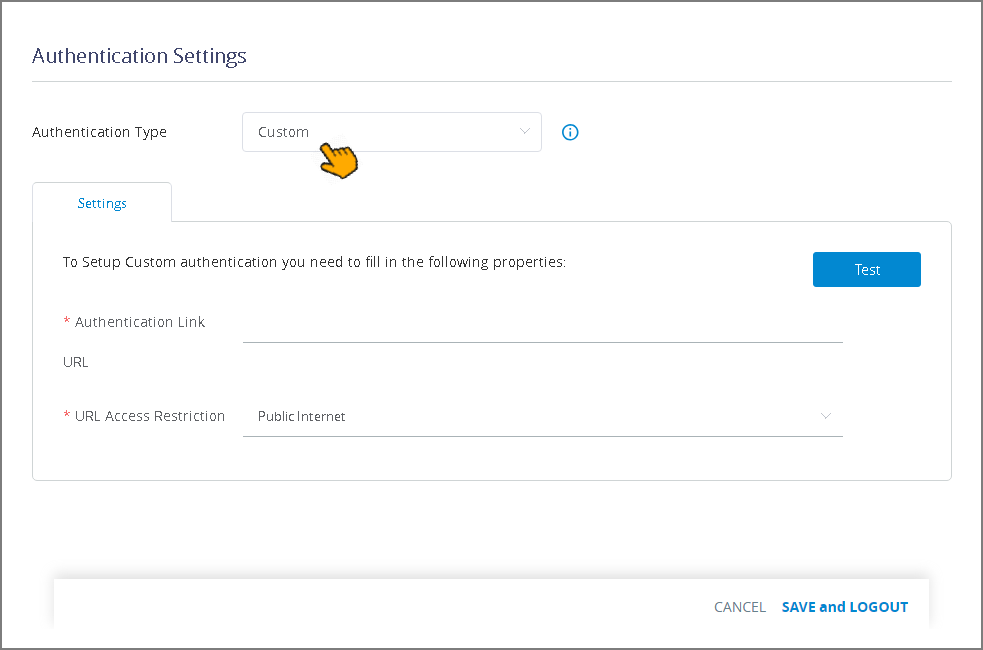
In the Authentication Link URL enter the full URL path to the relevant AuthLink server (e.g.,
http://ec2-345-170-82-915.compute-1.amazonaws.com/authlink).From the URL Access Restriction dropdown, select either Public Internet or Private Virtual Network.
Click Test at the upper right of the Settings panel. When your entries are valid, the message Connection Test Succeeded will be displayed.
When you finish entering Custom settings:
If you are configuring the custom AuthLink globally for the account, click Save and Logout. The settings will be saved, and you will be logged out of the account. You will need log in again in order for the new custom authentication method to become effective.
If you are configuring the custom AuthLink for a specific application, click Save. The new settings will be stored, and you can move to another panel to continue configuration as needed.
For information on specifying your server environment for AuthLink, see Configuring AuthLink Authentication.