Define Category
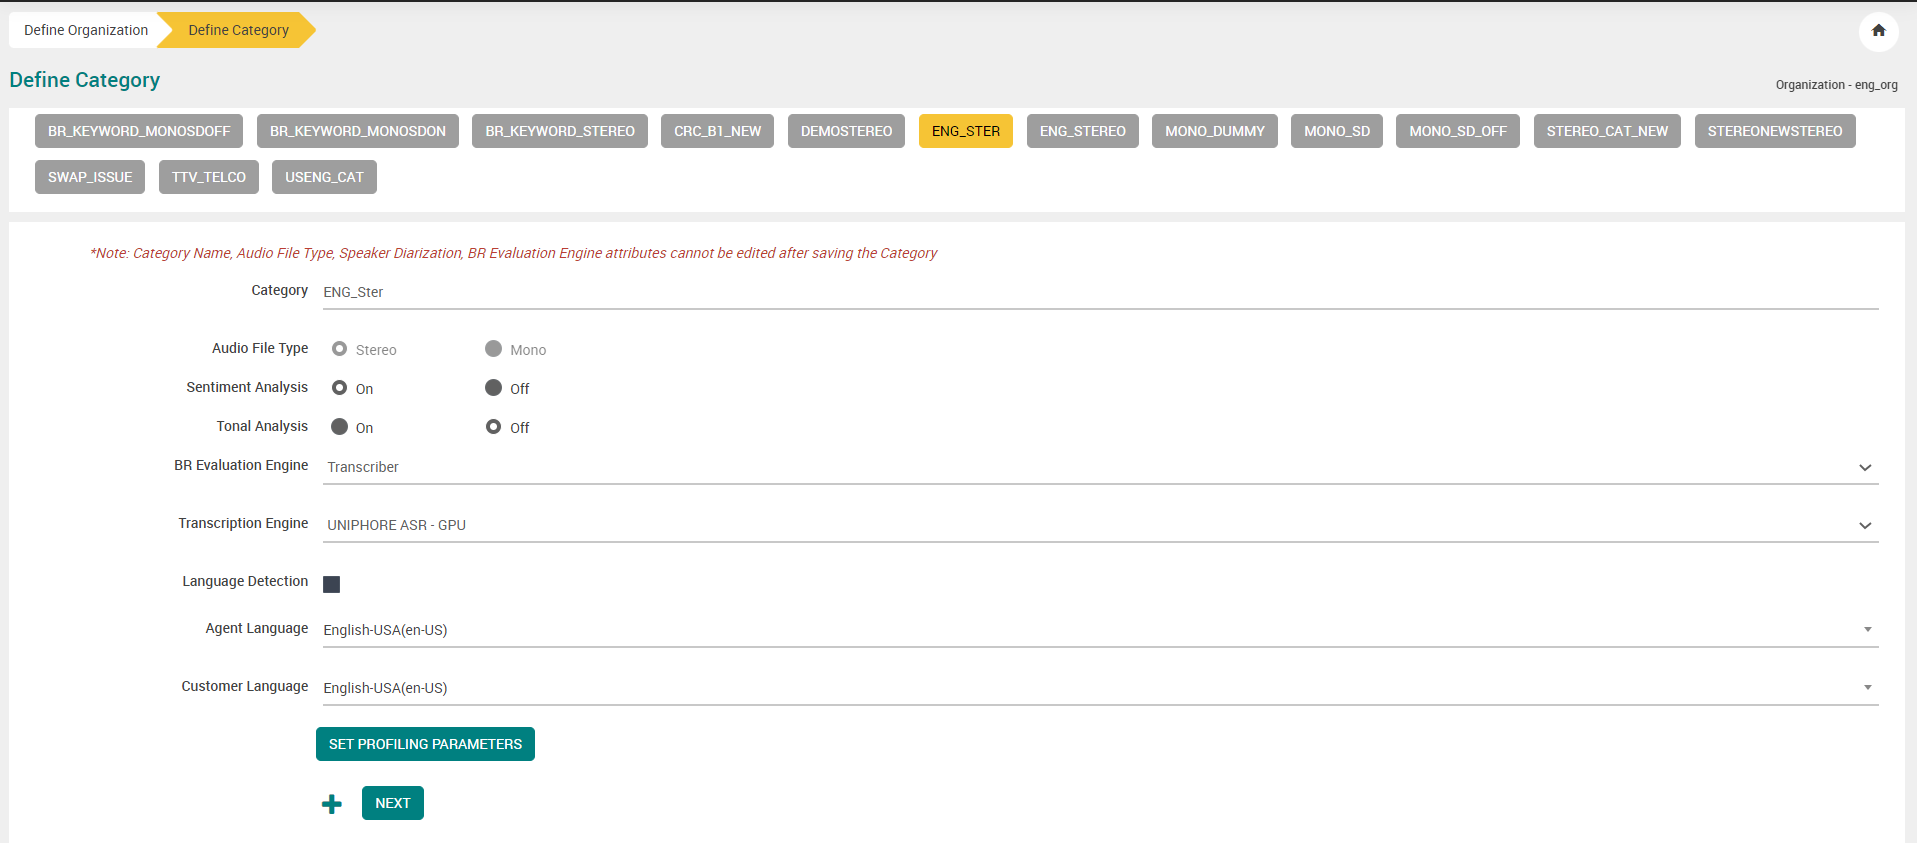
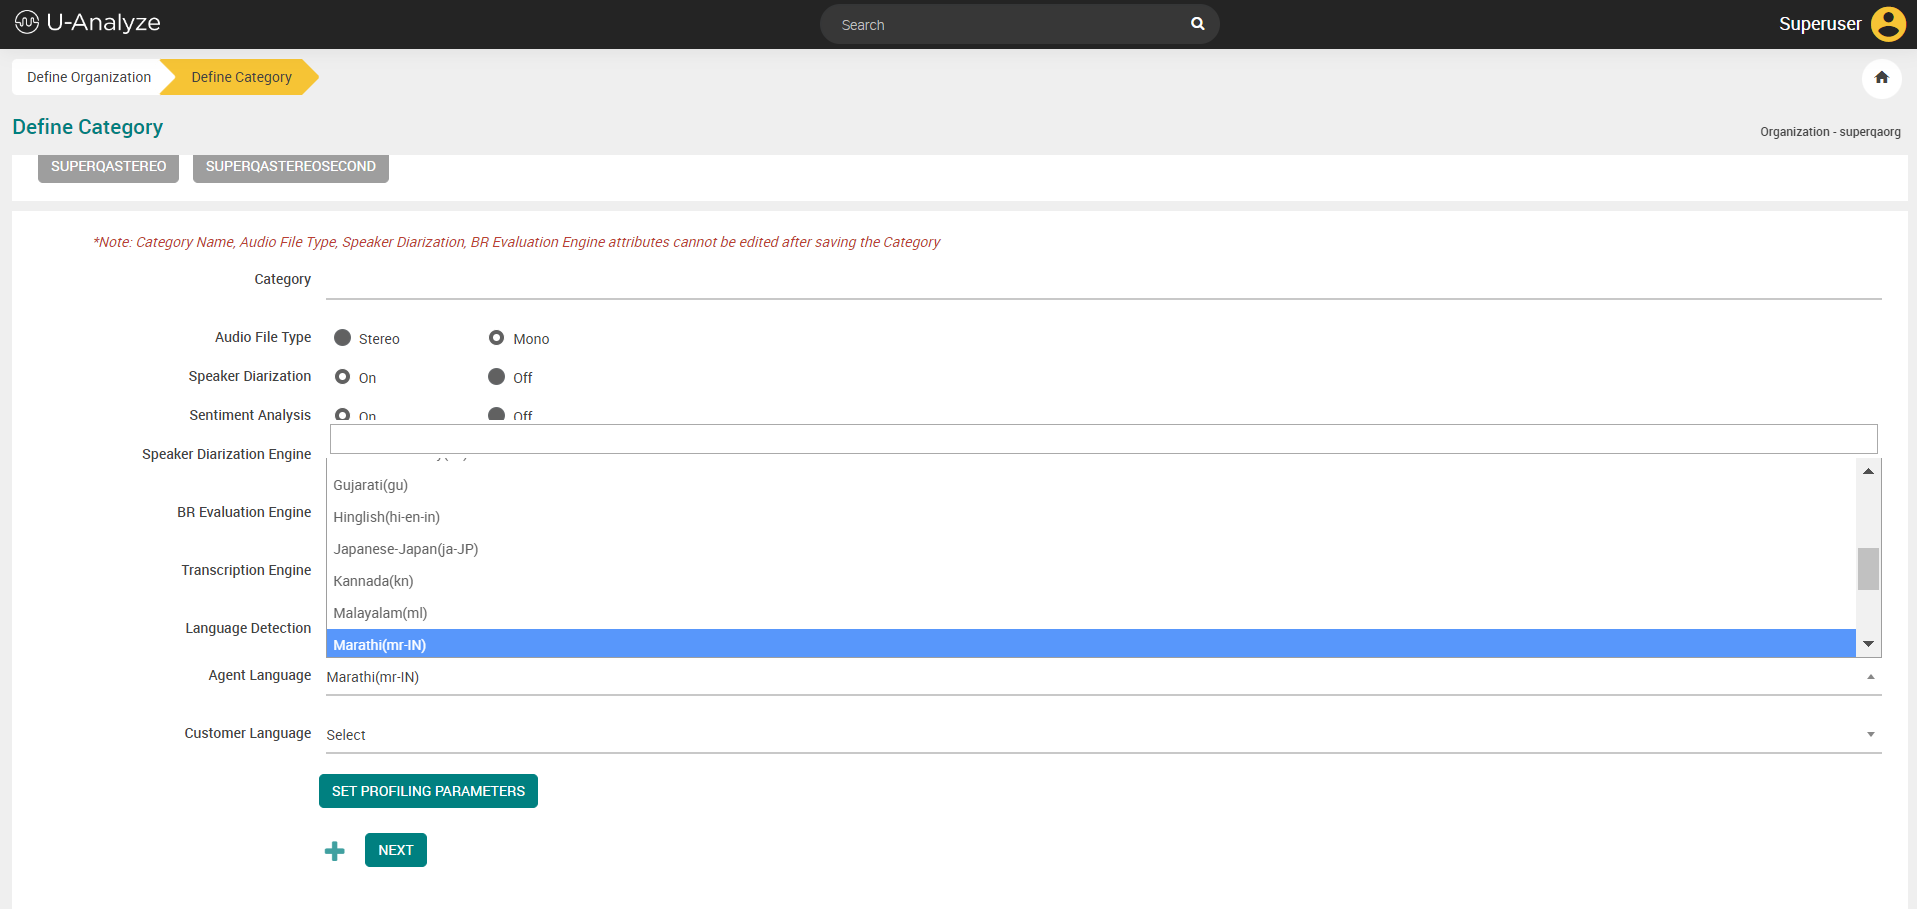
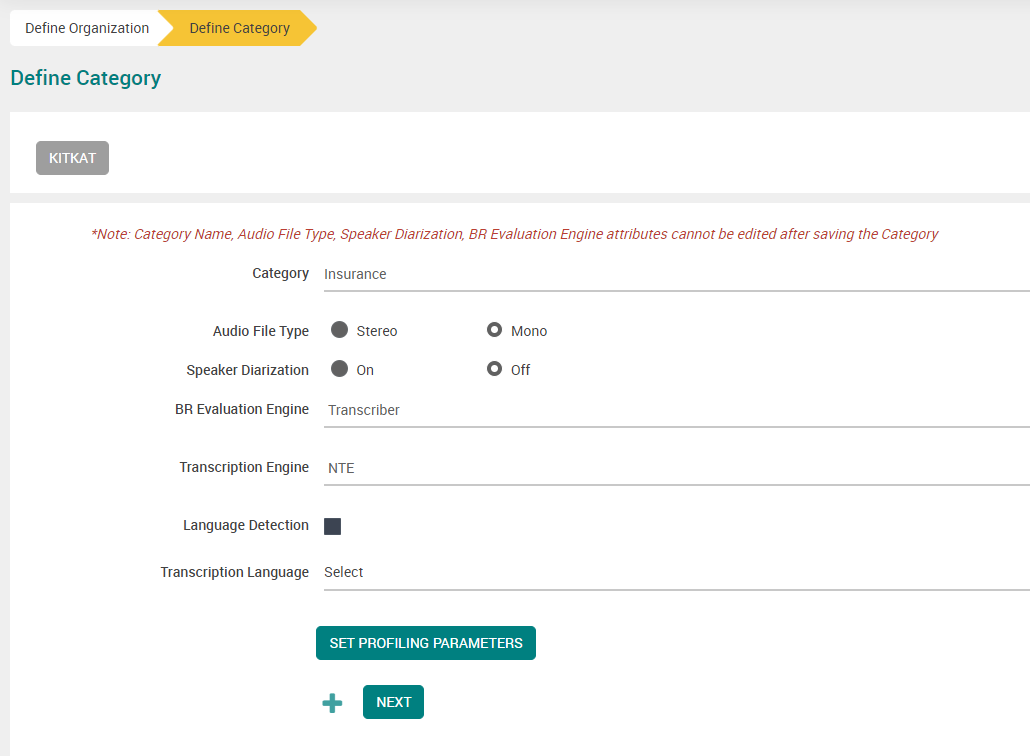
In the Category field, enter the category name.
Select the Audio File Type as Stereo or ‘Mono. For mono audio file type, speaker diarization option is available for selection. By default, option On is selected.
Note
System does not allow Admin to change the Speaker Diarization mode after a Business Rule is created.
Select option as ‘On’ or ‘Off’ in Sentiment Analysis field to analyze sentiment expressed at every turn in the conversation and also overall Agent conversation sentiment and Customer conversation sentiment. Sentiment can be enabled only for US-ENG and Hinglish calls since our models support only these languages out of the box.
Select any one of the Speaker Diarization engines from the drop-down list. This is to identify speakers as Agent or Customer at every turn of the conversation for Stereo Calls and for Mono Calls which are diarized.
Model 3 (Nuance)
Model 4 (Deep Learning)

Select the BR Evaluation Engine as Transcriber.
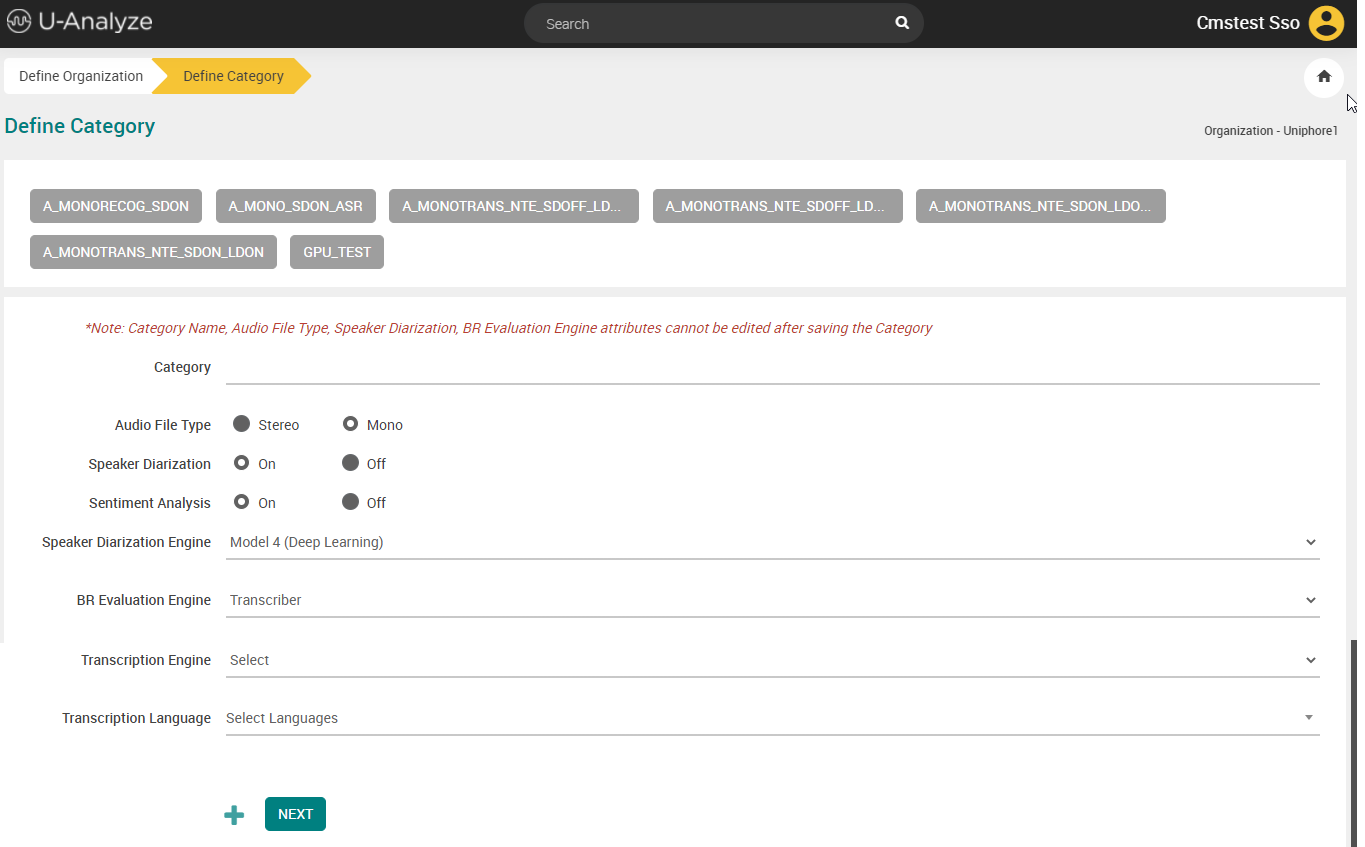
Select any of the below Transcription Engine from the drop-down list:
FANO ASR
NTE
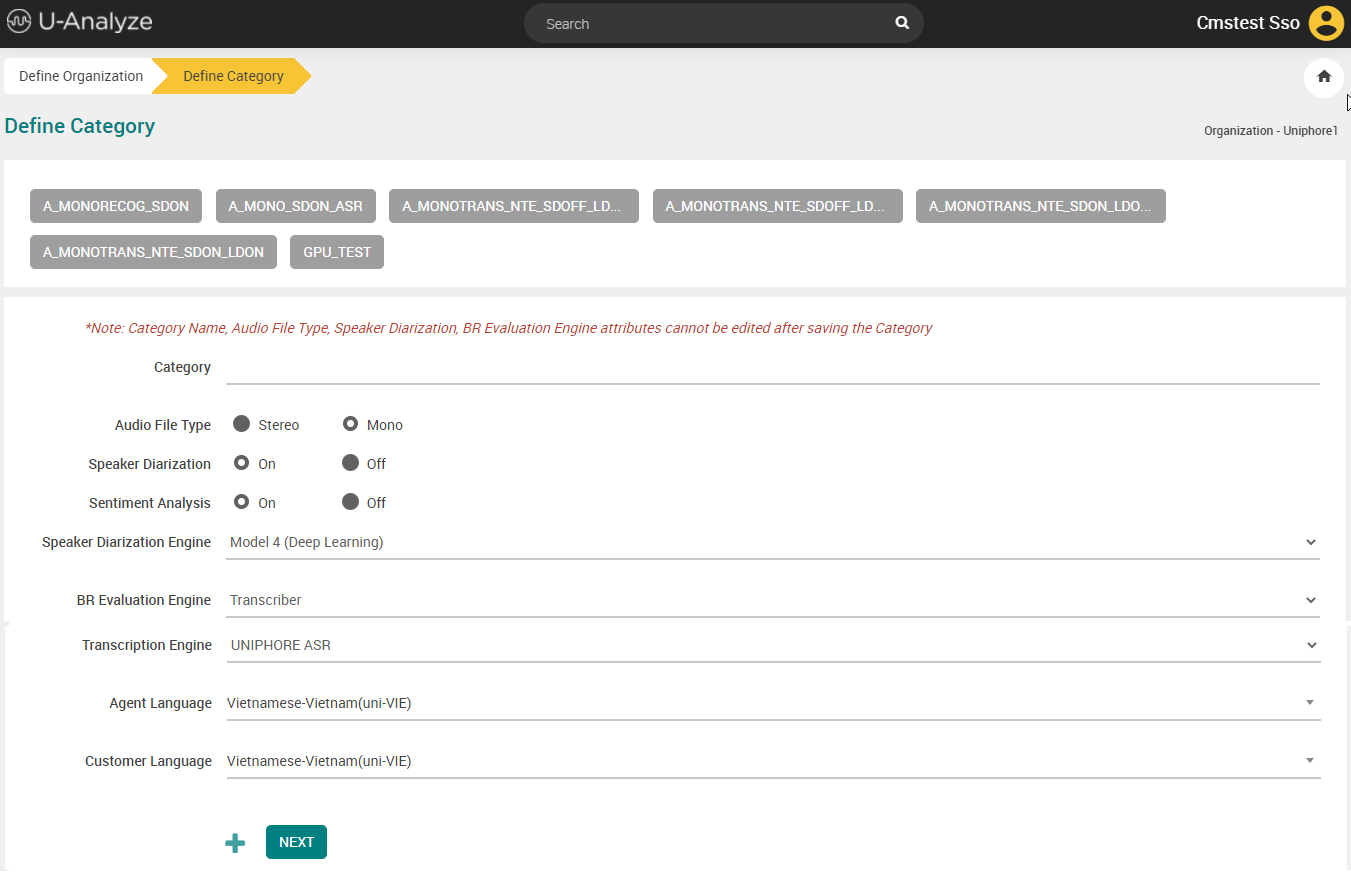
UNIPHORE ASR
UNIPHORE ASR - GPU

If you select FANO ASR engine, you can choose only Cantonese-China(zh) language as Agent and Customer language. This Engine supports only Cantonese language.
FANO ASR is not available for all the customers. This option is provided based on delivery-driven engagement.
If you select UNIPHORE ASR engine, you can choose only Vietnamese or Bahasa-Indonesia language as agent and customer language. This engine supports only Vietnamese and Bahasa-Indonesia languages.
If you select UNIPHORE ASR - GPU, you can choose any of the language that follows as agent or customer language:
1. English-USA
2. English-Indian
3. English-Great Britain
4. Hinglish
5. English-Filipino
6. Arabic
7. German
8. Japanese
9. French- Europe
10. Tamil
11. Malayalam
12. Tagalog
13. Spanish -North America
14. Kannada
15. English-Australasia
16. French Canadian
17. Vietnamese
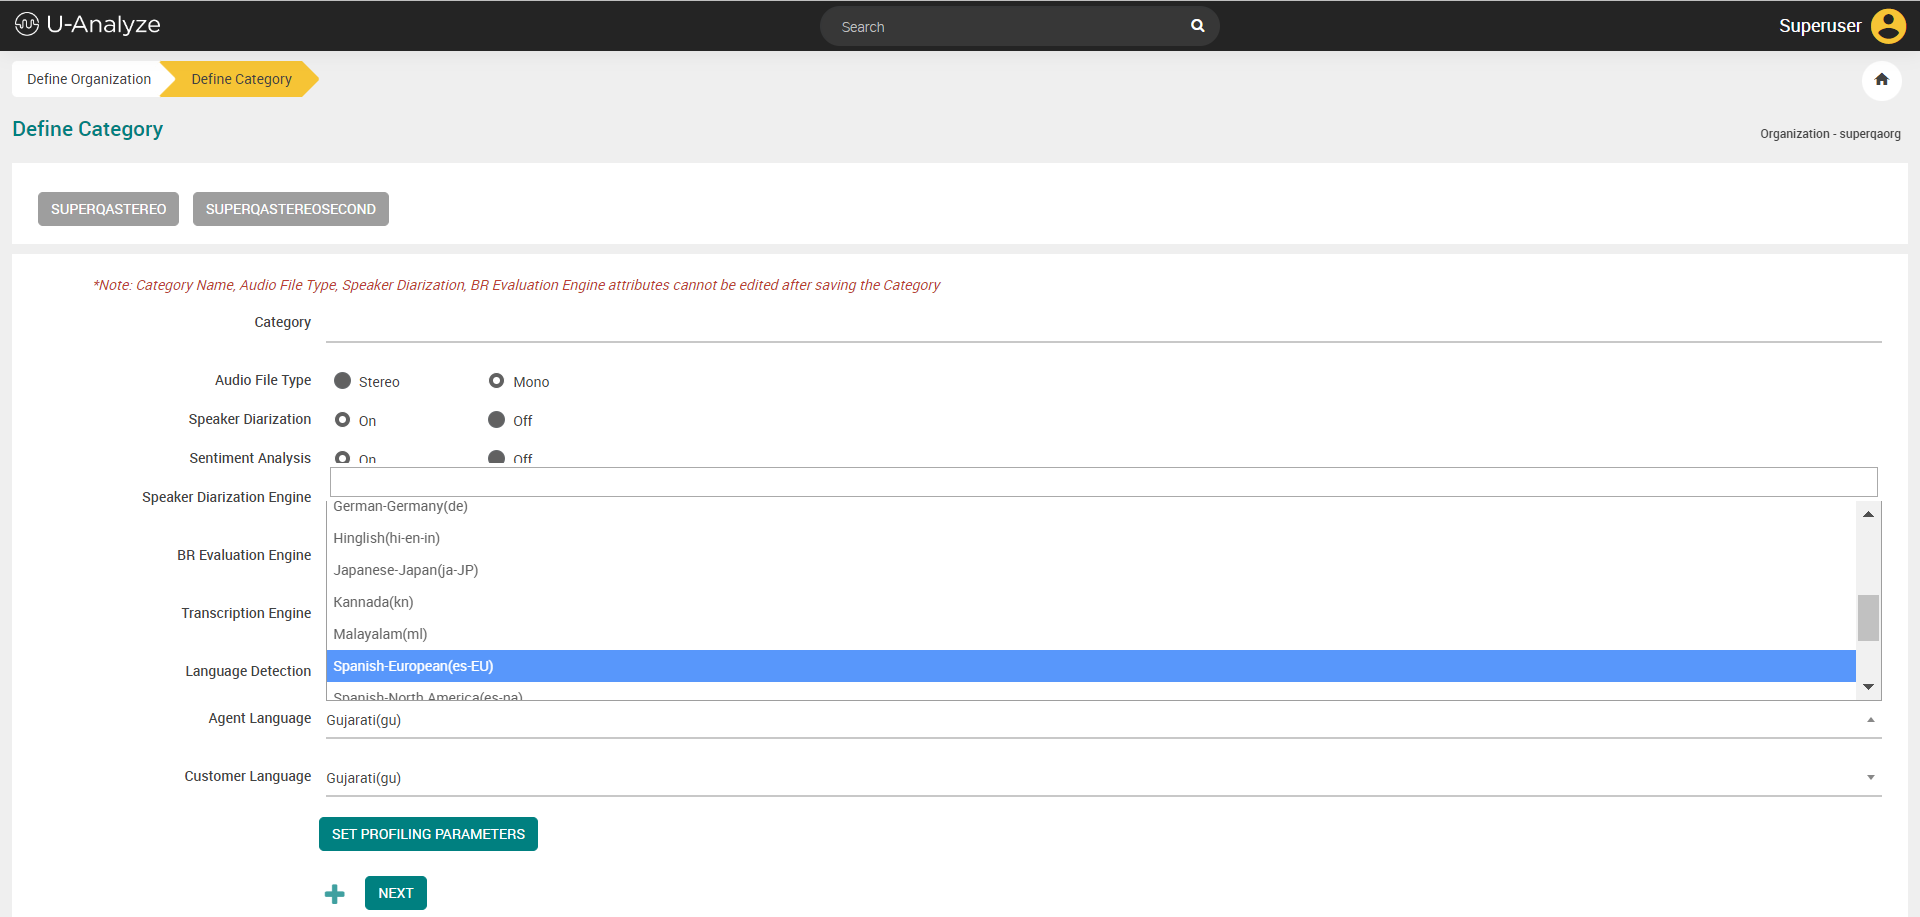
18. Gujarati (Introduced in version 2023.4)
19. Spanish-Europe (Introduced in version 2023.4)
20. Marathi (Introduced in version 2023.4)
21. Bengali (Introduced in version 2024.1)
These languages are available in the Agent Language and Customer Language drop downs in an alphabetical (A-Z) order.
If you select Transcription Engine as “NTE”, you have an option to enable the Language Detection feature.
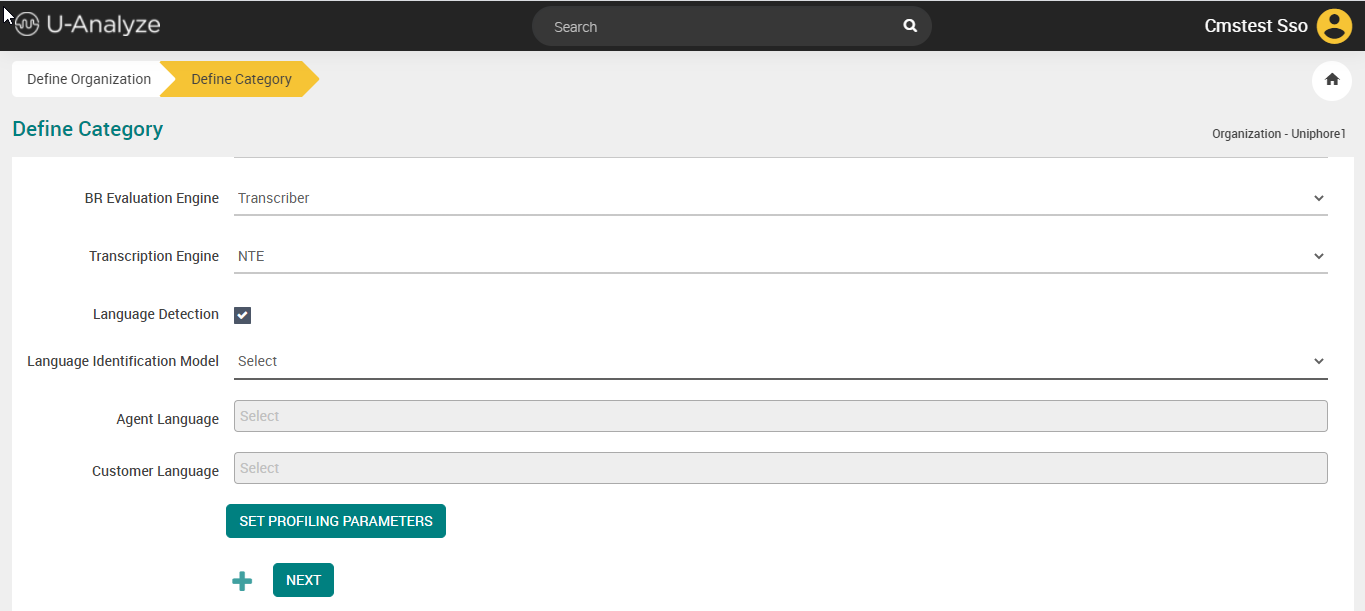
Select Language Identification Model (NTE LID or Uniphore LID) from the drop-down list. Uniphore’s Language Identification Model automatically identifies the language of the Speaker. Currently, U-Analyze supports English, Cantonese, Mandarin language detection and flags anything other than these languages as Others. The identified language can be used as the Language Pack for Transcription of the Audio.

Select Language Identification Model as NTE from the drop-down list. The different configurations for NTE Language Identification Model are as follows:
NTE Mono with Speaker Diarization ON and Language Detection ON.
NTE Mono with Speaker Diarization ON and Language Detection OFF.
NTE Mono with Speaker Diarization OFF and Language Detection ON.
NTE Mono with Speaker Diarization OFF and Language Detection ON.
NTE Stereo with Language Detection ON.
NTE Stereo with Language Detection OFF.
NTE Mono with Speaker Diarization ON and Language Detection ON
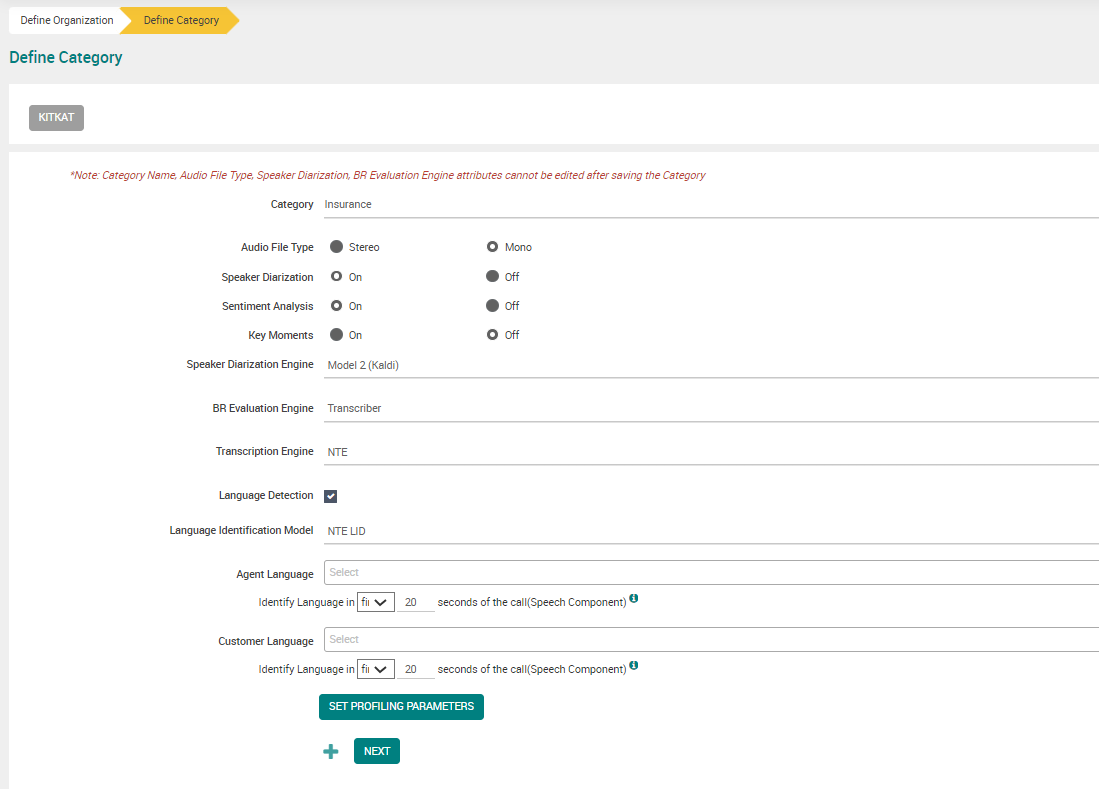
Select the Language Detection checkbox to detect languages for calls which are processed through Transcription Engine (Nuance Transcription Engine) and for specific offsets in the calls.
Select Language Identification Model as NTE.
Select Agent Language from the drop-down list. Multiple Languages can be selected for each Agent.
Note
In Customer Language section, the languages which are selected in Agent Language drop-down list are automatically displayed.
Enter the first “n” seconds or last “n” seconds for language detection. A maximum of 45 seconds are allowed.
NTE Mono with Speaker Diarization ON and Language Detection OFF
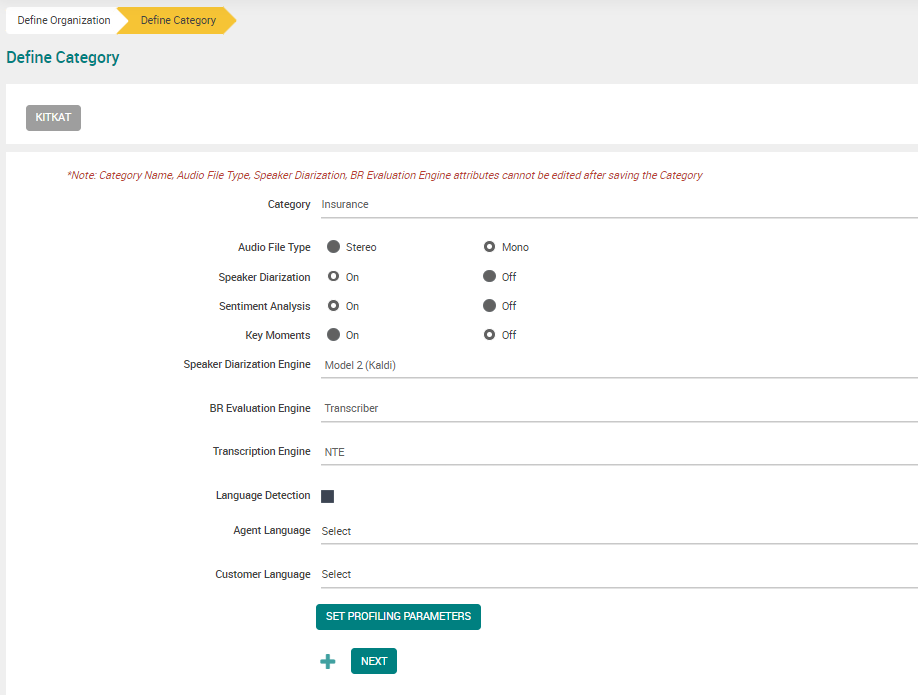
Select Agent Language from the drop-down list. Only one language can be selected.
Select Customer Language from the drop-down list. Only one language can be selected.
NTE Mono with Speaker Diarization OFF and Language Detection ON
Select the Language Detection checkbox.
Select Language from the drop-down list. Multiple languages can be selected for common channel.
Enter the first “n” seconds or last “n” seconds for language detection. Maximum of 45 seconds are allowed.
NTE Mono with Speaker Diarization OFF and Language Detection OFF
Select Language from the drop-down list. Only one language can be selected for common channel.
NTE Stereo with Language Detection ON
Select the Language Detection checkbox.
Select Language Identification Model as NTE.
Select Agent Language from the drop-down list. Multiple languages can be selected for each Agent.
Enter the first “n” seconds or last “n” seconds for language detection. A maximum of 45 seconds are allowed.
Select Customer Language from the drop-down list. Multiple languages can be selected for each customer.
Enter the first “n” seconds or last “n” seconds for language detection. A maximum of 45 seconds are allowed.
NTE Stereo with Language Detection OFF
Select Agent Language from the drop-down list. Only one language can be selected.
Select Customer Language from the drop-down list. Only one language can be selected.
Refer the below table for NTE 4.6 supported languages:
Table 4. List of supported languagesNTE 4.x-Language Name
NTE 4.x - Language code
Arabic Saudi Arabia
ara-SAU
Arabic International
ara-XWW
Catalan-Spain
cat-ESP
Mandarin-China
cmn-CHN
Mandarin-Taiwan
cmn-TWN
German-Germany
deu-DEU
English-Australian
eng-AUS
English-Canadian
eng-CAN
English-GreatBritain
eng-GBR
English-Indian
eng-IND
English-USA
eng-USA
English-South Africa
eng-ZAF
French-Canada
fra-CAN
French-France
fra-FRA
Hebrew-Israel
heb-ISR
Hindi
hin-IND
Hungarian-Hungary
hun-HUN
Italian-Italy
ita-ITA
Japanese
jpn-JPN
Korean-Korea
kor-KOR
Dutch-Netherlands
nld-NLD
Norwegian-Norway
nor-NOR
Polish-Poland
pol-POL
Portuguese-Brazil
por-BRA
Portuguese-Portugal
por-PRT
Russian-Russia
rus-RUS
Spanish-Argentinean
spa-ARG
Spanish-Chilean
spa-CHL
Spanish-Colombian
spa-COL
Spanish-Castillian
spa-ESP
Spanish-Guatemala
spa-GTM
Spanish-Mexican
spa-MEX
Spanish-United States
spa-USA
Swedish-Sweden
swe-SWE
Thai-Thailand
tha-THA
Turkish-Turkey
tur-TUR
Cantonese-China
yue-CHN
Malay-Malaysia
zlm-MYS
Danish-Denmark
dan-DNK
Click Set Profiling Parameters to provide profiling URL (Domain specific language model URL) for Agent and Customer, if required.
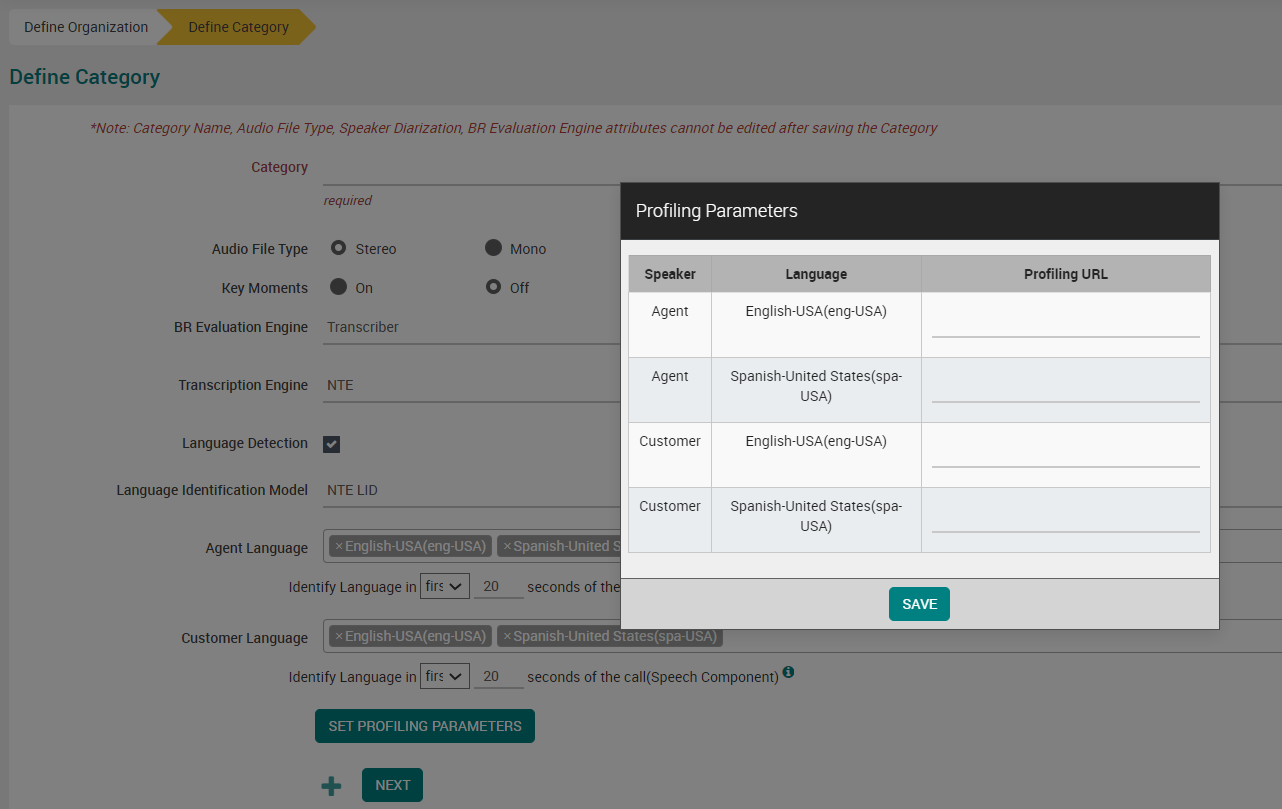
In profiling, keyphrases which are domain specific and proper nouns are included in the Keyphrase list to improve transcription accuracy. For more information, refer “Installation Guide” to create domain LMs.
Note
Domain specific language model URL is case sensitive.
Click Add Category (
 ) button to save and add the category. A confirmation message is displayed as “Category added successfully".
Click Next button to save data and move to Define Users screen.